Table of Contents
Advertisement
Quick Links
Advertisement
Table of Contents

Summary of Contents for Innovation Technology 2AUDF-CQ12X
- Page 1 Smart PTZ Battery Camera Operation Instruction FCC ID: 2AUDF-CQ12X...
-
Page 2: Table Of Contents
Contents 1.Packing list---------------------------------------01 2.Product appearance---------------------------02 3.Quick start---------------------------------------04 4.Set up the camra--------------------------------06 5.Install the camera---------------------------------11 6.Share the camera---------------------------------14 7.Charge the camera------------------------------17 8.Indicator light status--------------------------18 9.Product specification------------------------18 10.Firmware upgrade -------------------------19 11.FCC warning-----------------------------------19 12.FAQ-------------------------------------------21... -
Page 3: Packing List
Packing list 1. Camera*1 2. Bracket*1 3. Mounting kit*1 4. USB charging cable *1 5. Operation instruction*1 6. Screw for bracket*1... -
Page 4: Product Appearance
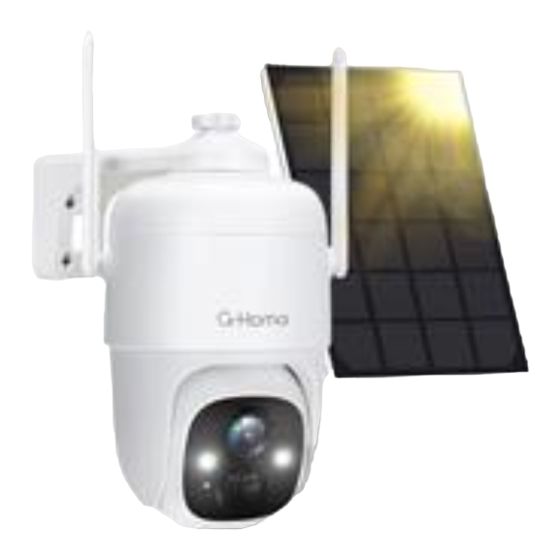
Product appearance Wi-Fi antenna Lens Infrared lamp White light Indicator light Human body infrared sensor... - Page 5 Micro-USB port Speaker Micro-SD card slot Reboot hole Power button...
-
Page 6: Quick Start
Quick start The smart battery camera supports battery-powered supply and AC-powered supply. 1. Download and install the App The wireless smart battery camera supports Android and iOS App. For your best experience, please scan the QR code below with your mobile phone, install the app, and follow the instruction to complete the user registration. - Page 7 2. Add the device Sign in to the App connect to Wi-Fi and add the device according to the prompts (please bring the device close to the router when configuring).
-
Page 8: Set Up The Camra
Set up the camera Click the "Add Camera Now" in the App and enter the Wi-Fi network name and password that you want the camera to connect. - Page 9 To ensure a longer distance connection, the camera only supports the 2.4Ghz Wi-Fi with stronger wall penetration capability and does not support Wi-Fi for enterprise¬level authentication currently. Please ensure that the entered Wi-Fi meets the requirements. After completion, click "Continue" to generate the QR code for pairing the camera.
- Page 10 2) After pressing the camera switch for 3 seconds, the camera will turn on. The camera will emit the scanning sound "Ding Dong Ding Dong" after it is turned on (if you do not hear it, please double click the power button). Power button 3) Take the lens of the camera facing the QR code generated on VicoHome about 20 cm (7 inches) until you hear a "Ding"...
- Page 11 4) After a while, the camera will give out a prompt sound of a successful connection. At this moment, please set the name for the device on the App and select the location you want to place the device. Click "Continue" to complete the pairing.
- Page 12 Possible problems with binding: When you hear the "Wi-Fi Password Error", please check ● whether the Wi-Fi password you entered in the App is correct; When you hear the "Authentication error", please ensure ● that your Wi-Fi network is not an enterprise-level network, and the device supports only the network with the security level below WPA-2;...
-
Page 13: Install The Camera
Install the camera You can place the camera on a shelf or other surfaces to use, or you can install it on a wall to use. (1) Select a good spot for your camera Select a good spot for your camera, please install the camera in a position where its view is not blocked and ensure that it is within the coverage of the Wi-Fi network. - Page 14 ommended height About 6 ft For outdoor use, please install the camera upside down to maximize the waterproof performance and the human body infrared sensor’s effectivity. (2) Install the bracket 1) Screw fixing: Fix the camera to the desired location. You can directly place the camera on a flat surface or fix the bracket to the wall or ceiling by screws.
- Page 15 2) Fix the camera Put the camera up side down and then fix the camera to the bracket by a screw .
-
Page 16: Share The Camera
Share the camera When you want to let other family members or friends view the camera, you can use this feature. Only the admin user who is the first to add the camera is able to share the camera and manage the settings for the camera. The shared users have limited access rights. - Page 17 2) Tap "Camera sharing", a QR code for sharing will be generated.
- Page 18 (2) Steps for Shared User For the family members or friends you want to share, find "Add friend's camera" on the Homepage to enter the scan code page, then scan QR code generared on the admin's phone, then send the access request to the admin user.
-
Page 19: Charge The Camera
(3) Steps for Admin User You will receive a confirmation notice, and you can complete sharing after agreeing. Charge the camera The App will remind you to charge your camera when the battery is low. Please use the Micro USB cable to plug into the 5V/1.5A charging adapter to charge the camera. -
Page 20: Indicator Light Status
Indicator light status Mode Status Working mode Blue Sleep mode Charging mode Yellow Fully charged mode Green Product specification Item Specification Camera lens Field of view: 110° Image resolution Max. 1920 X 1080 Video bit rate Adaptive Storage media Micro SD card (Up to 128GB) Rotation Angle 355°... -
Page 21: Firmware Upgrade
Firmware upgrade When you connect your camera through the App, it will prompt you if the latest firmware is available. You can also manually check the firmware version in the settings of the App. Please make sure that your camera is fully charged or connected to the power adapter before upgrading the firmware, please do not cut off the power supply during the upgrading. - Page 22 NOTE: This equipment has been tested and found to comply with the limits for a Class B digital device, pursuant to Part 15 of the FCC Rules. These limits are designed to provide reasonable protection against harmful interference in a residential installation.
-
Page 23: Faq
1.Q:Camera permission management: How to invite family and friends to use my camera together? A: Open the App and select your camera on the home page. Click the share button on the home page or the "Share" in the camera settings to enter the sharing page, and then click "Invite "... - Page 24 5.Q:How far should the camera be placed from the router? A: After testing, the Wi-Fi connection distance can normally reach up to150 meters in the open area. However, the actual situation depends on the strength of Wi-Fi and its surrounding environment (thick walls, electromagnetic devices, large metal objects will all cause interference to the Wi-Fi signals).
- Page 25 V1.0...
Need help?
Do you have a question about the 2AUDF-CQ12X and is the answer not in the manual?
Questions and answers