Advertisement
Quick Links
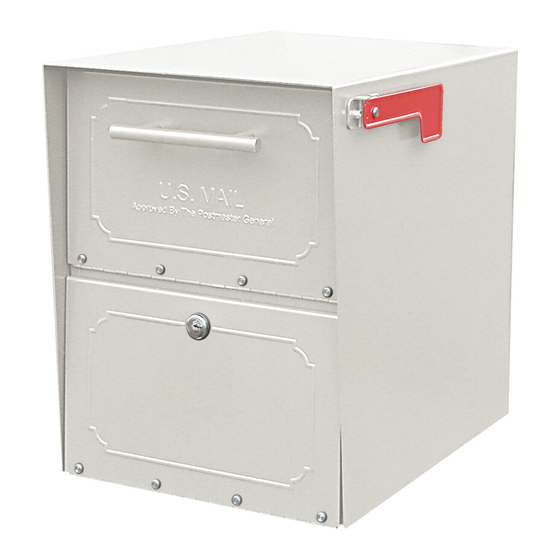
Before You Begin
Outgoing Flag
Your new mailbox comes fully assembled
with the exception of the included
outgoing flag. The outgoing flag should
be attached before proceeding to mount
the mailbox to it's post.
Parts
x 2, nuts
x1, outgoing flag
x 2, washers
Outgoing
Mail Clip
Keys
Your new mailbox comes with two keys. The keys allow access to the storage compartment. To retrieve
incoming deliveries, simply open the access door at the bottom of the box. IT IS IMPORTANT TO
NOTE THAT IT IS NOT THE RESPONSIBILITY OF MAIL CARRIERS TO OPEN MAILBOXES
THAT ARE LOCKED, ACCEPT KEYS FOR THIS PURPOSE, OR LOCK MAILBOXES AFTER
DELIVERY OF THE MAIL.
MOUNTING INSTRUCTIONS
R
To attach the
the threaded rods on the right
side of the mailbox, ensuring
proper orientation.
Then, place the washers
over the rods and secure the
flag with the nuts. Tighten
the nuts with a wrench.
Post Mount Mailbox | 6200 Series
flag, slide it over
Outgoing Mail
To leave mail for your carrier to pick up, place
it under the outgoing mail clip inside of the
hopper door and raise the outgoing flag. Upon
your carrier's next delivery, they will retrieve
your outgoing mail and lower the flag.
Advertisement

Subscribe to Our Youtube Channel
Related Manuals for Architectural Mailboxes 6200 Series


Summary of Contents for Architectural Mailboxes 6200 Series
- Page 1 Post Mount Mailbox | 6200 Series MOUNTING INSTRUCTIONS Before You Begin Outgoing Flag Your new mailbox comes fully assembled To attach the flag, slide it over with the exception of the included the threaded rods on the right side of the mailbox, ensuring outgoing flag.
- Page 2 Mailboxes posts and 4x4 wood-post adapters. If you are using an - or - existing post, not made by Architectural Mailboxes, please reference the mounting hole diameter and pattern in Option 2 to determine the hardware you will need for installation.
Need help?
Do you have a question about the 6200 Series and is the answer not in the manual?
Questions and answers