Advertisement
Quick Links
Advertisement

Summary of Contents for HOMEVIZ OB10
- Page 1 USER MANUAL HOMEVIZ OB10 Wireless Security Camera v1.0...
-
Page 2: Table Of Contents
CONTENTS What’s in the Box Product Overview Specifications Getting Started Contact Us... -
Page 3: What's In The Box
WHAT’S IN THE BOX OB10 Wireless Waterproof Cap × 1 Security Camera × 1 9.8ft Power Adapter (12V/1A) Antenna × 1 Screw × 4 Anchor × 4 Quick Start Guide HOMEVIZ OB10 Wireless Security Camera V1.0 Quick Start Guide × 1... -
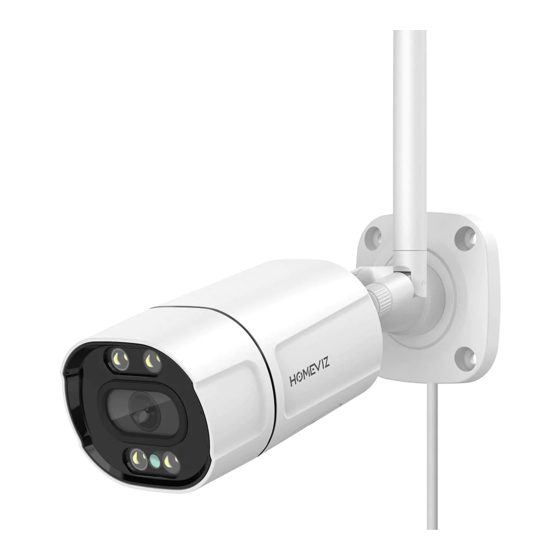
Page 4: Product Overview
PRODUCT OVERVIEW Reset Power Jack Antenna IR Lights White LED Lights Lens Photosensitive Sensor IR Lights White LED Lights Speaker Reset microSD Card Slot... -
Page 5: Specifications
Supports up to 128GB microSD card Waterproof Level IP66 Network 2.4GHz band GETTING STARTED 1. Downloading and Installing the App Option 1: Scan the QR code below: HOMEVIZ HOMEVIZ Option 2: Search for the "HOMEVIZ" app on the App Store or Google Play. - Page 6 Tip: To initialize the device, press and hold the reset button for about 10 seconds until you hear a prompt sound. 3. Setting up the Camera • Wireless Network Configuration Step 1: Open the "HOMEVIZ" app and tap "Login". (Please register first if you don't have an account.) Step 2: Tap "+". Device List...
- Page 7 Step 3: Tap "Wireless camera". Step 4: Tap "OB10 Security Camera". Step 5: Tap "Fast network configuration". Add camera Wireless camera Wireless camera Wireless camera Fast network configuration Add WIFI wireless webcan Pair via WiFi CB10 Security Camera Share & add...
- Page 8 Enter the network name and password of your current Wi-Fi network and Tap "Next". Note: This device currently only supports 2.4GHz Wi-Fi. If you are using 5GHz Wi-Fi, please confirm that your Wi-Fi is compatible with 2.4GHz. Step 2 Connect to the network Step 2 Connect to the network saina-210 saina-210...
- Page 9 • Alarm Push To receive alerts and push notifications: Step 1: Tap Step 2: Tap [Intelligent Alarm] to enter the alarm setting interface. Step 3: Enable"Humanoid Detection Switch", "APP Push", and "Allow Notifications". Customize alarm settings according to your needs. b11b75a5b5cbebed Intelligent alert Save...
- Page 10 • View Video Playback To playback video footage, ensure that an SD card (Max. 128GB, sold separately) is inserted into the camera. Step 1: Tap the device. Step 2: Tap [PlayBack]. Talk: Tap and hold to talk and listen Sound: Tap to unmute or mute Record: Tap to start/stop manual recording Snap: Tap to take a snapshot Setting: Tap to go to Settings...
- Page 11 • Night Alarm Light Setting Step 1: Tap on the device. Step 2: Tap [Vigilance]. Step 3: Enter the night alarm light settings page. There are three light modes: HUMAN SHAPE DETECTION, WARM LIGHT FULL COLOR and INFRARED MODE. • HUMAN SHAPE DETECTION: The white LED lights turn on only when human motion is detected at night, and a short full-color video clip is recorded.
- Page 12 • Customize Alarm Voice Settings Step 1: Tap Step 2: Tap [Intelligent Alarm]. Step 3: Tap [Alarm Sound]. Intelligent alert Save Device List b11b75a5b5cbebed Device Name b11b75a5b5cbebed Humanoid Detection Switch Turn the figure detection function on or off OSD Configuration Online Reginoal Settings Video Management...
- Page 13 Step 4: Tap the toggle switch next to [Alarm Sound] to enable or disable the alarm sound. If [Alarm Sound] is enabled, when the system detects an alarm situation, the set alarm sound will be heard. You can select from the system's built-in alarm sounds. If [Alarm Sound] is disabled, there will be no corresponding alarm sound when an alarm is triggered.
- Page 14 Option 1: Text-to-speech. Enter the desired alarm information in the text box, choose either a male or female voice, tap [Transformation] to proceed, tap [Listen] to listen, then tap [Upload prompt tone] to upload. Option 2: Record sound directly as the alarm message. to record and tap [Listen] to listen after the recording is complete, then tap [Upload prompt tone] to upload.
- Page 15 • Alert Area Settings Step 1: Tap Step 2: Tap [Intelligent Alarm]. Step 3: Tap [Alert Area] to enter the alert area settings interface. There is a variety of shapes for alert areas. Users can freely drag and adjust the size and rotation direction of the shape.
- Page 16 • Cordon Settings Step 1: Tap Step 2: Tap [Intelligent Alarm]. Step 3: Tap [Cordon] to enter the cordon settings interface. There are three modes for cordon settings. Users can freely drag and adjust the size and direction of the cordon. •...
- Page 17 Step 1: Tap Step 2: Tap [Share to friend] and a screenshot with a QR code will be sent to your friend. After scanning the QR code using the HOMEVIZ app, your friend can access the camera and adjust the related settings.
- Page 18 1. Unbind the original account: Contact the or original user to unbind the camera from its original account in the app (delete the camera from his/her HOMEVIZ account). Then you can bind the camera with your account. 2. Use the multi-person sharing function: Ask the original user to share the QR code (tap [Share to friends]).
-
Page 19: Contact Us
Detail information CONTACT US For any inquiries about HOMEVIZ products, please feel free to contact us. We will respond within 24 hours. Email: support@homeviz.net Tel: 301-670-7335 (US) Mon-Fri (except holidays) 9am-5pm (EST) Official website: www.homeviz.net...
Need help?
Do you have a question about the OB10 and is the answer not in the manual?
Questions and answers