Advertisement
Quick Links
Advertisement

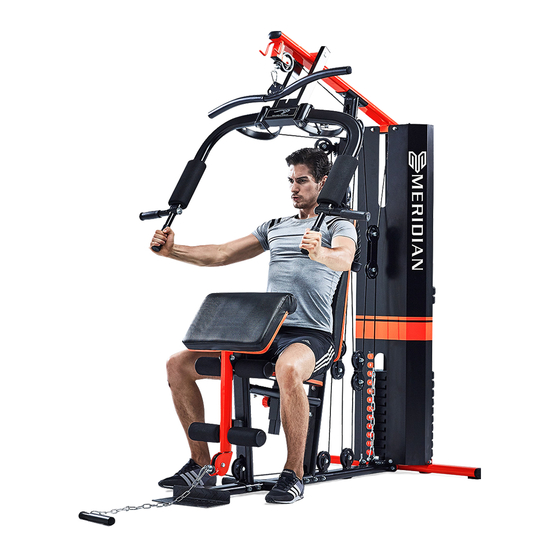
Summary of Contents for Meridian FIT-AOXIN-M2-AN2E
-
Page 2: Important Safety Instructions
& IMPORTANT SAFETY INSTRUCTIONS WARNING: To reduce the risk of serious injury, read all important precautions and instructions in this manual and all warnings on your machine before using your machine. We assume no responsibility for personal injury or property damage sustained by or through the use of this product. - Page 3 Final Picture...
-
Page 4: Spare Parts List
Spare parts list Item Item Description Description Main bottom frame M10x55 Bolt Front bottom frame Arm seat 40x80 flat oval tube Back seat Front Upright Seat Weight guide tube Knob Butterfly handle bar Φ19 Bushing Air frame Air frame knob Upper cross beam Foam endcap Seat bracket... - Page 5 Φ28Handle bar M10x20 Hex bolt Nut M8 (2900mm) Butterfly cable Nut M10 (2770mm) Row bar cable Pothook (490mm)Chain(long) (280mm)Chain( short) Ankle belt (2650mm)Lat bar cable...
-
Page 8: Assembly Steps
Assembly Steps Attention: 1. Put the washers to the two ends of the bolts. 2. For pre-assembly, put the bolts and screws are in the position, and tighten them with spanner after the full assembly. 3. Some parts are put in the machines already. 4.Suggest to assembly it by at least two persons. -
Page 9: Assembly Step
Assembly Step Picture 2 1. Attach weight plate(#27) to the weight guide tube(#5) by turn( groove side is under),attach weight plate bar pushing(#30) to the weight plate bar(#31), make the holes in the right position. Attach weight plate latch (#29) to the holes of the weight plates. 2. - Page 10 Assembly step Picture 3 1. Attached back seat(#39) to front upright( #4), using 2pcs M8x55 hex bolts(#64) and 2pcs flat washers Φ8(#55). 2. Attach air frame bolt (#16) to front upright( #4), using 1pce M8x40 hex bolt(#63), 2pcs flat washers Φ8(#55) and 1pce M8 nut (#74), put the knob (#43) to the air frame bolt( #16). 3.
- Page 11 Assembly Step Picture 4 1. Attach right butterfly arm(#11) to the U frame of air frame(#7), using 1pce M10x110 hex bolt(#72), 2pcs flat washers Φ10(#56)and 1pce M10 nut (#75). 2. Attach Φ90x245 foam(#35)to the right butterfly arm(#11). 3. Attach handle bar( #6) to the right butterfly arm(#11), using 1pce M10x25 hex bolt(#65) and 1pce flat washerΦ10(#59).
- Page 12 Assembly Step Picture 5 1. Attach the seat holder frame(#18) to the front upright(#4), using 2pcs M10x60 hex bolts(#68), 4pcs flat washers Φ10(#56),1pce connection plate(#17) and 2pcs M10 nuts (#75). 2. Attach seat bracket holder(#10) to the seat holder frame(#18), using 2pcs M10x55 bolts(#37), 2pcs flat washers Φ10(#56)and 2pcs M10 nuts (#75).
- Page 13 Assembly Step Picture 6 1. Attach arm seat(#38) to the arm seat frame(#14), using 4pcs M8x16 hex bolts(#61), 4pcs flat washers Φ8(#55). 2. Attach the arm seat frame (#14) to the seat bracket holder(#10), tighten the knob(#41). 3. Attach seat (#40) to the seat frame(#9), using 4pcs M8x16 hex bolts(#61) and 4pcs flat washers Φ8(#55).
- Page 14 Assembly step Picture 7 1. Attach 2pcs foam tube (#25) to the leg frame (#13) and the seat bracket holder (#10). 2. Attach Φ80x160 foam (#34) to the foam tube. 3. Attach the endcap (#44) to the foam tube.
- Page 15 Assembly step Picture 8: chain cables assembly step butterfly cable(#79)length 2900mm 2650mm Lat bar cable ( #78) length Tighten cables connection plate(#24) belt cable ( #58 ) length 2040mm Tighten Lat bar cable(#78)by the bolt and nut Keep 3-5MM distance Row bar cable (...
- Page 16 Assembly step Picture 9 Attach metal cover ( #67) to the upper cross beam (#8), main bottom frame (#1) and front bottom frame (#2), using 6pcs M8x16 hex bolts (#61) and 6pcsΦ8 flat washers (# 55).
- Page 17 Finally: 1. Please tighten all bolts and nuts firmly by spanner, not by hand. 2. Now the whole machine has been assembled completely. 3. Make sure to check all pulleys and cables before using your machine. 4. Please adjust cables according to actual situation at the beginning. &...


Need help?
Do you have a question about the FIT-AOXIN-M2-AN2E and is the answer not in the manual?
Questions and answers