LG CK57 Service Manual
Hide thumbs
Also See for CK57:
- Simple manual (12 pages) ,
- Owner's manual (44 pages) ,
- Service bulletin (26 pages)
Table of Contents
Advertisement
CONFIDENTIAL
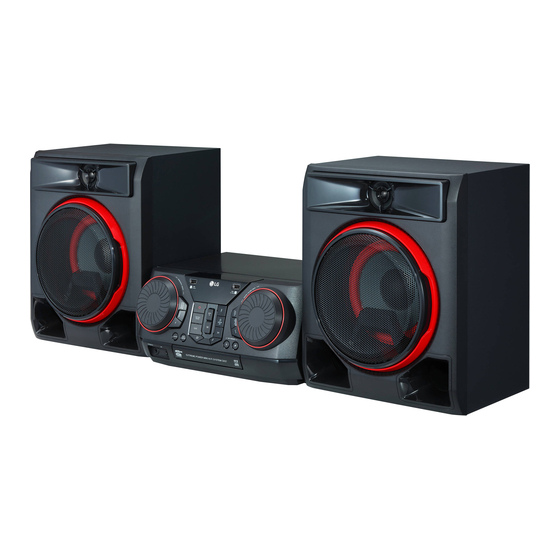
MINI HI-FI SYSTEM
SERVICE MANUAL
MODEL: CK57
(CK57, CKS57F/W)
CAUTION
BEFORE SERVICING THE UNIT, READ THE "SAFETY PRECAUTIONS"
IN THIS MANUAL.
P/NO : AFN78432907
MARCH, 2017
"Any reproduction, duplication, distribution (including by way of email, facsimile or other
electronic means), publication, modification, copying or transmission of this Service Manual is
STRICTLY PROHIBITED unless you have obtained the prior written consent of the LG Electronics
entity from which you received this Service Manual. The material covered by this prohibition includes,
without limitation, any text, graphics or logos in this Service Manual."
Copyright © 2018 LG Electronics Inc. All rights reserved.
Only for training and service purposes.
Advertisement
Table of Contents

Related Manuals for LG CK57


Summary of Contents for LG CK57
- Page 1 Service Manual is STRICTLY PROHIBITED unless you have obtained the prior written consent of the LG Electronics entity from which you received this Service Manual. The material covered by this prohibition includes, without limitation, any text, graphics or logos in this Service Manual.”...
- Page 2 CONTENTS SECTION 1 ..GENERAL SECTION 2 ..CABINET & MAIN CHASSIS SECTION 3 ..ELECTRICAL Copyright © 2018 LG Electronics Inc. All rights reserved. Only for training and service purposes.
-
Page 3: Table Of Contents
1. HIDDEN KEY MODE TABLE 2. HIDDEN KEY MODE DESCRIPTION PROGRAM DOWNLOAD GUIDE ........................1-7 FOTA UPDATE STEP USING BT APP ......................1-9 SPECIFICATIONS ............................1-11 Copyright © 2018 LG Electronics Inc. All rights reserved. Only for training and service purposes. -
Page 4: Servicing Precautions
(Do not use any other liquid cleaners, because they will damage the lens.) Take care not to use too much of this alcohol on the swab, and do not allow the alcohol to get inside the pick-up. Copyright © 2018 LG Electronics Inc. All rights reserved. Only for training and service purposes. - Page 5 7) The laser beam from the pick-up should NEVER be directly facing the eyes or bare skin. Armband Resistor (1 M) Resistor Conductive (1 M) Sheet Copyright © 2018 LG Electronics Inc. All rights reserved. Only for training and service purposes.
-
Page 6: Esd Precautions
ELECTRIC SHOCK. THE EXCLAMATION POINT WITHIN AN EQUILATERAL TRIANGLE IS INTENDED TO ALERT THE SERVICE PERSONNEL TO THE PRESENCE OF IMPORTANT SAFETY INFORMATION IN SERVICE LITERATURE. Copyright © 2018 LG Electronics Inc. All rights reserved. Only for training and service purposes. -
Page 7: Hidden Key Mode
- Entrance Key : Front ‘Stop’ + Remote Control Key ‘ ‘ for 5s. - Exit Key : Auto exit. - Explanation : ‘E2P CLR’ is displayed on the VPD and turn off the power automatically. Copyright © 2018 LG Electronics Inc. All rights reserved. Only for training and service purposes. -
Page 8: Program Download Guide
2) Copy Firmware file to USB device. NO USB Insert USB device at USB function. SEARCH FINISH AUTO POWER OFF Copyright © 2018 LG Electronics Inc. All rights reserved. Only for training and service purposes. - Page 9 2) Copy Firmware file to USB device. NO USB Insert USB device at USB function. SEARCH EQDEMOUP FINISH AUTO POWER OFF Copyright © 2018 LG Electronics Inc. All rights reserved. Only for training and service purposes.
-
Page 10: Fota Update Step Using Bt App
Step4 : Confi rm update When touch the “Update” button, user could Select the OK button on the caution message. update the SET fi rmware using FOTA. Copyright © 2018 LG Electronics Inc. All rights reserved. Only for training and service purposes. - Page 11 When fi nishing the fl ash memory writing, pop-up phone, the SET overwrite the fi rmware to fl ash message about fi nish is displayed and the SET memory. auto power off. 1-10 Copyright © 2018 LG Electronics Inc. All rights reserved. Only for training and service purposes.
-
Page 12: Specifications
Dimensions (W x H x D) Approx. 310 mm x 363 mm x 256 mm • Design and specifications are subject to change without notice. 1-11 Copyright © 2018 LG Electronics Inc. All rights reserved. Only for training and service purposes. - Page 13 1-12 Copyright © 2018 LG Electronics Inc. All rights reserved. Only for training and service purposes.
- Page 14 1. CABINET AND MAIN FRAME SECTION ....................2-3 2. PACKING ACCESSORY SECTION ......................2-7 3. SPEAKER SECTION ..........................2-8 DISASSEMBLY INSTRUCTIONS ........................2-10 ASSEMBLY INSTRUCTIONS ......................... 2-19 Copyright © 2018 LG Electronics Inc. All rights reserved. Only for training and service purposes.
- Page 15 Copyright © 2018 LG Electronics Inc. All rights reserved. Only for training and service purposes.
-
Page 16: Exploded Views
THE EXCLAMATION POINT WITHIN AN EQUILATERAL TRIANGLE IS INTENDED TO ALERT THE SERVICE PERSONNEL TO THE PRESENCE OF IMPORTANT SAFETY INFORMATION IN SERVICE LITERATURE. MAIN SMPS CABLE1 CABLE2 FRONT Copyright © 2018 LG Electronics Inc. All rights reserved. Only for training and service purposes. - Page 17 Copyright © 2018 LG Electronics Inc. All rights reserved. Only for training and service purposes.
-
Page 18: Packing Accessory Section
2. PACKING ACCESSORY SECTION 900 Remote control FM antenna Copyright © 2018 LG Electronics Inc. All rights reserved. Only for training and service purposes. -
Page 19: Speaker Section
3. SPEAKER SECTION 3-1. FRONT SPEAKER Copyright © 2018 LG Electronics Inc. All rights reserved. Only for training and service purposes. - Page 20 3-2. SUBWOOFER SPEAKER Copyright © 2018 LG Electronics Inc. All rights reserved. Only for training and service purposes.
-
Page 21: Disassembly Instructions
1-1) Remove the 5 Screws. 1-2) Remove the Case. Figure D1 2. Power Cord 2-1) Pull the Power Cord in the direction of Figure D2-1. Figure D2-1 2-10 Copyright © 2018 LG Electronics Inc. All rights reserved. Only for training and service purposes. - Page 22 3. Plate Bridge 3-1) Pull the Front Assembly in the direction of and remove the Plate Bridge in the direction of . Figure D3 2-11 Copyright © 2018 LG Electronics Inc. All rights reserved. Only for training and service purposes.
- Page 23 4-1) Remove the 2 Screws. Figure D4-1 4-2) Disconnect the 2 FFC Cables and the 2 Harness Cables from the MAIN PCB. Figure D4-2 2-12 Copyright © 2018 LG Electronics Inc. All rights reserved. Only for training and service purposes.
- Page 24 4-3) Unhook the 2 Hooks ( in Figure D4-3) next to Front Assembly. Figure D4-3 4-4) Unhook the 2 Hooks ( in Figure D4-4) under the Front Assembly. 4-5) Remove the Front Assembly. Figure D4-4 2-13 Copyright © 2018 LG Electronics Inc. All rights reserved. Only for training and service purposes.
- Page 25 5-1) Remove the Knob by inserting a fl at-head screwdriver in the position marked Figure D5. Figure D5 6. FRONT PCB 6-1) Remove the 8 Screws from the FRONT PCB. 6-2) Remove the 2 Plate Grounds Figure D6-1 2-14 Copyright © 2018 LG Electronics Inc. All rights reserved. Only for training and service purposes.
- Page 26 6-4) Removing the FRONT PCB, be careful that the USB Connector does not fall apart. Figure D6-2 7. JACK PCB 7-1) Unhook the 1 Hooks and Remove the JACK PCB. Figure D7 2-15 Copyright © 2018 LG Electronics Inc. All rights reserved. Only for training and service purposes.
- Page 27 8-1) Unhook the 2 Hooks and Remove the BT Module. Figure D8 9. Panel Rear 9-1) Remove the 5 Screws. 9-2) Remove the Panel Rear. Figure D9 2-16 Copyright © 2018 LG Electronics Inc. All rights reserved. Only for training and service purposes.
- Page 28 10-2) Disconnect the 2 FFC Cables. 10-3) Remove the MAIN PCB and SMPS PCB. Figure D10 11. Chassis 11-1) Remove the Chassis. Figure D11 2-17 Copyright © 2018 LG Electronics Inc. All rights reserved. Only for training and service purposes.
- Page 29 12. MD 12-1) Remove the 4 Screws. 12-2) Remove the MD. Figure D12 2-18 Copyright © 2018 LG Electronics Inc. All rights reserved. Only for training and service purposes.
-
Page 30: Assembly Instructions
1-2) Tighten the 4 Screws. Figure A1 2. MAIN PCB, SMPS PCB 2-1) Assemble the Chassis. Be careful because the area around the bracket is sharp. Figure A2-1 2-19 Copyright © 2018 LG Electronics Inc. All rights reserved. Only for training and service purposes. - Page 31 3. Panel Rear 3-1) Assemble the Panel Rear. Be careful because the area around the Panel Rear is sharp. 3-2) Tighten the 5 Screws. Figure A3 2-20 Copyright © 2018 LG Electronics Inc. All rights reserved. Only for training and service purposes.
- Page 32 4. BT Module 4-1) Assemble the BT Module. Figure A4 5. JACK PCB 5-1) Assemble the JACK PCB. Figure A5 2-21 Copyright © 2018 LG Electronics Inc. All rights reserved. Only for training and service purposes.
- Page 33 6-1) Assemble the front PCB to match the marked hook. Figure A6-1 6-2) Assemble the Plate Ground. 6-3) Tighten the 8 Screws. Figure A6-2 2-22 Copyright © 2018 LG Electronics Inc. All rights reserved. Only for training and service purposes.
- Page 34 7. Knob 7-1) Assemble the Knob. Figure A7 8. Front Assembly 8-1) Assemble the Front Assembly to the marked hook. Figure A8-1 2-23 Copyright © 2018 LG Electronics Inc. All rights reserved. Only for training and service purposes.
- Page 35 8-2) Connect the 2 FFC Cables and the 2 Harness Cables from the MAIN PCB. Figure A8-2 8-3) Tighten the 2 Screws. Figure A8-3 2-24 Copyright © 2018 LG Electronics Inc. All rights reserved. Only for training and service purposes.
- Page 36 9-1) Assemble the Plate Bridge. Figure A9 10. Power Cord 10-1) Insert the Power Cord into the hook as shown in Figure D10-1. Figure A10-1 2-25 Copyright © 2018 LG Electronics Inc. All rights reserved. Only for training and service purposes.
- Page 37 10-2) Insert the Power Cord into the Panel Rear as shown in Figure D10-2. Figure A10-2 11. Case 11-1) Assemble the Case. 11-2) Tighten the 5 Screws. Figure A11 2-26 Copyright © 2018 LG Electronics Inc. All rights reserved. Only for training and service purposes.
- Page 38 3. ICs .................................3-34 PRINTED CIRCUIT BOARD DIAGRAMS .......................3-35 1. SMPS P.C.BOARD ..........................3-35 2. MAIN P.C.BOARD ..........................3-37 3. FRONT P.C.BOARD ..........................3-39 4. MIC P.C.BOARD DIAGRAM .........................3-41 Copyright © 2018 LG Electronics Inc. All rights reserved. Only for training and service purposes.
-
Page 39: One Point Repair Guide
If TH901 is open, replace it with a same specifi ca- replace it with a new one. replace it with a new one. tions one. Copyright © 2018 LG Electronics Inc. All rights reserved. Only for training and service purposes. - Page 40 If it doesn’t have any voltage, it’s destroyed. Replace it with a new one. 1-2-3. Service hint (Any picture / Remark) < SMPS schematic diagram > Copyright © 2018 LG Electronics Inc. All rights reserved. Only for training and service purposes.
-
Page 41: Booting When Power On The Set
2-1-3. Service hint (Any picture / Remark) KEY2 KEY2 IC500 IC500 X500 X500 X501 X501 IC501 IC501 12 VA 12 VA IC102 IC102 < MAIN board top view > Copyright © 2018 LG Electronics Inc. All rights reserved. Only for training and service purposes. -
Page 42: Vfd Is Not Displayed When Power On The Set
If the VH signal is output, replace VFD301 with new one. 3-1-3. Service hint (Any picture / Remark) < Waveform of GR and SG signal > Copyright © 2018 LG Electronics Inc. All rights reserved. Only for training and service purposes. -
Page 43: Operation Of Md
IC400 IC400 < MAIN < Waveform of SP- & SP+ board top < MAIN board bottom view > for driving SPINDLE motor > view > Copyright © 2018 LG Electronics Inc. All rights reserved. Only for training and service purposes. - Page 44 CN401(pin7) < MAIN < Waveform of SLED- & SLED+ board top < MAIN board bottom view > for driving SLED motor > view > Copyright © 2018 LG Electronics Inc. All rights reserved. Only for training and service purposes.
- Page 45 LOAD- : pin10 to CN401(pin2) < MAIN < Waveform for driving board top < MAIN board bottom view > TRAY open / close motor > view > Copyright © 2018 LG Electronics Inc. All rights reserved. Only for training and service purposes.
- Page 46 TR- : pin15 to CN401(pin17) IC400 IC400 < MAIN < Waveform of TR± board top < MAIN board bottom view > for driving TRACKING actuator > view > Copyright © 2018 LG Electronics Inc. All rights reserved. Only for training and service purposes.
- Page 47 F+ : pin14 to CN400 (pin15) < MAIN < Waveform of F± board top < MAIN board bottom view > for driving FOCUSING actuator > view > 3-10 Copyright © 2018 LG Electronics Inc. All rights reserved. Only for training and service purposes.
-
Page 48: Sound
[CK57 : Total 2.1ch 1100W 350+350+400] [CK56 : Total 2ch 700W] < I2S Signal Flow > < Waveform of I2S audio interface signals > 3-11 Copyright © 2018 LG Electronics Inc. All rights reserved. Only for training and service purposes. - Page 49 OUT_A OUT_A OUT_D OUT_D OUT_D OUT_D IC702 IC702 IC701 IC701 L703 L703 L702 L702 L704 L704 L701 L701 < MAIN board top view > 3-12 Copyright © 2018 LG Electronics Inc. All rights reserved. Only for training and service purposes.
- Page 50 [CK57 : Total 2.1ch 1100W 350+350+400] [CK56 : Total 2ch 700W] < Waveform of USB D± signal > < USB function signal fl ow > 3-13 Copyright © 2018 LG Electronics Inc. All rights reserved. Only for training and service purposes.
- Page 51 [CK57 : Total 2.1ch 1100W 350+350+400] [CK56 : Total 2ch 700W] < AUX function signal fl ow > < MAIN board top view > 3-14 Copyright © 2018 LG Electronics Inc. All rights reserved. Only for training and service purposes.
- Page 52 [CK57 : Total 2.1ch 1100W 350+350+400] [CK56 : Total 2ch 700W] < MAIN board top view > < TUNER IN function signal fl ow > 3-15 Copyright © 2018 LG Electronics Inc. All rights reserved. Only for training and service purposes.
-
Page 53: Electrical Troubleshooting Guide
2.5 V at Replace IC941. IC941 pin1? D935 normal? Replace D935. D932 normal? Replace D932. D931 normal? Replace D931. Power line of main PCB is short. 3-16 Copyright © 2018 LG Electronics Inc. All rights reserved. Only for training and service purposes. - Page 54 Q901 normal? Replace Q901. D951 normal? Replace D951. Is there about 2.5 V Replace IC951. at IC951 pin1? Power line of main PCB is short. 3-17 Copyright © 2018 LG Electronics Inc. All rights reserved. Only for training and service purposes.
- Page 55 Check or replace D931. D931 normal? ZD931 normal? Check or replace ZD931. Q301 / Q302 normal? Check or replace Q301 / Q302. Check or replace VFD. 3-18 Copyright © 2018 LG Electronics Inc. All rights reserved. Only for training and service purposes.
-
Page 56: Mcs Part Check
3. IC503 CHECK CHECK IC500 PIN. Check Check MCS Refer to MCS troubleshooting. pinA12, pinB12 SF_SCK : voltage 3.3 VA. SF_MISO Replace IC500. Check IC500. 3-19 Copyright © 2018 LG Electronics Inc. All rights reserved. Only for training and service purposes. -
Page 57: Fld Display Check
IC500->VFD301 data communication STB/ IC500 Pin F2, B3, B1. DATA/ CLK Check output data IC500 Pin B3. FLD light on? Replace IC500. Check IC500. 3-20 Copyright © 2018 LG Electronics Inc. All rights reserved. Only for training and service purposes. -
Page 58: Pwm Modulation Check
Check each line resistor output. IC700 input data. Check PWM modulator output Replace IC700. Check IC700. FL: Pin48(-),49(+)/ FR: Pin46(-),47(+). WF : 44(-), 45(+) Other output check. 3-21 Copyright © 2018 LG Electronics Inc. All rights reserved. Only for training and service purposes. -
Page 59: Power Amp Part Check
Check PWM modulator output IC701/IC702 : pin28, 29, 36, 37, 44, 45, 52, 53. Check output Replace the coil. line coil (L705, 706, 707, 708). 3-22 Copyright © 2018 LG Electronics Inc. All rights reserved. Only for training and service purposes. -
Page 60: Aux / Tuner Function Check
Check tuner module voltage Check tuner module(TU200) (Pin4: +3.3 V). operation. Check IC500 Pin P7, P8, P10, P11. Check tuner module data. Refer to function check. 3-23 Copyright © 2018 LG Electronics Inc. All rights reserved. Only for training and service purposes. -
Page 61: Cd Function
(16.9344 Check Cristal (X400). Replace Cristal (X400). MHz) at IC401 Pin51. Check IC500 Replace IC500. input/output and control line. Refer to function check. 3-24 Copyright © 2018 LG Electronics Inc. All rights reserved. Only for training and service purposes. -
Page 62: Double Usb Function
Check IC500 Display “NO FILE”. Replace IC500. (Pin U7, U8/ A7, A8). Check USB audio file in USB device (MP3, WMA file is playable) 3-25 Copyright © 2018 LG Electronics Inc. All rights reserved. Only for training and service purposes. -
Page 63: Waveforms Of Major Check Point
⑪ ⑫ ICIC500 pin N2 IC500 pin D1, IC500 pin E2 USB_5 V Fig 4. USB ⑬ ⑭ IC500 pin A8, IC500 pin A7 3-26 Copyright © 2018 LG Electronics Inc. All rights reserved. Only for training and service purposes. -
Page 64: Wiring Diagram
M I C JAC K m odul e H ar ness U S B FR O N T U SB 2 U SB 1 3-27 3-28 Copyright © 2018 LG Electronics Inc. All rights reserved. Only for training and service purposes. -
Page 65: Block Diagrams
PW M + AM P Bl ock Speaker FR O N T Bl ock Li ght i ng [CK57 : Total 2.1ch 1100W 350+350+400] [CK56 : Total 2ch 700W] 3-29 3-30 Copyright © 2018 LG Electronics Inc. All rights reserved. Only for training and service purposes. -
Page 66: Power Block Diagram
CD PICK UP 300 mA 300 mA TR Switching 12 V 100 mA IC701 PVDD 100 mA TR Switching Amp 12 V IC702 3-31 3-32 Copyright © 2018 LG Electronics Inc. All rights reserved. Only for training and service purposes. -
Page 67: Circuit Voltage Chart
GVDD : 11.98 V C953 2200 Audio Amplifi er VDD : 10.8 ~ 13.2 V VDD : 11.99 V VDD : 11.99 V 3-33 3-34 Copyright © 2018 LG Electronics Inc. All rights reserved. Only for training and service purposes. -
Page 68: Printed Circuit Board Diagrams
1. SMPS P.C.BOARD DIAGRAM (TOP VIEW) (BOTTOM VIEW) NOTE) Warning Parts that are critical with respect to risk of fire or electrical shock. 3-35 3-36 Copyright © 2018 LG Electronics Inc. All rights reserved. Only for training and service purposes. -
Page 69: Main P.c.board
2. MAIN P.C.BOARD DIAGRAM (TOP VIEW) (BOTTOM VIEW) 3-37 3-38 Copyright © 2018 LG Electronics Inc. All rights reserved. Only for training and service purposes. -
Page 70: Front P.c.board
3. FRONT P.C.BOARD DIAGRAM (TOP VIEW) (BOTTOM VIEW) 3-39 3-40 Copyright © 2018 LG Electronics Inc. All rights reserved. Only for training and service purposes. -
Page 71: Mic P.c.board Diagram
4. MIC P.C.BOARD DIAGRAM (TOP VIEW) (BOTTOM VIEW) 3-41 3-42 Copyright © 2018 LG Electronics Inc. All rights reserved. Only for training and service purposes.
Need help?
Do you have a question about the CK57 and is the answer not in the manual?
Questions and answers
How do you take subwoofer apart