Table of Contents
Advertisement
Quick Links
Histoires d'eau
MC
Once upon a time... water
Conserver ce guide après l'installation car il contient des informations utiles pour le service et la garantie.
Keep these instructions after you have finished the installation, it contains useful information regarding service and warranty.
TM
Instructions d'installation - Garantie
Installation Instructions - Warranty
Numéro de série / Serial number
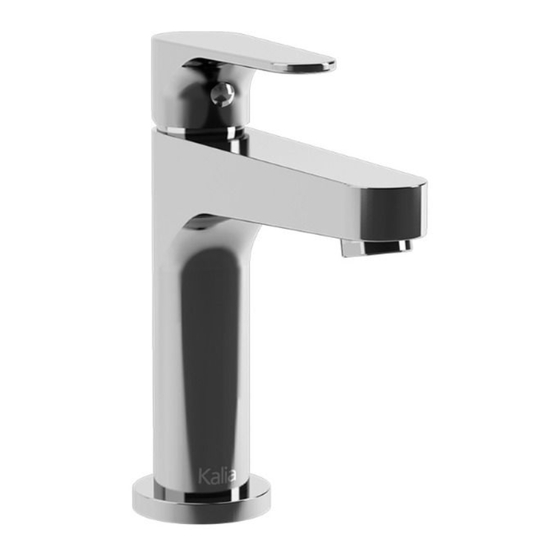
BF1412 KONTOUR™
Robinet monotrou de lavabo
Single Hole Lavatory Faucet
BF1285 KONTOUR™
Robinet monotrou de lavabo avec drain à pression
Single Hole Lavatory Faucet with push drain
BF1286 KONTOUR™
Grand robinet monotrou de lavabo
Tall Single Hole Lavatory Faucet
01/16
www.KaliaStyle.com
102692_Rev. C
Advertisement
Table of Contents

Related Manuals for Kalia KONTOUR BF1412


Summary of Contents for Kalia KONTOUR BF1412
- Page 1 BF1412 KONTOUR™ Robinet monotrou de lavabo Single Hole Lavatory Faucet BF1285 KONTOUR™ Robinet monotrou de lavabo avec drain à pression Single Hole Lavatory Faucet with push drain BF1286 KONTOUR™ Grand robinet monotrou de lavabo Histoires d’eau Tall Single Hole Lavatory Faucet Once upon a time...
- Page 3 Merci d’avoir choisi Kalia! Thank you for choosing Kalia! Merci d’avoir choisi un produit Kalia et de faire confiance à Thank you for choosing a Kalia product and for placing your notre entreprise. trust in our company. Kalia a une philosophie d’affaires basée sur des valeurs Kalia has a business philosophy based on solid core values fondamentales dont l’innovation et l’excellence ainsi qu’un...
-
Page 4: Renseignements Importants
Après avoir coupé l’alimentation d’eau, ouvrir le robinet pour libérer la pression d’eau. Kalia reserves the right to make any changes to the design of the product, without notice. Use the installation instruction Kalia se réserve le droit d’apporter toute modification au supplied with the product. -
Page 5: Service Parts Diagram
KONTOUR™ Schéma des pièces de rechange Service Parts Diagram BF1412-BF1285 BF1286 BF1285 seulement/ BF1285 only ou/or ou/or 102692_Rev. C... -
Page 6: Liste Des Pièces De Rechange
Instruction Part list_Faucets_Rev.A Kontour BF1285-BF1286_Rev.A * KONTOUR™ BF1412-BF1285-BF1286 Kontour Mono Small BF1285 & Mono Tall BF1286 Liste des pièces de rechange Service Parts List Assemblage / Sous-Assemblage / Numéro de pièce / Description Qté / Qty Assembly Sub-assembly Part Number 103070-XXX * Manette / Handle 103071... -
Page 7: Outils Et Matériaux Nécessaires
Outils et matériaux nécessaires Necessary Tools and Materials Tournevis Phillips et plat Flat and Phillips screwdriver Clé hexagonale 2 mm 2 mm Allen key Ruban d’étanchéité pour filetage Thread sealant tape Clé à molette Adjustable wrench Pince multiprise Gripping pliers Etape 1 - Installation du robinet Important : Couper l’alimentation en eau avant de débuter. - Page 8 Etape 2 - Installation de la base du drain seulement inclus avec BF1369/ only included with BF1369 Si vous avez un robinet BF1412-BF1286, passer directement à l’étape 3. Démonter le drain tel qu’illustré (fig. 2). Installer la base du drain avec le joint de caoutchouc sur le trou de l’évier.
-
Page 9: Step 4 - Installation Checkout
Etape 4 - Vérification de l’installation Activer l’eau et vérifier s’il y a des fuites (fig. 4). S’il y a lieu, voir la section Guide de dépannage. Votre installation est maintenant complétée! Step 4 - Installation Checkout Turn on the water and look for leaks (fig. 4). If applicable, refer to the Troubleshooting section. -
Page 10: Entretien Et Nettoyage
Kalia. Les dommages par un traitement Kalia product. Damages resulting from inappropriate inapproprié ne sont pas couverts par la garantie Kalia. -
Page 11: Guide De Dépannage
Guide de dépannage Troubleshooting Guide Avant toute intervention, couper l’alimentation d’eau et Before any operation, turn off the water and turn the ouvrir le robinet pour libérer la pression si nécessaire. faucet on to release the pressure if required. Le débit de l’eau est faible ou inexistant. Water flow is low or non-existent. - Page 12 Notes 102692_Rev. C...
-
Page 13: Garantie Limitée
Dans tous les cas, Kalia inc., ne peut être tenue responsable de tout montant excédant le prix d’achat du produit qui a été déboursé... -
Page 14: Limited Warranty
(1) year from the initial date of purchase by the owner/ end-user, contractor or builder from an authorized dealer. If the product is sold by Kalia Inc. as a display item, a one (1) year warranty applies. - Page 15 102692_Rev. C...
- Page 16 Kalia inc. 1355, 2e Rue Sainte-Marie (Québec) Canada G6E 1G9 t. 1-418-387-9090 1 877 GO KALIA (1-877-465-2542) f. 1-418-387-9089 www.KaliaStyle.com 102692_Rev. C Imprimé au Canada / Printed in Canada...
Need help?
Do you have a question about the KONTOUR BF1412 and is the answer not in the manual?
Questions and answers