Table of Contents
Advertisement
Quick Links
Advertisement
Table of Contents

Related Manuals for Getac Z710R


Summary of Contents for Getac Z710R
- Page 1 Z710 USER MANUAL...
- Page 2 Getac. It does not include Google’s closed-source applications such as Gmail, Google Maps, Android Market, etc. For the latest version of the manual, please visit the Getac website at www.getac.com. Detailed instructions on using Android 2.3 are also provided in the User’s Guide...
- Page 3 available from Google’s website. Note that not all applications and features described in Google’s document are supported by your device.
-
Page 5: Table Of Contents
Table of Contents Chapter 1 Getting Started .......... 1-1 Identifying Hardware Components ........1-1 Front Components ............. 1-1 Back Components ............. 1-3 Top Components ............1-4 Bottom Components ........... 1-5 Left-Side Components ..........1-6 Getting Your Device Ready for Use ........ 1-7 Installing the SIM Card .......... - Page 6 Customizing Your Home Screen ......... 2-4 Using the Launcher ............. 2-5 Working with Menus ............ 2-6 Options Menus ............2-6 Context Menus ............2-6 Status Bar ..............2-7 Quick Contact ............. 2-7 Entering Information ............. 2-8 Using the Onscreen Keyboard ........2-8 Editing Text ............
- Page 7 Adding a VPN ............3-7 Connecting to a VPN ..........3-8 Disconnecting from a VPN ........3-8 Connecting to a Computer via USB ........ 3-8 Adding an Account ............3-9 Chapter 4 Placing and Receiving Calls ...... 4-1 Opening the Phone Application ........4-1 Placing a Call ............
- Page 8 Using Contacts List and Details ......... 5-2 Editing Contacts Details ..........5-3 Joining or Separating Contacts ........5-4 Calendar ..............5-5 Working with Different Views ........5-5 Viewing Event Details ..........5-6 Creating an Event ........... 5-6 Editing or Delete an Event ........5-7 Changing Calendar Settings ........
- Page 9 Viewing Pictures and Videos ........7-4 Working with Thumbnails ........... 7-5 Music ................ 7-6 Copying Music Files onto the SD Card ....... 7-6 Playing Music ............7-7 Add a Song to the Ringtone List ....... 7-8 Working with Playlists ..........7-8 Chapter 8 Managing Your Device .......
- Page 10 Chapter 10 ........ Regulatory Information 10-1 Regulations Statements ..........10-1 European Notice ............10-1 FCC Regulations............. 10-2 Safety Precautions ............10-3 About Charging ............10-3 About the Charger ..........10-3 About the Radio Frequency Exposure ......10-4...
-
Page 11: Chapter 1 Getting Started
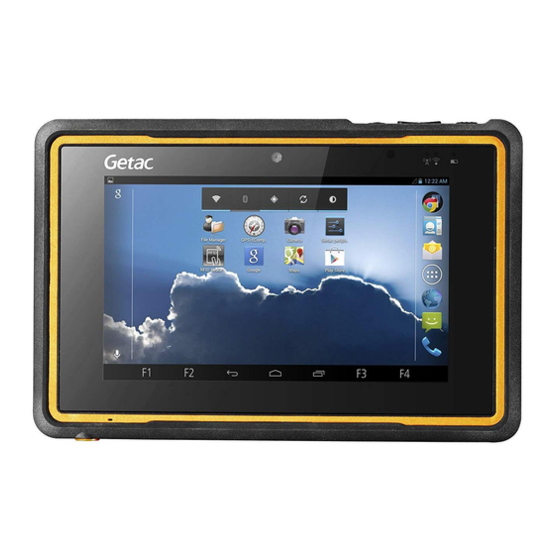
Chapter 1 Getting Started This chapter introduces you to the external components of your device and guides you through the process of setting up your device for use. Identifying Hardware Components Front Components Getting Started... - Page 12 Component Description Takes still pictures or records video clips. The front lens Camera Lens supports 1 MP (mega pixel). Senses the ambient light for automatic adjustments of the Light Sensor display and keypad backlight. The features can be enabled through OSD Control Panel and G-Manager.
-
Page 13: Back Components
Back Components Ref Component Description Plays music, sounds and voices. Speaker Serves as the input device by tapping on the touchscreen Stylus to make selections and enter information. Store it in the slot when not in use. Provides extra light when taking pictures. ... -
Page 14: Top Components
Top Components Component Description Starts up your device. Power Button Turns off or restores the screen. When pressed longer: Opens a menu with options for Silent mode, Airplane mode, and Power off. decrease the sound volume. Volume Control Buttons increase the sound volume. -
Page 15: Bottom Components
Bottom Components Component Description Connects to the AC adapter. Power Connector Connects the external antenna for WWAN (wireless wide WWAN area network) 3G connectivity. Pass-through Connector NOTE: Must be connected via docking. Connects the external antenna for GPS signal reception. ... -
Page 16: Left-Side Components
Left-Side Components Component Description For holding a tether (such as the stylus tether). There Tether Holder is one holder on the left side and another on the right side. Inside is the microSD card slot. MicroSD Card Cover ... -
Page 17: Getting Your Device Ready For Use
Getting Your Device Ready for Use Installing the SIM Card 1. Open the SIM card slot by removing one screw. 2. Insert the SIM card into the slot. NOTE: To remove the SIM card, slightly push in the card to release it and then pull the card out of the slot. -
Page 18: Performing The Initial Startup
3. The charge indicator glows in amber when charging is in progress. Do not disconnect your device from AC power until the battery is fully charged, as indicated by the amber indicator turning into green. This will take a couple of hours. -
Page 19: Using Options
4. Follow the on-screen instructions to complete the setup process for touchscreen calibration, language, and others. 5. After the setup is completed, the Home screen appears. You can now use your device. Using Options Using a MicroSD Card Your device has a microSD card slot where you can insert a microSD memory card. -
Page 20: Using The Tether
Removing an SD card You can safely remove the SD card from your device any time the device is shut down. If you need to remove the card while the device is on, unmount the card first to prevent corrupting or damaging the card. To unmount: 1. -
Page 21: Chapter 2 Basic Skills
Chapter 2 Basic Skills This chapter familiarizes you with the basic operations of your device. CAUTION: The device can get uncomfortably warm when you use it in high temperatures. In such a circumstance, please take safety measures (such as wearing gloves) to protect yourself. Prolonged body contact can cause discomfort and potentially a burn. -
Page 22: Navigating On The Screen
Navigating on the Screen CAUTION: Do not use a sharp object such as a ballpoint pen or pencil on the touchscreen. Doing so may damage the touchscreen surface. Use your finger or the included stylus. NOTE: The stylus can be tethered to your device. Store it in the slot (on the back of your device) when not in use. -
Page 23: Home Screen
Home Screen The Home screen is your starting point to access all the features on your device. You can have it display application icons, widgets, shortcuts, and other features that you want. At the top of the screen, the Status bar displays the time, information about the status of your device, and icons for notifications that you’ve received. -
Page 24: Customizing Your Home Screen
Folders Add a folder where you can organize Home screen items, or folders that contain your contacts. Your folders’ contents are kept up to date automatically. Customizing Your Home Screen You can add application icons, shortcuts, widgets, and other items to any part of the Home screen. -
Page 25: Using The Launcher
Removing an Item from the Home Screen 1. Tap and hold the item you want to remove, until it is enlarged. Don’t lift the stylus. The Launcher icon changes to a Trash Can icon. 2. Drag the item to the Trash Can icon. Changing the Wallpaper 1. -
Page 26: Working With Menus
Tap an icon in the Launcher to open the application. When you open an application, the other applications you’ve been using keep on running. You can quickly switch among your applications, to work with several at once. To switch to a recently used application, press and hold the Home key to open a small window with icons of applications that you’ve used recently. -
Page 27: Status Bar
Status Bar The Status bar appears at the top of almost every screen. It displays icons indicating that you’ve received notifications (on the left) and icons indicating the phone’s status (on the right), along with the current time. Notifications icons Status icons Notification icons report the arrival of new messages, events, and alarms. -
Page 28: Entering Information
icon that you can tap to open a bubble with options for quickly initiating a connection to that contact. Contacts that you can access with Quick Contact are displayed differently in different applications, but usually with a picture frame that looks like this: Tap a Quick Contact icon to open a bubble with icons for all the ways you can communicate with the contact. -
Page 29: Editing Text
To enter text, tap the keys on the keyboard to type. NOTE: Tap and hold a vowel or the C, N, or S key to open a small window where you can tap an accented vowel or other alternate letter. If you’ve used the Android Keyboard settings to make more than one ... -
Page 30: Locking The Screen
Go to the Home screen for the Search widget (which is on the Home screen by default). Tap the Search icon in the Launcher. Press the Search key. In applications such as Contacts, the application’s own search box opens when you press the key. 2. - Page 31 You can configure screen lock security so that only a pattern, PIN, or password can unlock the screen. (See “Location and Security Settings” in Chapter 8 for information on configuring screen lock security.) 2-11 Basic Skills...
-
Page 33: Chapter 3 Getting Connected
Chapter 3 Getting Connected This chapter tells you how you can get your device connected through a variety of ways. Overview Types of Connections Your device can connect to a variety of networks and devices, including mobile networks for voice and data transmission, Wi-Fi data networks, and Bluetooth devices, such as headsets. -
Page 34: Connecting To Mobile Networks
Connecting to Mobile Networks Your device supports HSDPA (High-Speed Downlink Packet Access). HSDPA is an enhanced 3G (third generation) mobile telephony communications protocol. It can operate on 850/900/1800/1900/2100MHz. To use the phone, you need to first set up an account with a mobile phone network service provider. -
Page 35: Using Wi-Fi Networks
device to access a different set of networks entirely, or to behave in special ways when roaming. While on the Home screen, press the menu key on your device. Tap Settings Wireless & networks Mobile networks. From here you can check what network you’re using, enable or disable data roaming, and limit your data connections to 2G networks. -
Page 36: Connecting To A Wi-Fi Network
Connecting to a Wi-Fi Network 1. Make sure the Wi-Fi radio is on. (See “Turning Wi-Fi On or Off” previously.) 2. While on the Home screen, press the menu key on your device. 3. Tap Settings Wireless & networks Wi-Fi settings. 4. -
Page 37: Using The Bluetooth Function
(SSID) or is currently out of range. In the Wi-Fi settings screen, tap Add Wi-Fi network (at the bottom of the list of discovered networks). Using the Bluetooth Function NOTE: Getac does not guarantee the product’s compatibilities with the Bluetooth headsets/devices from all manufacturers. Bluetooth technology is a short-range wireless communications technology. Devices with Bluetooth capabilities can exchange information over a distance of about 10 meters (30 feet) without requiring a physical connection. -
Page 38: Pairing With A Bluetooth Device
Pairing with a Bluetooth Device The first time you use a new Bluetooth device with your device, you must “pair” them, so that they know how to connect securely to each other. After that, you can simply connect to a paired device. 1. -
Page 39: Managing Bluetooth Settings
2. Tap Settings Wireless & networks Bluetooth settings. 3. In the list of devices, tap a paired but unconnected device in the list. If the device you expected isn’t displayed, tap Scan for devices. 4. When connected, the Status bar displays the icon. -
Page 40: Connecting To A Vpn
5. Configure each component of the VPN settings following the instructions from your network administrator. 6. Press the menu key on your device and tap Save. The VPN is added to the list on the VPN settings screen. Connecting to a VPN 1. -
Page 41: Adding An Account
You receive a notification that the USB is connected. 2. Open the Notifications panel and tap USB connected. 3. Tap Turn on USB storage in the screen that opens to confirm that you want to transfer files. You can now access the internal SD card of your device and the external SD card (if inserted) from your computer. - Page 42 2. While on the Home screen, press the menu key on your device. 3. Tap Settings Accounts & sync Settings Add account. 4. Enter your email address and password. 5. Tap Next. Your device attempts to communicate with your account service provider to validate your account.
-
Page 43: Chapter 4 Placing And Receiving Calls
Chapter 4 Placing and Receiving Calls This chapter tells you how to use the Phone application. Opening the Phone Application You can open the Phone application by several ways: Tap the Phone application icon in the Launcher ( ). The application opens ... -
Page 44: Placing A Call
Placing a Call There are several ways you can place a call. Dialing a Call 1. Tap the Phone application icon in the Launcher ( ). Or, if you are currently using Phone or Contacts, tap the Phone tab. 2. Tap the keys on the phone keypad to enter phone number. If you enter a wrong number, tap to erase digits one by one. -
Page 45: Placing A Call From The Call Log
Placing a Call from the Call Log The Call log is a list of all the calls you’ve made, received or missed. 1. Tap the Call log tab. 2. Tap the green phone icon at the right of the entry. NOTE: See “Using Call Log”... -
Page 46: During A Call
During a Call Adjusting the Phone Volume To adjust the call volume, use the volume control button on your device ( to increase or to decrease). CAUTION: Never raise the sound volume level too high when using earphones. An excessive sound volume level could cause damage to your hearing. Using Additional Functions When a call is in progress, you can put a call on hold, create a phone conference, mute your microphone, and more. -
Page 47: More Phone Operations
Icons Functions Merges the current calls into a conference call. (See “Setting up a Conference Call” later for more information.) Allows you to place another call while putting the current call on hold. (See “Setting up a Conference Call” later for more information.) Setting up a Conference Call NOTE: You may need to consult your mobile phone network service for the availability and subscription of the conference call function. -
Page 48: Reading Or Sending Messages
To open Call log, tap the Call log tab. Calls are listed with the most recent at the top. Scroll to view earlier entries in the log. Tap a Call log entry to open a screen where you can call the contact again, send the contact a message, add the number to your Contacts, and learn more about the original call. -
Page 49: Dialing An International Call
Some mobile phone network services may require that a SIM card be inserted, and in some cases that the PIN be entered. There may be other emergency numbers available. Your mobile phone network service may save additional local emergency numbers in the SIM card. Dialing an International Call When you are manually dialing a number, tap and hold on the number key 0 until the + sign appears. -
Page 51: Chapter 5 Contacts And Calendar
Chapter 5 Contacts and Calendar This chapter tells you how to use the Contacts and Calendar applications. Contacts The Contacts application gives you quick and easy access to the people you want to reach. To open Contacts, tap the Contacts icon in the Launcher ( You can also open Contacts by using Quick Contact. -
Page 52: Adding A Contact
To select individual contacts to import, tap and hold the contact you want and tap Import in the menu that opens. Adding a Contact 1. After opening Contacts, press the menu key on your device and tap New contact. 2. Enter the contact’s name. 3. -
Page 53: Editing Contacts Details
To view the details of a contact, tap the contact in the contact list. From the details screen, you can tap a communication method to start dialing, texting, or emailing the contact by using the listed number, address, and so on. Editing Contacts Details Editing Information 1. -
Page 54: Joining Or Separating Contacts
1. Select the contact entry in the contacts list. 2. Press the menu key on your device and tap Options. 3. Tap the down arrow button to open the ringtone list. Tap the one to play when the contact calls. 4. -
Page 55: Calendar
Calendar The Calendar application works with the web-based Google Calendar calendaring service for creating and managing events, meetings, and appointments. It also works with the Microsoft Exchange ActiveSync calendaring service. To open Calendar, tap the Calendar icon in the Launcher ( The first time you open Calendar, you are asked to add an account first or, if an account has been set up, you will see the existing calendar events from your account on the web. -
Page 56: Viewing Event Details
Week View Week view displays a chart of the events of one week. Day View Day view displays a chart of the events of one day, in a table of one-hour rows. A red line indicates the current time. Agenda View Agenda view is a list of your events in chronological order. -
Page 57: Editing Or Delete An Event
Editing or Delete an Event To edit an event, tap and hold the event and tap Edit event in the menu that opens. Or, if you are viewing the event details, press the menu key on your device and tap Edit event. To delete an event, tap and hold the event and tap Delete in the menu that opens. -
Page 59: Chapter 6 Web And Communications
Chapter 6 Web and Communications This chapter tells you how to use the Browser, Email, and Messaging applications. Browser Use the Browser application to view webpages and to search for information on the web when your device is connected to the Internet. Surfing the Web 1. -
Page 60: Working With Bookmarks
2. To go to a webpage, tap the URL box at the top of the Browser screen. (If the URL box isn’t visible, drag the page down until the URL box comes into view.) 3. Enter the address (URL) of the webpage. Tap a suggestion or enter an address and tap the arrow icon Webpages that are optimized for mobile devices typically open at a size appropriate for your screen. -
Page 61: Changing Browser Settings
Adding a Bookmark 1. Open the webpage you want to bookmark. 2. Tap the bookmark icon at the top of the screen. Or, press the menu key on your device and tap Bookmarks Add. 3. Edit the name and the address if necessary and tap OK. Opening a Bookmark 1. -
Page 62: Email
Email Use the Email application to read and send email from the email service account(s) that you have. Opening Email and the Account Screen Opening Email Tap the Email application icon in the Launcher ( The first time you open Email, a setup wizard opens to help you add an email account;... -
Page 63: Reading And Responding To E-Mail Messages
If you have configured Email to send and receive email from more than one account, you can view all messages sent to all accounts in your Combined Inbox. NOTE: You can add email accounts by pressing the menu key on your device while in ... -
Page 64: Composing And Sending An E-Mail
Tap the right or left arrow icon to read the next or previous message. NOTE: You can delete, star, or mark unread a batch of messages at once. In the Inbox or mailbox, check the messages that you want to work with as a batch. Composing and Sending an E-mail 1. -
Page 65: Working With Account Folders
Working with Account Folders Each account has Inbox, Outbox, Sent, and Drafts folders. Depending on the features supported by your account’s service provider, you may have additional folders. To open the folders screen, tap the folder icon while in the Accounts screen. You can also open an account’s folders while viewing its Inbox or other folder, by pressing the menu key on your device and tapping Folders. -
Page 66: Composing And Sending Messages
When you receive a new message, you will see a new message notification icon in the Status bar (unless you have disabled the feature). Tap the notification to open the message list screen. 2. Tap a message thread to open it. If you have disabled the auto-retrieve feature of MMS, you have to tap Download to view a MMS message. -
Page 67: Changing Messaging Settings
Press the menu key on your device and tap Add subject to add a message subject. Press the menu key on your device and tap Attach to open the options menu for adding multimedia item(s). After adding an item, you can use the buttons in the screen to preview, change, or remove the media attachment. -
Page 69: Chapter 7 Multimedia
Chapter 7 Multimedia This chapter tells you how to use the Camera, Camcorder, Gallery, and Music applications. Camera and Camcorder Use the Camera or Camcorder application to take pictures and shoot videos. NOTE: Camera and Camcorder belong to the same application. Taking Pictures 1. - Page 70 Green focus indicators appear at four corners. A shutter sound is played when the picture is taken. 5. The picture you just took is displayed as a thumbnail at the corner. You can tap the thumbnail to view the picture. (See “Gallery” in this chapter for more information.) The file is saved to the internal SD card of your device.
-
Page 71: Shooting Videos
Available choices depend on the current resolution setting. Zoom Adjust the contrast in the range of +4 to -4. Contrast Shooting Videos 1. To open Camcorder, tap the Camcorder icon in the Launcher ( ). You will be in Video mode. 2. -
Page 72: Gallery
Icons and Items Descriptions Sets the frequency to match the local electrical system Flicker mode (50Hz or 60Hz) for flicker free shooting under electric Settings light. Restores all Camera settings to their default values. Restore to defaults Icons and Items Descriptions Five choices (Automatic, Incandescence, Daylight, Fluorescence, and Cloudy) from which you can select... -
Page 73: Working With Thumbnails
4. When you open a picture, control icons appear around the picture. These icons allow you to send the picture to others, set the picture as your wallpaper or contact picture, delete the picture, and zoom in/out. To access more functions such as editing the picture, press the menu key on your device. -
Page 74: Music
Deletes the picture. Delete Crops the picture with a sizable and movable frame. Crop Sets the picture as your wallpaper or contact picture. Set as Plays the video in full screen. Video Play Options Sends the video to others. Share Deletes the video. -
Page 75: Playing Music
Playing Music 1. To open Music, tap the Music widget on the Home screen or tap the Music icon in the Launcher ( Music searches the SD card(s) for music files and builds a catalog of your music, based on information about each file that is stored in the file itself. 2. -
Page 76: Add A Song To The Ringtone List
Switches on or off shuffle mode (tracks are played in random order). Switches to the next repeat mode: Don’t repeat, Repeat the playlist, or Repeat the current track. Add a Song to the Ringtone List You can use a song as your phone ringtone, in place of one of the ringtones that come with the device. - Page 77 You can also add the song that is playing in the Playback screen as the first song in a playlist by pressing the menu key on your device and tapping Add to playlist. Or tap Save as playlist to save all the songs in an album that you’re playing as a playlist.
-
Page 79: Chapter 8 Managing Your Device
Chapter 8 Managing Your Device This chapter tells you how to manage power and configure your device. Managing Power The operating time of a fully charged battery depends on how you are using the device. Some functions, such as using multimedia or operating an SD card, may consume the battery power considerably. -
Page 80: Power-Saving Tips
Power-Saving Tips Follow these suggestions to maximize the battery’s operating time, particularly when you are relying solely on the battery power for extended time periods. Turn off radios that you aren’t using. Lower the screen brightness and set a shorter screen timeout. ... -
Page 81: Settings
Settings NOTE: Incorrect settings may cause your system to malfunction. Make sure that you fully understand the function of a certain item before any adjustment. Some setting items are available only for specific subscriptions you have with your carrier or applications you have in your device. The Settings application contains most of the tools for customizing and configuring your device. - Page 82 Item Description Check to turn on Bluetooth radio. Bluetooth To set the device name and discoverability. Bluetooth settings To scan for Bluetooth devices and view the result. (See “Pairing with a Bluetooth Device” in Chapter 3 for more information.) To set the type of VPN to add and view the list of VPNs VPN settings that you’ve previously configured.
-
Page 83: Call Settings
Call Settings Item Description See below. Call settings To limit use to outgoing calls only to the fixed dialing numbers Fixed Dialing (FDN) that you save on the SIM card. (GSM phones only) Numbers Voicemail service To select your carrier’s voicemail service or another service, if possible. -
Page 84: Display Settings
Item Description To set the volume of ringtones that sound when you receive Volume a phone call or notification, media (music, videos, etc.), and alarms. If you uncheck the option to use the same volume for both calls and notifications, you can set the notification ringtone volume independently. -
Page 85: Location And Security Settings
Location and Security Settings Item Description To set whether to use information from Wi-Fi and mobile Use wireless networks networks for location-aware applications. To set whether to use the built-in GPS (Global Positioning Use GPS satellites System) satellite receiver to pinpoint your location. To specify the unlock security. -
Page 86: Applications Settings
To delete all secure certificates and related credentials and Clear storage erase the secure storage’s own password. Applications Settings Item Description Check to permit installation of applications that you obtain from Unknown sources web sites, email, or other locations other than Android Market. To open a list of applications on your device. -
Page 87: Privacy Settings
The rest of this screen lists the account(s) you’ve added Manage accounts to the device. (For information on adding an account, see “Adding an Account” in Chapter 3.) To change an account’s sync settings, tap the account to open a screen where you can select the items to sync. (The available items depend on the account.) Item Description... -
Page 88: Search Settings
Lists the amount of space on the internal SD card the amount SD card, Total/ Available space you have used. Tap to safely remove the SD card from your device when Unmount SD card the device power is on. (This item appears only when an SD card is inserted in your device.) Tap to format the SD card inserted in your device. -
Page 89: Language And Keyboard Settings
Language and Keyboard Settings Item Description To select the language of the operating system. (Languages Select language supported depend on your model.) Note that this does not change the keyboard language. To set up options related to the onscreen keyboard. Android keyboard…... -
Page 90: Voice Input And Output Settings
Voice Input and Output Settings Item Description To set the text-to-speech application to use, if you have more Text-to-speech settings than one installed. Accessibility Settings Item Description Check to enable all installed accessibility plug-ins. Accessibility Check to allow the power button to end a phone call instead Power button ends of turning off the screen. -
Page 91: About Phone
About Phone Item Description Displays a long list of information about your battery, mobile Status network connection, and other details. Displays current measured values of sensors. Sensors Displays a list of the applications and operating system Battery use components you have used since you last connected the device to a power source, sorted by the amount of power they have used. -
Page 93: Chapter 9 Caring And Maintenance
Chapter 9 Caring and Maintenance This chapter gives solutions to common device problems you may encounter. It also provides guidelines on taking care of your device. Caring for Your Device Taking good care of your device will ensure trouble-free operation and reduce the risk of damage to your device. - Page 94 The screen surface can easily be scratched. Avoid touching it with sharp objects. Non-adhesive generic screen protectors designed specifically for use on portable devices with LCD panels may be used to help protect the screen from minor scratches. Never clean your device with it powered on. Use a soft, lint-free cloth to wipe ...
-
Page 95: Regulations Statements
Chapter 10 Regulatory Information NOTE: Marking labels located on the exterior of your device indicate the regulations that your model complies with. Please check the marking labels on your device and refer to the corresponding statements in this chapter. Some notices apply to specific models only. -
Page 96: Fcc Regulations
EN55022: Radio disturbance characteristics EN55024: Immunity characteristics EN6100-3-2: Limits for harmonic current emissions EN6100-3-3: Limitation of voltage fluctuation and flicker in low-voltage supply system EN60950 / IEC 60950: Product Safety The manufacturer cannot be held responsible for modifications made by the User and the consequences thereof, which may alter the conformity of the product with the CE Marking. -
Page 97: Safety Precautions
Changes or modifications not expressly approved by the party responsible for compliance could void the user‘s authority to operate the equipment. Safety Precautions Prolonged listening of music in maximum volume can damage the ears. The use of headphones other than those recommended/supplied can cause ... -
Page 98: About The Radio Frequency Exposure
Connect the charger to a proper power source. The voltage and grounding requirements are found on the product case and/or packaging. Do not use the charger if the cord becomes damaged. Do not attempt to service the unit. There are no serviceable parts inside. Replace ...
Need help?
Do you have a question about the Z710R and is the answer not in the manual?
Questions and answers