
Related Manuals for Smeg CTPU15X


Summary of Contents for Smeg CTPU15X
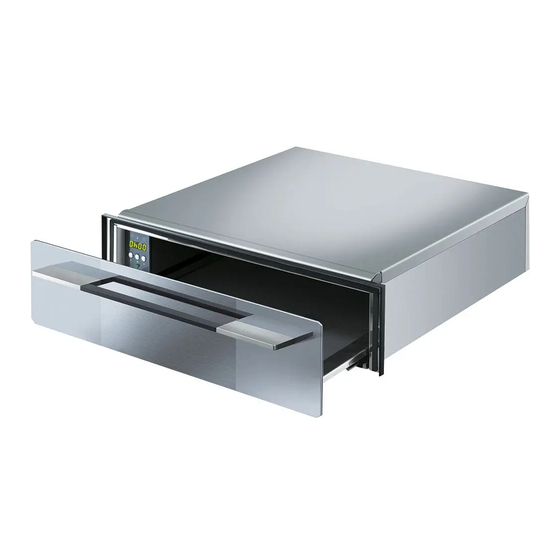
- Page 1 Instructions for Use Warming Drawer Notice d'utilisation Chauffe-vaisselle CTPU15X CTU15S...
-
Page 2: Table Of Contents
INSTALLATION INSTRUCTIONS ..............21 Dear Customer, Before going any further, we want to thank you for preferring our SMEG product. We are sure that this modern, functional and practical warming drawer, manufactured with top quality materials, will fully meet your expectations. - Page 3 Grounding Instructions This appliance must be connected to a grounded, metallic, permanent wiring system, or an equipment grounding conductor should with circuit conductors connected to the equipment grounding terminal or lead on the appliance. Warning! IMPROPER USE OF THE GROUNDING CAN RESULT IN A RISK OF ELECTRICAL SHOCK.
-
Page 4: Precautions For Use
Precautions for Use PRECAUTIONS FOR USE This manual is an integral part of the appliance. Take good care of it and keep it to hand throughout the warming drawer’s life cycle. We urge you to read this manual and all the information it contains carefully before using the appliance. - Page 5 Precautions for Use This appliance is tagged under European Directive 2002/96/EC on Waste electrical and electronic equipment (WEEE). This directive contains the regulations governing the collection and recycling of decommissioned appliances throughout the European Union. Never obstruct the openings and slits provided for ventilation and heat dispersal.
-
Page 6: Safety Information
Safety Information SAFETY INFORMATION Carefully read the instructions before installing and using the equipment. The manufacturer liable improper installation and use of the equipment that may cause injuries and damage. Always keep the instructions at hand, so they can be easily referred to during use. - Page 7 Safety Information authorized service facility for examination, repair, or adjustment. 7. The use of accessory attachments not recommended by the appliance manufacturer may cause injuries. 8. Do not use outdoors . 9. Do not let cord hang over edge of table, or touch hot surfaces.
- Page 8 Safety Information experience and knowledge if they are given supervision or instructions concerning how to use the appliance in a safe way and understand the hazards involved. Children should not play with the appliance. Keep packaging materials away from children. Risk of suffocation! ...
-
Page 9: Safety Instructions
Safety Information The electric connection is made via an omnipolar switch, which is suitable for the intensity to be tolerated and which has a minimum gap of 3mm between contacts, which will ensure disconnection in case of emergency or when cleaning the crockery warmer. - Page 10 Safety Information WARNING! Only use the appliance once it has been fitted into its built-in position. Only in this manner can it be guaranteed that users cannot access the electrical components. WARNING! Never open up the appliance’s frame. Possible contacts with electrical conducting parts or changes to electrical or mechanical components may represent a danger to users’...
-
Page 11: Precautions During Use
Safety Information PRECAUTIONS DURING USE This appliance complies with current safety standards. Improper use of the appliance may put the user at risk. Read the operating instructions carefully before using the appliance for the first time. In this way you will avoid the risk of injuring yourself or damaging the appliance. -
Page 12: Get To Know Your Warming Drawer
Instructions for the User GET TO KNOW YOUR WARMING DRAWER 1. – Control panel 2. – Anti-slip mat How the warming drawer works This appliance is equipped with a warm air circulation system. A fan distributes the heat generated by an electrical heating element throughout the interior of the appliance. -
Page 13: Before Using For The First Time
Instructions for the User BEFORE USING FOR THE FIRST TIME Never leave packaging residues unattended in the home. Separate waste packaging materials by type and consign them to the nearest separate disposal centre. Before using the appliance for the first time you should clean the interior and the exterior, following the cleaning instructions given... -
Page 14: Description Of Controls
Instructions for the User DESCRIPTION OF CONTROLS All the appliance's control and monitoring devices are placed together on the front panel. The table below provides the key to the symbols used. 1. Timer indicator light 2. Temperature indicator light 3. Delayed Start indicator light 4. -
Page 15: Using The Warming Drawer
Instructions for the User USING THE WARMING DRAWER Precautions and General Advice When the warming drawer is used for the first time, it should be heated to the maximum temperature for long enough to burn off any oily residues left by the manufacturing process, which might contaminate foods with unpleasant smells. - Page 16 Instructions for the User 8.2.3 Delayed Start In this mode the Display shows the remaining time for the operation to start and counting-down. The Operation indicator light will blink and the Delayed Start indicator is illuminated. To set a delayed start, proceed as follows: 1.
- Page 17 Tip: place those dishes into the device while it is being preheated. Load capacity Load capacity depends on the size of the crockery items. CTPU15X 6 persons servings 6 X 24cm dinner plates 6 x 10cm soup bowls 1 x 19cm serving dish...
-
Page 18: Cleaning And Maintenance
Instructions for the User CLEANING AND MAINTENANCE Cleaning is the only maintenance action that is required normally. Warning! Cleaning must be done with the warming drawer disconnected from the electrical power supply. Remove the plug from the power socket or disconnect the warming drawer power supply circuit. -
Page 19: What Should I Do If The Warming Drawer Doesn't Work
Instructions for the User Mat with non-slip surface The non-slip surface mat can be removed to facilitate cleaning of the drawer. The mat can be cleaned by hand using hot water with a few drops of washing-up liquid. Dry thoroughly. The non-slip mat should only be replaced when it is completely dry. -
Page 20: Disposal Instructions - Our Environment Policy
Instructions for the User The switchboard fuses/ circuit breakers have fused/ tripped out. The crockery is heating up too much. The electronic board has a malfunction. 11 DISPOSAL INSTRUCTIONS - OUR ENVIRONMENT POLICY Our products are only packaged using non-pollutant, environment-friendly, recyclable materials. -
Page 21: 12 Installation Instructions
Instructions for the Installer 12 INSTALLATION INSTRUCTIONS 12.1 Before installation Check that input voltage indicated characteristics plate is the same as the voltage of the power outlet you are going to use. Open the drawer and take out all the accessories and remove the packing material. - Page 22 Instructions for the Installer 1. Place the warming drawer on the shelf and slide it towards the interior of the niche in such a way that it is centred and completely lined up with the front of the unit. 2. Check that the warming drawer’s frame is properly levelled and is sitting evenly on the shelf.
- Page 23 Instructions for the Installer CTPU15X CTU15S...
Need help?
Do you have a question about the CTPU15X and is the answer not in the manual?
Questions and answers