Advertisement
Quick Links
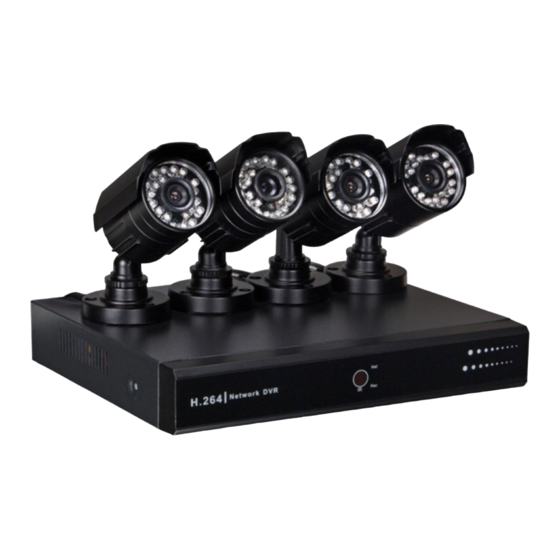
CCTVSET2
VIDEO SECURITY SET: DVR + 4 CAMERAS + ACCESSORIES + 500 GB
HARD DISK
STANDAARD VIDEOBEWAKINGSSET: DVR + 4 CAMERA'S +
ACCESSOIRES + 500 GB HD
SET DE BASE DE SÉCURITÉ VIDÉO: DVR + 4 CAMÉRAS +
ACCESSOIRES + DISQUE DUR DE 500 GO
JUEGO DE VIGILANCIA ECONÓMICO: VIDEOGRABADORA DIGITAL +
4 CÁMARAS + ACCESORIOS + DISCO DURO DE 500 GB
KOSTENGÜNSTIGER ÜBERWACHUNGSSATZ: DVR + 4 KAMERAS +
ZUBEHÖR + 500 GB-FESTPLATTE
SISTEMA ECONÓMICO DE SEGURANÇA POR VÍDEO: DVR + 4
CÂMARAS + ACESSÓRIOS + DISCO RÍGIDO DE 500 GB
USER MANUAL
GEBRUIKERSHANDLEIDING
MODE D'EMPLOI
MANUAL DEL USUARIO
BEDIENUNGSANLEITUNG
MANUAL DO UTILIZADOR
3
29
55
81
107
134
Advertisement

Related Manuals for Perel CCTVSET2


Summary of Contents for Perel CCTVSET2
- Page 1 CCTVSET2 VIDEO SECURITY SET: DVR + 4 CAMERAS + ACCESSORIES + 500 GB HARD DISK STANDAARD VIDEOBEWAKINGSSET: DVR + 4 CAMERA'S + ACCESSOIRES + 500 GB HD SET DE BASE DE SÉCURITÉ VIDÉO: DVR + 4 CAMÉRAS + ACCESSOIRES + DISQUE DUR DE 500 GO JUEGO DE VIGILANCIA ECONÓMICO: VIDEOGRABADORA DIGITAL +...
- Page 2 CCTVSET2 V. 02 – 08/04/2015 ©Velleman nv...
-
Page 3: Safety Instructions
If in doubt, contact your local waste disposal authorities. Thank you for choosing Perel! Please read the manual thoroughly before bringing this device into service. If the device was damaged in transit, do not install or use it and contact your dealer. -
Page 4: Installation
CCTVSET2 plug-and-play remote surveillance via smartphone apps Android ® : ATVCloud Apple ® (iPhone ® , iPod ® and iPad ® ): ATVCloud optional (not incl.): VGA & DVI monitor: MONSCA5N router: EM4544, EM4571 Overview Refer to the illustrations on page 2 of this manual. - Page 5 CCTVSET2 1. Enter the default user name [admin] in the User Name field. 2. You do not need to enter a password in the Password field. 3. Left-click Login to finish the login operation. REMARK The mouse will be locked for 10 seconds after three failed login attempts. Enter the correct login user name as soon as the mouse unlocks.
- Page 6 CCTVSET2 1. Left-click the Sequence icon to enter the function. 2. Left-click in the field. Enter the interval in seconds using the numeric keypad and confirm with OK. 3. Left-click OK to confirm and to activate the function. 4. Left-click the Stop Sequence icon to disable the sequence function.
- Page 7 CCTVSET2 7.2.5 Clients The Clients function lists all remote hosts connected to the DVR. 1. To disconnect a host, left-click the remote host to select. 2. Left-click Disconnect. 3. Left-click Disconnect All to disconnect all hosts simultaneously. 7.2.6 Snapshot The Snapshot function allows you to take screenshots of the selected channel. Proceed as follows: 1.
- Page 8 CCTVSET2 Transferring a Saved Snapshot onto a USB Stick 1. Insert your USB stick into one of the USB ports at the back of the DVR. 2. Search and select your snapshot as described under 7.2.7 Searching a Saved Snapshot above.
- Page 9 CCTVSET2 Scheduled Recording 1. Left-click the Record Setup icon to enter the function. 2. Select your channel and check off the scheduled option. 3. Left-click Set for the selected channel to open the programme window. 4. Enter the starting and ending times for your recording. Left-click OK to confirm the schedule.
- Page 10 CCTVSET2 2. Select your channel and enter all necessary parameters to fine-tune your recording selection. 3. Left-click Play to enter the Playback window (see The Playback Window below). The Playback Window The Playback Window allows several playback functions for your recorded video.
-
Page 11: System Setup
CCTVSET2 2. Select your channel and enter all necessary parameters to fine-tune your recording selection. 3. Left-click Backup to save your recording. REMARK Make sure to have your USB stick connected to the DVR. 7.2.10 Clear Alarm The Clear Alarm function allows you to clear the alarm settings for one selected channel or all channels. - Page 12 CCTVSET2 General 1. Left-click the General icon to enter the menu. 8.1.1 General The General menu allows you to adjust all general settings. Proceed as follows: 1. Left-click the General icon to enter the menu. V. 02 – 08/04/2015 ©Velleman nv...
- Page 13 CCTVSET2 2. Set up as desired. 3. Left-click OK to confirm. 8.1.2 Time The Time allows you to adjust all time settings. Proceed as follows: 1. Left-click the Time icon to enter the menu. 2. Set up as desired. 3. Left-click OK to confirm.
- Page 14 CCTVSET2 8.1.3 User The User menu allows you to adjust all user settings, either a local or network user. Proceed as follows: Local User 1. Left-click the User icon to enter the menu. 2. Check off the Local User box and left-click Add or Edit.
- Page 15 CCTVSET2 Network User 1. Left-click the User icon to enter the menu. 2. Check off the Network User box and left-click Add or Edit. 3. Set up as desired. 4. Left-click OK to confirm. Channel 1. Left-click the General icon to enter the menu.
- Page 16 CCTVSET2 8.2.1 Preview The Preview menu allows you to adjust all general on-screen settings such as name position. Proceed as follows: 1. Left-click the General icon to enter the menu. 2. Set up as desired. 3. Left-click OK to confirm.
- Page 17 CCTVSET2 1. Left-click the Stream icon to enter the menu. 2. Set up as desired. 3. Left-click OK to confirm. 8.2.3 Audio The Audio menu allows you to adjust all general audio settings. Proceed as follows: 1. Left-click the Audio icon to enter the menu.
- Page 18 CCTVSET2 8.2.4 Privacy Mask The Privacy Mask menu allows you to mask parts – max. 4 – of the channel. Proceed as follows: 1. Left-click the Privacy Mask icon to enter the menu. 2. Set up as desired. 3. Left-click OK to confirm.
- Page 19 CCTVSET2 8.3.1 Setting The Setting menu allows you to set all general connection settings. Proceed as follows: 1. Left-click the Setting icon to enter the menu. 2. Set up as desired. 3. Left-click OK to confirm. 8.3.2 Service The Service menu allows you to set all network settings. These network settings are important if you wish to control your monitoring system remotely.
- Page 20 CCTVSET2 2. Set up as desired. 3. Left-click OK to confirm. Alarm 1. Left-click the Alarm icon to enter the menu. REMARK Refer to chapter 7.2.10 Clear Alarm above for more alarm functions. 8.4.1 Motion Detect The Motion Detect menu allows you to define your motion detection area. Proceed as follows: 1.
Need help?
Do you have a question about the CCTVSET2 and is the answer not in the manual?
Questions and answers