
Related Manuals for Darfon VOTANI

Summary of Contents for Darfon VOTANI
- Page 1 49.Y2301.021 USER MANUAL VOTANI X1 YTFR06 148x210mm Format 封面 300P 銅西卡單面霧 P,內頁 64 頁(4 頁空白頁) Paper saddle stitching Binding White Colors 64 pages Pages ...
- Page 2 U s e r M a n u a l...
-
Page 4: Table Of Contents
Contents Picture of the bike Before cycling on the E-bike Adjusting the handlebar Adjusting the saddle Light Battery Operation Controlling of Display Front Motor Series P.13 Middle Motor Series P.27... -
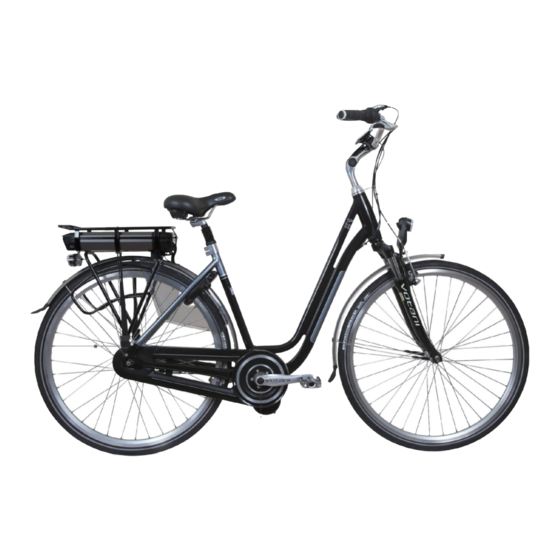
Page 5: Picture Of The Bike
Picture of Bike Front Moter Series Battery Controlller Display Sensor Motor... - Page 6 Picture of Bike Middle Moter Series Battery Display Motor / Controller / Sensor...
- Page 7 This manual will explain how to use your Votani electric cycle. We strongly advise you to read this manual carefully, so you can enjoy your Votani as long as possible. In this manual you will find the most important tips for your Votani with pedal support, its control and its use.
-
Page 8: Adjusting The Handlebar
It is best to shift back to gear 1 or 2 in the low support mode (Eco). Once you reach the desired speed, select the support which fits your speed. The design of the cycle is a combination of ergonomics, technology and aestheics, which results in a unique cycling experience. -
Page 9: Adjusting The Saddle
Adjusting the saddle To adjust the saddle position, the saddle position be adjusted a short distance forwards or backwards, and tilted up or down at the point where it's connected to the seat-pin. Use the hex key to Use the hex key to release bolts. -
Page 10: Battery Operation
Brakes Make sure that both wheels turn freely when you do not brake. Check the condition of the brakes frequently. You e-bike has been designed for cycling on a normal road. Extreme maneuvering might damage your cycle and cause injury. Maintenance Use a damp cloth and a neutral detergent to cleanse your cycle. - Page 11 Do not drop the charger or the battery. Do not charge the battery in direct sunlight. (So do not put the battery near the window.) It is possible to charge the battery directly while it is still in the e-bike. In that case it is absolutely necessary to switch the On/Off switch to the Off position.
- Page 12 Battery Charger Warnings 1. For convenience and safety, please separate thebattery with the frame while you are charging it. 2. The input condition is acceptable for AC 115 / 230V (50 ~ 60Hz), and output condition is DC 36V with maximum current 4 A. 3.
- Page 13 D. While the charger starts charging, the led shows yellow color. E. While the charger finishes charging, the led shows green color. Charging time: The charging time depends on the remaining energy in the battery and the charger current. If the battery is completely exhausted you can make this calculation: For example: Battery is 8.8 Ah and the charger is 2A -->...
-
Page 14: Controlling Of Display
Controlling of Display Front Motor Series Appearance description Distance unit Km/h Message Speed Connect fail ! Assistance level Information option 34567. Battery capacity 20:37:4 Backlight switch Time a. Speed - Display of current speed, and precision is decimal point one. b. Backlight switch - Control the display backlight. c. - Page 15 g. Information option Info. Description Unit Total accumulated distance. km or mile This value is always kept. Trip Trip distance. km or mile km / hr Average speed of the trip mile / hr Pedal rotations per minute Estimated remaining range. km or mile Range h.
- Page 16 Function key description Keys : a. Power ● Press and hold [ ] for 1.5 seconds, power will be turned on. ● When power is on, press and hold [ ] for 2 seconds, power will be turned off. b. Backlight switch ●...
- Page 17 Operation Normal function a. Turn On / Turn Off Make sure the battery is installed, and then press [ ] for 1.5 second, it will turn on the power. EXCIMER When the power is turned on, press and hold [ ] for 2 seconds to shut down system.
- Page 18 b. Pin enable If pin lock function is enabled, as Meter Lock shown in the picture, then it needs to enter the password when power is Input pi n: turned on. 0 0 0 If the password is wrong, it will display "Pin error !"...
- Page 19 c. Switch for backlight When power is turned on, press [ then display backlight symbol will be Km /h shown and backlight is on. 34567. 20:37: 4 Press [ ] again, then backlight symbol will disappear, and backlight is turned off. Km /h 34567.
- Page 20 e. Information selection 34567. 20:37:4 When power is turned on, press [ ] to select "ODO" -> "Trip" -> "Average" -> "RPM" -> "Range". Km /h Km /h Km /h Trip 00075. 34567. 00009. 20:37:4 20:37:4 20:37: 4 Km /h Km /h Range 00000.
- Page 21 Function Setting Press [ ] for 1.5 seconds, then it will enter the function setting mode. Km /h 34567. 20:37: 4 As it entered function setting mode, press [ ] or [ ] to select different functions. To enter these functions, you can press [ ], or press and hold ] for 1.5 seconds to leave function setting.
- Page 22 About me Wheel setup Wheel setup About me a. Trip clear Trip clear Enter trip clear, press [ ] or [ ] to select "Yes" to clear the trip, and press [ ] to confirm. Then it will leave function setting automatically. Note.
- Page 23 b. Information rotation display setting ALT d isplay As entering information-alternative display setting, you can press [ ] or [ ] to select "Yes" to activate it or "No" to leave. And press [ ] to confirm. Then it will leave function setting automatically. With this function enabled, the screen will show as below, and information options automatically alternates for every 2 seconds.
- Page 24 c. Password setting 1. Input old passowrd Pin number Input old 0 0 0 Please enter the old password at the cursor, and then press ] or [ ] to change the number, and press [ ] to the next. After all the numbers have been set, press [ ] or [ to select "Yes"...
- Page 25 d. Password enable Pin enable As entering pin setting, you need to confirm whether to enable pin-lock function or not. If yes, press [ ] to enable, or press [ ] to disable. Press [ ] to confirm, then it will leave function setting automatically.
- Page 26 f. Time setting Time setup 0 3 7 As entering time setting, change the time at the cursor, and press [ ] or [ ] to change the number, then press [ ] to the next. After all the numbers have been set, press [ ] or [ ] to select "O"...
- Page 27 h. The software information About me (H MI) v1 .009 ( Con tr olle r) v1 .001 T , G As entering the software information, it will show the version of HMI and controller. Press [ ] to leave function setting.
-
Page 28: Middle Motor Series
Middle Motor Series Interface Power Speed Mode Level Unit Walking Distance Time Unit TRIP Button... - Page 29 ON/OFF Long press M to start display. Long press M again to switch off. Display off automatically after no any operation on vehicle for ten munites (default). Walking assist Long press [ ], to start assist walking. highlights on scree. Vehicle goes at 6km/h. Only in case of pushing, can this function be used.
- Page 30 TRIP clearance Power on, long press M and [ ] to clear TRIP distance. Error code When something goes wrong with system, error code will flash on scree. Check details on attached list. Vehicle stops working in case of any error. Only when error is gone, can vehicle work again.
- Page 31 Speed limit Limit range from 15Km/h to 40Km/h. Press press [ ] or [ ] to change the limit. Press M to save and skip to backlight setting. Backlight Press press [ ] or [ ] to change the brightness, range from 1 to 8. Press M to save and skip to time setting.
- Page 32 Time Press [ ] or [ ] to change the hour, then press M to minute setting, press ] or [ ] to change the minute. Press M to save and exit. Setting effects after restart.
- Page 33 Attached list: Error code Definition Throttle no homing Throttle abnormality Low voltage protection Over voltage protection Hall sensor abnormality Phase line abnormality Controller overheat Temperature sensor in controller abnormality Current sensor abnormality Speed sensor abnormality Communication abnormality in BMS...
- Page 34 Inhoud Foto van de fiets P.34 Voordat u met de elektrische fiets gaat fietsen P.36 Het stuur aanpassen P.37 Het zadel aanpassen P.38 Verlichting P.38 Werking van de accu P.39 Bediening van het display Serie met motor aan voorzijde P.43 Serie met motor in het midden P.57...
-
Page 35: Foto Van De Fiets
Foto van de Fiets Serie met motor aan voorzijde Batterij Controlller Tonen Sensor Motor... - Page 36 Foto van de Fiets Serie met motor in het midden Batterij Tonen Motor / Controller / Sensor...
- Page 37 Gefeliciteerd met de aanschaf van deze Votani elektrische fiets. In deze handleiding leggen wij u uit hoe u uw Votani elektrische fiets kunt gebruiken. Wij genieten van uw Votani. In deze handleiding vindt u de belangrijke tips voor uw Voltani met pedaalondersteuning, de bediening en het gebruik.
-
Page 38: Het Stuur Aanpassen
Het is het beste om terug te schakelen naar de 1e of 2e versnelling in de modus met lage ondersteuning (Eco). Als u de gewenste snelheid eenmaal heeft betreikt, kunt u de ondersteuning kiezen die bij uw snelheid past. Het ontwerp van de fiets is een combinatie van ergonomie, technologie en vormgeving. Samen zorgen zij voor een unieke fietservaring. -
Page 39: Het Zadel Aanpassen
Het zadel aanpassen Om de zadelstand aan te passen kan de positie van het zadel een klein beetje vooruit of achteruit worden verplaatst en omhoog of omlaag worden gekanteld op het punt waar het verbonden is met de zadelpen G e b r u i k t G e b r u i k t z e s k a n t s l e u t e l z e s k a n t s l e u t e l o m... -
Page 40: Werking Van De Accu
Remmen Zorg ervoor dat beide wielen vrij draaien als u niet remt. Controleer regelmatig de conditie van de remmen. Uw elektrische fiets is ontworpen voor het fietsen op een normale weg. Extreem manoeuvreren kan uw fiets beschadigen en blessures veroorzaken. Onderhoud Gebruik een vochtige doek en een neutraal reinigingsmiddel om uw fiets schoon te maken. - Page 41 Laat de lader van de accu niet vallen Accu niet opladen in direct zonlicht. (Plaats de accu dus niet nabij het raam). Het is mogelijk de accu direct op te laden terwijl hij nog op de elektrische fiets zit. In dat geval is het absoluut noodzakelijk om de Aan/Uit-schakelaar in de Uit- stand te zetten.
- Page 42 Acculader Waarschuwingen 1. Ten behoeve van het gemak en de veiligheid moet u de accu van het frame halen tijdens het opladen. 2. De invoerconditie is acceptabel voor AC 115 / 230V (50 ~ 60Hz), en uitvoerconditie is DC 36V met maximum stroom 4 A. 3.
- Page 43 D. Als de lader begint op te laden, gaat er een groene LED knipperen. E. Als de lader klaar is met laden, wordt de LED groen van kleur. Oplaadtijd: De oplaadtijd is afhankelijk van de resterende energie in de accu en de stroom van de accu. Als de accu helemaal leeg is kunt u de volgende berekening maken: Bijvoorbeeld: Accu is 8,8 Ah en de lader is 2A -->...
-
Page 44: Bediening Van Het Display
Bediening van het display Voorwiel Motor Serie Beschrijving uiterlijk Distance unit Eenheid afstand Km/ h Message Melding Speed Snelheid Connect fail ! Assistance level Niveau ondersteuning Information option Informatie-optie 34567. Battery capacity Vermogen accu 20:37:4 Schakelaar Backlight switch Time Tijd achterverlichting a. - Page 45 g. Informatie-optie Info. Omschrijving Eenheid Totaal afgelegde afstand. Deze km of mijl waarde wordt altijd bijgehouden. Trip Dag tocht. km of mijl km/u Gemiddelde snelheid tocht. mijl/u Pedaalrotaties per minuut Geraamd resterend bereik. km of mijl Range h. Vermogen accu Resterend vermogen (%) en Omschrijving knipperlicht display...
- Page 46 Beschrijving van de functietoetsen Toetse: a. Stroom ● Druk 1.5 seconden op [ ], stroom wordt ingeschakeld. ● Als stroom is ingeschakeld, druk 2 seconden op [ ],stroom wordt uitgeschakeld b. Schakelaar achtergrond verlichting ● Als stroom is ingescakeld, druk op [ ], achergrond verlichting display wordt ingeschakeld ●...
- Page 47 Bediening Normale functie a. Inschakelen / Uitschakelen Zorg ervoor dat de accu is geïnstalleerd en druk vervolgens 1,5 seconden op [ ], hierdoor wordt de stroom ingeschakeld. EXCIMER Druk, als de stroom is ingeschakeld, 2 seconden op [ ] om het systeem uit te schakelen.
- Page 48 b. Pin Als de functie met pinvergrendeling Meter Lock actief is, zoals in de afbeelding, moet er een wachtwoord worden ingevoerd Input pi n: als de stroom wordt ingeschakeld. 0 0 0 Als het wachtwoord niet juist is, verschijnt er "Pin fout!" en moet de gebruiker de pincode opnieuw invoeren.
- Page 49 c. Schakelaar voor achtergrond verlichting Druk, als de stroom is ingeschakeld, op [ ], vervolgens verschijnt het Km /h symbool voor achtergrond verlichting en is de achtergrond verlichting aan. 34567. 20:37: 4 Druk nog een keer op [ ] en vervolgens zal het symbool voor achtergrond verlichting Km /h verdwijnen en is de achtergrond verlichting...
- Page 50 e. Informatie selecteren Km /h 34567. 20:37: 4 Druk, wanneer strrom is ingeschakeld op [ ] om “ODO” “Trip” “Gemiddeld” “RPM” “Bereik” te selecteren. Km /h Km /h Km /h Trip 00075. 34567. 00009. 20:37:4 20:37:4 20:37:4 Km /h Km /h Range 00000.
- Page 51 Functie-instelling Druk [ ] gedurende 1,5 seconden, vervolgens wordt de modus om functies in te stellen geopend. Km /h 34567. 20:37: 4 Druk, als de modus voor het instellen van functies is geopend, op [ ] of [ ] om verschillende functies te selecteren.
- Page 52 About me Wheel setup Wielinstelling Overmij a. Trip wissen Trip clear Trip wissen invoeren, druk op [ ] of [ ] om “Ja” te selecteren om de trip te wissen, en bevestig met [ ]. Vervolgens wordt de functie-instelling automatisch verlaten. Let op.
- Page 53 b. Instelling voor automatisch roteren van de Informatie ALT displa y Tijgdens invoeren ALT display, drukt u op [ ] of [ ] om “Ja” te selecteren om het te activeren of “Nee” om te verlaten. Bevestig met [ ]. Vervolgens verlaat u de functie automatisch.
- Page 54 c. Wachtwoord 1. Oud wachtwoord Pin number Input old 0 0 0 Voer het oude wachtwoord in bij de cursor en druk vervolgens op [ ] of [ ] om het cijfer te wijzigen, en druk op [ ] om naar het volgende te gaan. Druk, nadat alle cijfers zijn ingesteld, op [ ] of [ ] om “Ja”...
- Page 55 d. Wachtwoord activeren Pin enable Tijdens het invoeren van de pincode, moet u bevestigen of u de pin vergrendeling wilt activeren of niet. Zo ja, druk op [ ] om te activeren, of druk op [ ] om te deactiveren. Bevestig met [ ], vervolgens wordt de functie-instelling automatisch verlaten.
- Page 56 f. Tijdinstelling Time setu p 0 3 7 Wijzig, bij het invoeren van de tijdinstelling, de tijd bij de cursor, en druk op [ ] of ] om het cijfer te wijzigen, druk vervolgens op [ ] om naar het volgende te gaan.
- Page 57 h. Informatie over de software About me (H MI) v1 .009 ( Con tr olle r) v1 .001 T , G Tijdens het invoeren van de software-informatie, wordt de versie van HMI en regelaar getoond. Druk op [ ] om de functie-instelling te verlaten.
-
Page 58: Serie Met Motor In Het Midden
Serie met motor in het midden Display Stroom Power Snelheid Modus Mode Niveau Level Eenheid Unit Walking Lopend Distance Afstand Tijd Time Eenheid Unit Tocht TRIP Toets... - Page 59 Aan/uit Druk langdurig op M om het display te starten. Druk nogmaals langdurig op M om uit te schakelen. Display gaat automatisch uit als fiets tien minuten niet wordt bediend (standaard). Wandel Functie Druk langdurig op [ ], om ondersteuning bij lopen te starten. Licht op scherm op. Fiets gaat met 6km/u.
- Page 60 TRIP wissen Stroom aan, druk langdurig op M en [ ] om Trip-afstand te wissen. Foutcode Als er iets mis gaat in het systeem, knippert er een foutcode in het scherm. Zie details op bijgevoegde lijst. Fiets stopt met werken in geval van een fout. Pas als fout is verholpen kan fiets weer werken.
- Page 61 Snelheidslimiet Bereik van 15 km/u tot 40 km/u. Druk op [ ] of [ ] om de limiet te wijzigen. Druk op M om op te slaan en naar instelling achtergrond verlichting te gaan. Achtergrond verlichting Druk op [ ] of [ ] om de helderheid te wijzgen, bereik van 1 tot 8.
- Page 62 Tijdinstelling Druk op [ ] of [ ] om het uur te wijzigen, druk vervolgens op M om minuut in te stellen. Druk op [ ] of [ ] om de minuut te wijzgen. Druk op M om te slaan en te verlaten. Instelling wordt effectief na opnieuw starten.
- Page 63 Bijgevoegde lijst: Foutcode Definitie Gashendel niet terug naar uitgangspositieThrottle abnormality Afwijking gashendel Laagspanningsbescherming Overspanningsbescherming Afwijking Hall-sensor Afwijking faselijn Oververhitting regelaar Afwijking temperatuursensor in regelaar Afwijking stroomsensor Afwijking snelheidssensor Afwijking communicatie in BMS...
- Page 64 49.Y2301.021 V2.0...
- Page 65 Darfon Electronic Corp. Meerenakkerweg 1-17 5652 AR Eindhoven...