
Summary of Contents for Lightning Phantom
- Page 2 INTRODUCTION This manual contains information on how to properly adjust and operate your Lightning bicycle for maximum comfort, safety, and performance. The recumbent position and seat require alternate adjustment methods. The unconventional design and closeness of the front wheel to your feet require that new riding skills must be acquired.
- Page 3 FIG. 1-0...
- Page 4 1.0 THE PHANTOM ASSEMBLY A) Remove all items from the box and unwrap. Be careful to support the handlebars so the cables are not kinked. B) Install the steering column onto the tilt steering mechanism. C) Verify/place the tilt steering mechanism in a vertical position and tighten the securing bolt to 13-22 foot pounds.
- Page 5 FIG. 1-1...
- Page 6 I) Front shifter connection/ adjustment: Rotate shifter until cable is fully released and thread cable to Derailleur. Figure 1-2 shows the cable installation for the front derailleur. J) Install the pedals. Note: The left side pedal has reverse (left hand) threading. K) Unroll and install chain, see Figure 1-3 for proper chain routing.
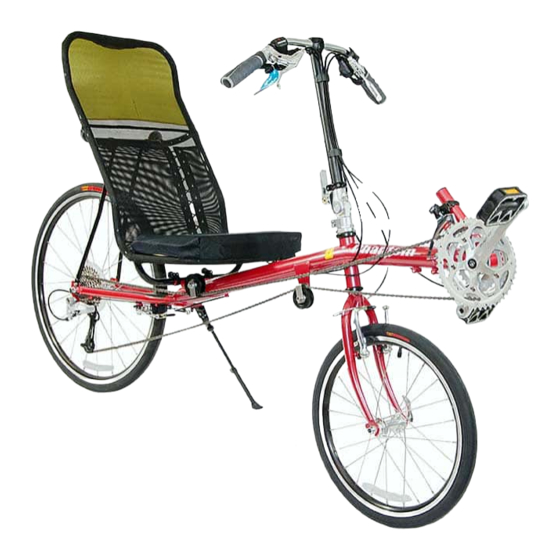
- Page 7 FIG. 1-3...
- Page 8 FIG. 1-4...
- Page 9 2.0 ADJUSTMENTS BEFORE RIDING 2.1 CRANK ADJUSTMENT: On Lightning Bicycles, the cranks are moved to accommodate differences in leg length. Adjust the cranks as follows: NOTE: Do not apply any grease to the bottom bracket extension tube, otherwise it might rotate under pedaling pressure.
- Page 10 2.2 HANDLEBAR ADJUSTMENT: A) To raise the bars, loosen the Quill bolt with a 6mm Allen wrench. Then tap down to loosen the quill wedge. B) Adjust the handlebars up or down so that there is approximately 1/2 inch of clearance between your knees and the handlebars (see Fig.
- Page 11 2.3 CHAIN LENGTH ADJUSTMENT: NOTE: If the optional chain tensioner is installed it will normally take up any chain slack resulting from fore and aft bottom bracket adjustments, thus this section can be skipped. After adjusting the cranks, check and adjust the chain length.
- Page 12 Finally, look into the distance, not at the front wheel. 3.1 PEDAL TYPE: The Phantom comes with platform pedals which make learning to ride easy. If you install clipless pedals, follow these tips: A) Don't engage when first learning how to ride.
- Page 13 3.3 SLOW SPEED TURNING: WARNING! During slow speed turns, the front wheel can be turned far enough so that your feet will hit it if youare pedaling. Practice the following carefully, and always pay attention to the front wheel when making U-turns, turning into a driveway, etc. A) The easiest solution is to coast through the turn, and keep your foot on the side you are turning in the up position.
- Page 14 3.4 HANDLING AND STABILITY: A Lightning bicycle has fair stability and responsive steering. It is not necessary to aggressively hold onto the handlebars. A relaxed grip is best for riding in a straight line. One hand on the bars is adequate for relaxed cruising. As speed increases, the stability actually improves if maximum power is not applied to the pedals.
- Page 15 3.7 CLIMBING HILLS: Use a lower gear and spin! If your pedaling speed drops below 60 rpm, then your power also drops off. Pulling on the handlebars does not help any. One trick to try on long and/or steep hills for relief or extra power is this: Steer with one hand and push on your knee with your other hand as you pedal.
- Page 16 D) BE CAREFUL when cornering fast on unfamiliar roads. Any gravel in the corner may cause a slide out. Because of the low Lightning seat position, it is possible to lean over more in a corner than a standard bike without realizing it.
- Page 17 (6mm) aluminum cage or rib type cages. 4.2 REAR RACK: The custom Lightning specific rack works best, other similar racks also work with some bending of the attaching arms. Use the aft set of threaded holes in the rear dropouts for attaching racks and fenders.
- Page 18 They easily mount on most rear racks. However, any pannier that fits your rack will work. 4.4 SEAT BAG: The best option is the Lightning seat bag. It has a large capacity, and is easily slipped on. It also has pockets for 1 or 2 hydration bladders.
- Page 19 5.0 MAINTENANCE 5.1 THE SEAT The seat as received on new Lightning Bicycles is fairly tight. After an initial break-in period of riding, the seat will loosen up due to stretching of the material. The seat back should be tightened by taking the slack out of the string that runs along the sides.
- Page 20 After about 10,000 miles or so it might show excessive wear or make excessive noise, at that point it should be replace. A replacement idler is available from Lightning Cycles. 5.3 HEADSET ADJUSTMENT To adjust tension on the headset bearings, loosen the adjusting ring locking bolt (see Fig.
- Page 21 5.10 FORK O-RING An O-ring is installed between the fork and steerer tube, inside the frame (see Fig. 5-5). This O-ring slows down the steering response of the bike. If you want quicker steering, remove the O- ring. If you want even slower steering a second O-ring can be installed.
- Page 22 FOR YOUR RECORDS FRAME S/N: ................BOUGHT FROM: ..............DATE OF PURCHASE: ............SERVICING: DATE ITEM ..........................................................................................................................................................................................................................................................................................................................................................
- Page 23 FREE from defects in materials and workmanship for five years from the date of purchase. During the limited warranty period, all original parts determined by Lightning to be defective will be repaired or replaced, at the sole option of Lightning, free of charge. Lightning will additionally pay during these periods reasonable dealer labor charges arising solely due to replacement of defective parts /frames, and ground shipping of replacement parts/frames from Lightning.
Need help?
Do you have a question about the Phantom and is the answer not in the manual?
Questions and answers