
Subscribe to Our Youtube Channel
Related Manuals for Masseuse Remidial Deluxe +


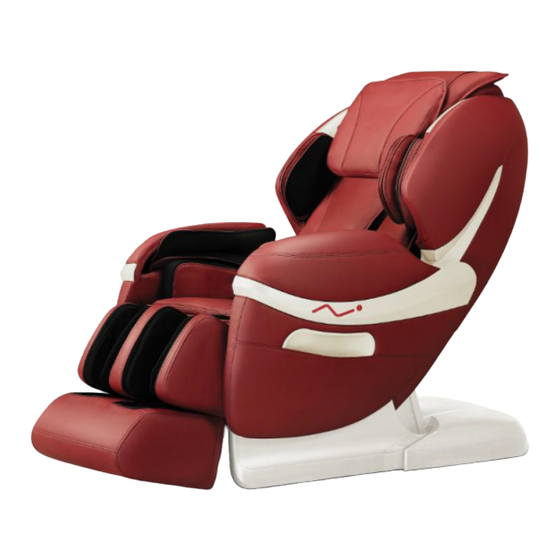
Summary of Contents for Masseuse Remidial Deluxe +
- Page 2 Contents Massage chair structure II Main components & Technical Specifications III Distribution and functions of the Power board & Main board pluggable unit IV Troubleshoot of the chair Disassemble diagram of parts of the mechanism VI Study & Conclusion...
- Page 3 (pic 1)──Front of the chair Massage chair structure Valve interposer 3D massage mechanism mechanis medme mechanism Internal valve , Valve interposer Shoulder massage component mechanism Waist twist component airpump component Footrest cylinder...
- Page 4 (pic 2)──Back of the chair Massage chair structure Transformer 9660-A33X Power board Main board Backrest cylinder Main Drive Component Power switch Controller connection emergency switch Power filter No ① 4A Fuse Power switch component...
- Page 5 (pic 3)── Side of the chair Massage chair structure Negative ions board 7W Speaker Negative ions keypad Negative ions generator 12V Fan...
- Page 6 (pic 4)── Massage chair structure 3D massage mechanism motors & detecting board Kneading gearbox component Stretch circle testing board Kneading motor 3D motor Width testing & signal Neck & shoulder position transfer board potentiometer Traveling testing board Top limit switch for 3D motor Traveling motor Traveling gearbox...
- Page 7 (Form 1) Main components & Technical Specifications Components Specifications Specifications Name & Rated voltage 3D motor 62ZYT100-35G DC110V 30~80Ω Kneading/Flapping/Travling/Butt ock swing motor DC110V 30~80Ω 62ZYT100-36G Air pump AC110V 110~120Ω Backrest cylinder 100~150Ω DDG110V-450/260 AC110V...
- Page 8 (Form 2) Main components & Technical Specifications Components Specifications Specifications Name & Rated voltage Footrest cylinder 100~150Ω DDG110V-260/120 DC110V RED-BLACK:Input AC220V Transformer White-Black: OutputAC110V 9660-A33X-RT AC110V/220V/ : AC12V Black-black Output 240V Blue-Blue: AC28V Output electromagnetic valve fanfold plug DC12V 40~50Ω Traveling switch (Touching switch)...
- Page 9 (Pic 5) Main components & Technical Specifications (图 5) No ② 4A Fuse CON101 : AC220V CON102:Ringlike Transformer power input AC220V Input& AC110V Output CON301 : Ringlike Transformer output AC12V No: ③ 6AFuse CON104 : AC110V CON302:Ringlike Transfer to Main board Transformer Output AC28V CON307:shunt DC16V...
- Page 10 (Pic 6) Main components & Technical Specifications CON21 : Kneading CON20 : Flapping CON6 : Traveling CON22:Foot roller CON5:3D motor motor motor motor motor CON45: Top & Bottom limits switch CON29 : Buttock of the massage mechanism swing motor CON46:Massage mechanism function testing wire CON9 :...
- Page 11 Troubleshoot of the chair 1 ── can not start the chair The reason why Chair can not start Power board probelm Main board probelm Power supply or power drive problem Fuse burned Controller problem Pic 5 No. ③ Fuse Power wire loose Filter or power Pic 2 NO.
- Page 12 470UP capacitance 4007rectifying diode JY1905 isolating transformer Optocoupler 817 compensa 274 integration ting pipe Pic 7 Main board & DC5VA power switch part schematic circuit diagram The connection of the DC5V power switch and can not start massage problem: As Pic5 power board get AC220V power input to CON1→Then the good power board will through CON306 + 5VA & GND output DC5V to main board→then main board MCU&...
- Page 13 LED4 5VA ① power indicator light DC5VA +5VA、+5VB、DC12V input AC signal to start ③6A fuse LED1 DC3.3V ② power indicator light DC5VB LED2 5VA varistor LED3 5VB CON1 input ② 4A fuse +5VA、+5VB、DC12V input AC signal to start AC220V power Pic 8 power indicator light on power board Pic 9 power indicator light on PC board ①power indicator light:power switch DC5VA power indicator light...
- Page 14 Troubleshooting Analysis 2──motors on massage hand don’t work Kneading/ tap motor don’t work The wire which The wire on PC board Motor’ problem connect with PC has problem board and motors CON20 tapping has problem motor See 10 and 12,test t optocoupler he kneading and tap group field-effect tube...
- Page 15 Pic 12 Kneading/Tapping motor driving circuit Moving motor don’t work optocoupler 250 CON20 moving motor The testing circuit The wire which Motor’ problem The wire on PC board has problem, the connect with PC has problem single chip cannot board and motors give a sign has problem Audion 8050...
- Page 16 DC110V drive switch tube 13N50C field-effect Move up/move Move signal IR21091 paster transistor Move up signal 250 optocoupler backward signal input integration Q7 move up signal paster 8050 audion Move down/move Move up/move down DC110V power output plug CON6 forward signal input Pic 14 moving/stretch motor driving circuit diagram ☆...
- Page 17 Stretch motor don’t work Figure 15 traveling limit switch The testing circuit has Optocoupler 250 The wire which Motor’s The wire on PC board CON15 stretch problem, the single chip connect with PC problem has problem motor cannot give a sign board and motors has problem First figure 4 check the...
- Page 18 LNK306 integration 817 optocouple Four motors don’t work The optocouple 250 optocouple 250 DC13V DC110V driving power has without DC13V power working power is short out problem DC13V stabilivolt 4743 First make sure there is Figure 17 and 18,check Open circuit to test, when 1mH inductance AC110V power input to PC 4743 stabilivolt、LNK306...
- Page 19 Troubleshooting analysis 3──cylinder’s lifting problem Cylinder’s lifting problem The two cylinders can only Power on, the backrest lay down, calf One cylinder can only rise Backrest cylinder can One cylinder cannot rise up rise up or only decline only rise up no matter or down rest cylinder rise up and stop testing, up or only decline...
- Page 20 Stretch limit switch in cylinder Hall tube circle testing in cylinder Pic 20 cylinder testing circuit diagram Field effect tube Fuse tube 13N50C WH250-400 Optocoupler 817 Relay 212L Audio 8050 Wire inside Audio 8050 Audio 8050 Circle testing board Stretch limit switch in cylinder Pic 21 cylinder driving circuit diagram Pic 22 components inside...
- Page 21 Troubleshooting analysis 4──air pressure abnormal Air pressure abormal When the power on, the air One group airbags don’t release air The air pump cannot start One group airbags don’t fill out air pump work automatically, canot stop PC board is The air pump’s ①...
- Page 22 Control AC110V ON-OFF silicon control BCR5PM Control signal transduction Optocoupler 3023 SMD triode8050 chip74HCT595 Field-effect transistors STN4828 SMD diodes 4007 Pic 25 air pump AC110v circuit board Pic 26 cylinder circuit board ☆airbag massage working principle : Firstly , the driver board giving AC110V to air pump to do working with air and also control the solenoid valve on/off to make the airbag full air or release air as program requirement .
- Page 23 Troubleshoot chapter 5──Hip swing SMD triode 8050 Hip swing function cant stop working Doesn’t work Photo coupler250 Swing number detect Motor damaged Driver board damaged Field-effect transistors board damaged, cause the 13N50C driver board cant receive the signal of the hip Detect the motor working situation , so that Pic 27 or 29,detect the...
- Page 24 Pic 29 hip swing /foot roller motor driver circuit board Troubleshoot chapter 6──Foot roller Foot roller working un Q25 SMD triode 8050 Foot Roller doesn’t work Roller working when power Photo coupler 250 one output pug ofphoto Motor damaged, Driver board damaged thermistor coupler 250 in low level ( no welding ,pic.30...
- Page 25 thermistor ,resistance value 75℃ working normal ≤ 5Ωis resistance value larger , that motor cant work Foot roller motor resistance value is 70~90Ω Two inductances in the wire that used for anti-interference , but always with bad welding , pls take care of this point .
- Page 26 BCR5PM controlled silicon Photo coulper3023 SMD triode 8050 Heating output CON18 AC28V input CON19 Pic. 33 back heating circuit board Troubleshoot chapter 8──music or blue booth Music One speaker works no music when used cell phone MP3 Blue tooth cant connected Speaker damager Music board Power board...
- Page 27 blue tooth signal Plug for magnetic input valve input Plug for magnetic valve output Music signal Left armrest magnetic MP3 audio wire valve Plug for connect Driver audio signal board, blue tooth, and input DC3.3V power plug Power board DC16V input Audio signal enlarge output blue tooth audio signal...
- Page 28 Troubleshoot chapter 9──Anion function Anion doesn’t work Anion board/anion generator Fan cant start Power board damaged On/off button damaged damaged Anion board Anion board Anion generator DC16V don’t send the current to Switch board damaged Fan damaged damaged, DC12V damaged damaged, DC12V the anion board, see pic.35 output no giving...
- Page 29 Troubleshoot chapter 10──armrest lights Armrest lights in bad performance Not full of light working Right light panel doest work Both side light doest work Light Panel LED damaged ①Right light panel damaged. Left light panel DC5V 稳压管 Power board DC16V don’t send the ②Left light panel damaged (because AMS117-5.0 不良或集成...
- Page 30 disassemble diagram of parts of the mechanism 1──Armrest Used the wrench to dismantle the screw that marked in red (see picture), remove the armrest. the hole of screw in armrest...
- Page 31 disassemble diagram of parts of the mechanism 2──Hip swing component 1.:remove the seat cushion 2.:open the zip 3.:dismantle the 4 units screw that fixed the button hip swing component . 4:dismantle the full hip swing component from the chair...
- Page 32 disassemble diagram of parts of the mechanism 3──calf 1:open the PU cover that connect the calf and seat . 2:dismantle the protection cover of seat frame 3:dismantle the screw which fixed calf shaft 4: dismantle the calf parts from the chair after removed the calf air tube, wire.
- Page 33 disassemble diagram of parts of the mechanism 4──upper-armrest cover 1:dismantle the back cover 2:dismantle 4 units screw that inside of upper –armrest(side), see picture above , it already be marked on red . 3:dismantle 2 units screw that outside of upper-armrest (bottom), see picture, it already be marked on red. 4:...
Need help?
Do you have a question about the Remidial Deluxe + and is the answer not in the manual?
Questions and answers