LG LTM9000ST Owner's Manual & Cooking Manual
Hide thumbs
Also See for LTM9000ST:
- Specifications (2 pages) ,
- Specifications (2 pages) ,
- Service manual (41 pages)
Table of Contents
Advertisement
Advertisement
Table of Contents

Related Manuals for LG LTM9000ST


Summary of Contents for LG LTM9000ST
- Page 1 LTM9000ST...
-
Page 2: Table Of Contents
Child Lock ... 11 Ez on... 11 Auto Cook ... 12 Thank you for purchasing a LG microwave oven. Please record the model number and serial number of this unit for future reference. We also suggest you record the details of your contact with LG (LG Electronics U.S.A., Inc.) -
Page 3: Safety
PRECAUTIONS TO AVOID POSSIBLE EXPOSURE TO EXCESSIVE MICROWAVE ENERGY ... • Do not attempt to operate this oven with the door open, since open-door operation can result in harmful exposure to microwave energy. It is important not to defeat or tamper with the safety interlock. -
Page 4: Important Safety Instructions
SAFETY - MICROWAVE IMPORTANT SAFETY INSTRUCTIONS The safety instructions below will tell you how to use your oven to avoid harm to yourself or damage to your oven. WARNING - To reduce the risk of burns, electric shock, fire, injury to persons, or exposure to excessive microwave energy: 1. -
Page 5: Important Safety Instructions
IMPORTANT SAFETY INSTRUCTIONS When using electrical appliances, especially when children are present, basic safety precautions should always be followed, including the following: 1.Read all instructions before using your toaster. 2.Do not touch hot surfaces. 3.To protect against electrical hazards, do not immerse cord, plug, or the appliance in water or other liquid. -
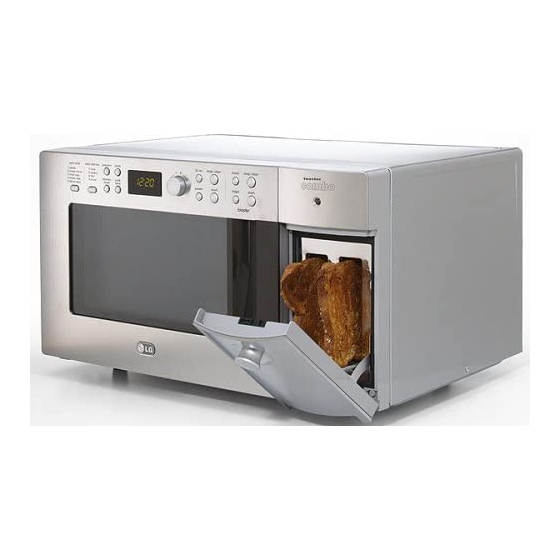
Page 6: Understanding Your Toaster Combo
UNDERSTANDING YOUR TOASTER COMBO SPECIFICATIONS Power Supply Rated Power Consumption Output Microwave Toaster Rated Current Overall Dimensions (WxHxD) Oven Cavity Dimensions (WxHxD) Capacity of Oven Cavity *IEC 60705 RATING STANDARD Specifications subject to change without prior notice. INSTALLATION A. Circuits For safety purposes this oven must be plugged into a 20 Amp circuit. -
Page 7: Parts And Accessories
UNDERSTANDING YOUR TOASTER COMBO PARTS AND ACCESSORIES Control Panel See-Through Door Your oven comes with the following accessories: 1 Owner’s Manual and Cooking Guide 1 Glass Turntable 1 Rotating Ring Microwave Oven Toaster Easy-Clean Oven Cavity Safety Interlock System Toaster Indicator Light Toaster... -
Page 8: Control Panel
UNDERSTANDING YOUR TOASTER COMBO CONTROL PANEL MICROWAVE CONTROL AREA 1. DISPLAY. The Display includes a clock and indicators that tell you time of day, cooking time settings, and cooking functions selected. 2. AUTO COOK. Touch this button and turn the dial knob to select programmed food items. 3. -
Page 9: Using Your Microwave Oven
USING YOUR MICROWAVE OVEN COOKWARE GUIDE Most heat-resistant, non-metallic cookware is safe for use in your microwave oven. However, to test cookware before using, follow these steps: 1. Place the empty cookware in the microwave oven. 2. Measure 1 cup of water in a glass measuring cup and place it in the oven beside the cookware. 3. -
Page 10: Tips For Microwave Cooking
USING YOUR MICROWAVE OVEN TIPS FOR MICROWAVE COOKING BROWNING Meat and poultry with high fat content that are cooked for 10 or 15 minutes or longer will brown lightly. Foods cooked a shorter time can be brushed with a browning agent, such as Worcestershire sauce, soy sauce, or barbecue sauce. -
Page 11: Clock
USING YOUR MICROWAVE OVEN CLOCK Example: To set the clock for 10:30. Touch: Display Shows: Turn the dial knob to set hours. Turn the dial knob to set minutes. KITCHEN TIMER Your microwave oven can be used as a kitchen timer. -
Page 12: Auto Cook
USING YOUR MICROWAVE OVEN AUTO COOK Use this function to cook food without entering a cook time or power. You don’t need to touch START. Automatically microwave cooking will start. Refer to the “Auto Cook Table” below for more information. Example: To cook 2 potatoes. -
Page 13: Timed Cooking
USING YOUR MICROWAVE OVEN TIMED COOKING This feature lets you program a specific cook time and power. For best results, there are 10 power level settings in addition to HIGH power (100%). Refer to the “Microwave Power Level Table” on page 14 for more information. -
Page 14: Microwave Power Levels
USING YOUR MICROWAVE OVEN MICROWAVE POWER LEVELS Your microwave oven has 10 cook power levels to let you cook or heat a wide variety of foods. Refer to the table below for suggestions: Microwave Power Level Table Power Level • Boiling water. •... -
Page 15: Auto Defrost Sequence List
USING YOUR MICROWAVE OVEN NOTE: When you touch the START button, the display changes to defrost time count down. The oven will beep during the DEFROST cycle. At this time, open the door and turn, separate, or rearrange the food. Remove any portions that have thawed. -
Page 16: Auto Defrost Table
USING YOUR MICROWAVE OVEN AUTO DEFROST TABLE Meat setting FOOD SETTING BEEF Ground Beef, MEAT Remove thawed portions with fork. Bulk Turn over. Return remainder to oven. Ground Beef, MEAT Separate and rearrange. Patties Round Steak Turn over. Cover warm areas with MEAT aluminum foil. - Page 17 USING YOUR MICROWAVE OVEN AUTO DEFROST TABLE (CONT.) Poultry setting FOOD SETTING CHICKEN Whole POULTRY Turn over (finish defrosting breast- side down). Cover warm areas with aluminum foil. Cut-up Separate pieces and rearrange. Turn over. Cover warm areas with aluminum foil. CORNISH HENS Whole...
-
Page 18: Using Your Toaster
TIPS FOR TOASTER IMPORTANT Before using the toaster for the first time, set the Darkness Control at medium and operate the toaster without bread in order to burn off residues on the heating elements. You will notice an odor that is characteristic of new heating elements. -
Page 19: Operating Instruction
OPERATING INSTRUCTION • Make sure the crumb tray is pushed all the way in place before plugging toaster into wall outlet. • Remove all protective wrappings from food before placing into toasting slots. Place bread into slots and Close the door. Then select one mode (Toast/Bagel) and turn the dial knob to the desired setting (experiment to suit individual taste). -
Page 20: Bagel
Bagel Use this function to bake bagel. Example : To bake bagel at level 7. Touch: Turn the dial knob to set level 7. NOTE: If you plug in and touch “toast”, the display shows level 5. After using it, the display shows the last baking level. -
Page 21: Troubleshooting
Questions and Answers Operation Question Why is the oven light not on during cooking? Why does steam come out of the air exhaust vent? Will the oven and toaster be damaged if it operates empty? Does microwave energy pass through the viewing screen in the door? Why does a tone sound when a button on the control panel is touched? - Page 22 Questions and Answers Food Question What is wrong when baked foods have a hard, dry, brown spot? Why do eggs sometimes pop? Why are scrambled eggs sometimes a little dry after cooking? Is it possible to pop popcorn in a microwave oven? Why do baked apples sometimes burst during cooking?
-
Page 23: Before Calling For Service
BEFORE CALLING FOR SERVICE You can often correct operating problems yourself. If your oven and toaster fail to work properly, locate the operat- ing problem in the list below and try the solutions listed for each problem. If the oven and toaster still do not work properly, contact the nearest Authorized Service Center. Authorized Service Centers are fully equipped to handle your service requirements. - Page 24 FEDERAL COMMUNICATIONS COMMISSION RADIO FREQUENCY INTERFERENCE STATEMENT (U.S.A. ONLY) WARNING This equipment generates and uses ISM frequency energy and if not installed and used properly, that is in strict accordance with the manufacturer's instruc- tions, may cause interference to radio and television reception.
-
Page 25: Warranty
LG MICROWAVE OVEN LIMITED WARRANTY — USA LG Electronics, Inc. will repair or replace your product, at LG’s option, if it proves to be defective in material or workmanship under normal use, during the warranty period set forth below, effective from the date of original consumer purchase of the product. - Page 26 Printed in China P/NO.: 3828W5A4193...
Need help?
Do you have a question about the LTM9000ST and is the answer not in the manual?
Questions and answers