Table of Contents
Advertisement
Available languages
Available languages
Quick Links
HORNO MICROONDAS PROFESIONAL 25 Lt.
Four à Micro-ondes Professionnelle
Profi-Mikrowelle ofen
Professional microwave oven
Forno a microonde Professionale
Forno Microondas Profissional
Microgolfoven Professioneel
INSTRUCCIONES DE USO Y MANTENIMIENTO
CONSEILS D'UTILISATION ET D'ENTRETIEN
GEBRAUCHS UND INSTANDHALTUNGSANLEITUNG
INSTRUCTIONS FOR USE AND MAINTENANCE
ISTRUZIONI PER L'USO E LA MANUTENZIONE
INSTRUÇÕES DE USO E MANUTENÇÃO
GEBRUIKS- EN ONDERHOUDSAANWIJZINGEN
Advertisement
Table of Contents

Related Manuals for Lacor 69325


Summary of Contents for Lacor 69325
- Page 1 HORNO MICROONDAS PROFESIONAL 25 Lt. Four à Micro-ondes Professionnelle Profi-Mikrowelle ofen Professional microwave oven Forno a microonde Professionale Forno Microondas Profissional Microgolfoven Professioneel INSTRUCCIONES DE USO Y MANTENIMIENTO CONSEILS D'UTILISATION ET D'ENTRETIEN GEBRAUCHS UND INSTANDHALTUNGSANLEITUNG INSTRUCTIONS FOR USE AND MAINTENANCE ISTRUZIONI PER L'USO E LA MANUTENZIONE INSTRUÇÕES DE USO E MANUTENÇÃO GEBRUIKS- EN ONDERHOUDSAANWIJZINGEN...
-
Page 2: Table Of Contents
ÍNDICE PÁG ÍNDICE PÁG Importantes Medidas de Seguridad Medidas de Segurança Importantes Principales especificaciones tecnicas Principais características técnicas Información Relevante Informação Relevante Instalación Instalação Aviso Advertência Descripción de las partes Descrição dos componentes Materiales que se pueden usar Materiais que se podem utilizar Materiales a evitar Materiais que não se devem utilizar Funcionamiento... -
Page 3: Importantes Medidas De Seguridad
GUARDE ESTAS INSTRUCCIONES Este manual contiene información de seguridad relevante para el mantenimiento, uso y manejo de este producto. Cualquier omisión al seguir estas instrucciones puede resultar en un daño serio. Si no entiende el contenido de este manual, comuníqueselo a su supervisor. No ponga en funcionamiento este equipo hasta que no haya leído y entendido el contenido de este manual. -
Page 4: Principales Especificaciones Tecnicas
PRINCIPALES ESPECIFICACIONES TÉCNICAS MODELO: 69325 VOLTAJE: 220-240V/50Hz POTENCIA ENTRADA: 1550W POTENCIA SALIDA: 1000 W CAPACIDAD HORNO: 25Lts. MEDIDAS: 51x36,3x31 Cm. PESO: 14,6 Kgr. INFORMACIÓN RELEVANTE Información sobre la garantía Este manual aporta las instrucciones de instalación, funcionamiento y seguridad del microondas. - Page 5 PRECAUCIONES 1.- Coloque la unidad en una base a la altura adecuada, en una zona conveniente para su uso. Se debe evaluar en su ubicación que la unidad o su contenido no se caigan accidentalmente y sea lo suficientemente fuerte como para soportar el peso de la unidad. 2.- No coloque nada encima del microondas;...
- Page 6 ADVERTENCIA 1.- Advertencia: Los líquidos y otros alimentos no deben calentarse en recipientes sellados ya que existe riesgo de que exploten. 2.- Advertencia: Es peligroso para cualquier persona aparte de una persona capacitada el quitar la cubierta que protege frente a la exposición a la energía del microondas. 3.- Advertencia: No permita que los niños usen el horno sin supervisión, sólo permita que usen el aparato cuando se les hayan dado las instrucciones apropiadas de modo que el niño pueda usar el horno de una manera segura y comprenda los peligros de un uso...
-
Page 7: Instalación
18.- No use este horno cerca del agua, en un sótano húmedo o cerca de una piscina. 19.- La temperatura de las superficies accesibles puede ser elevada cuando el electrodoméstico está en funcionamiento. Mantenga el cable alejado de la superficie calentada y no cubra el horno. -
Page 8: Descripción De Las Partes
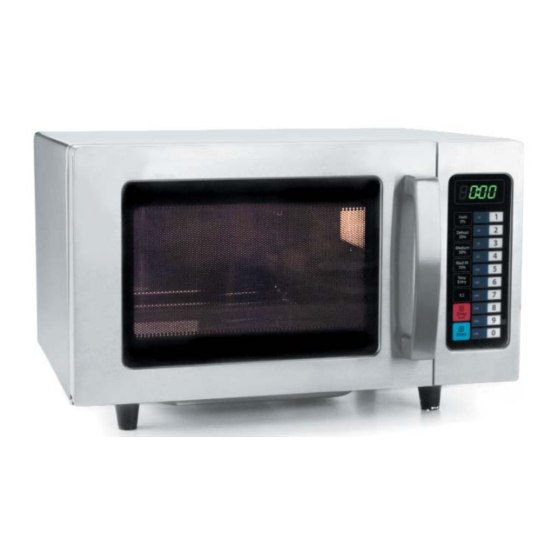
DESCRIPCION DE LAS PARTES A.- Panel de control B.- Ventana de observación C.- Puerta D.- Sist. de bloqueo de seguridad 0.- Display 1.- Botón potencia 2.- Botón tiempo de cocción 3.- Botón X2 4.- Botón de parada/cancelación 5.- Botón inicio 6.- Botenes números/tiempo... -
Page 9: Materiales A Evitar
MATERIALES QUE PUEDE USAR EN EL HORNO MICROONDAS Utensilios - Observaciones Plato para Dorar Siga las instrucciones del fabricante. La parte inferior del plato para dorar debe ser de al menos 3/16 pulgadas (5 mm) superior al plato giratorio. Un uso incorrecto puede provocar la rotura del plato giratorio. -
Page 10: Funcionamiento
FUNCIONAMIENTO MODO USUARIO Esta función permite parametrizar/ajustar las distintas funciones disponibles en el microondas: 1.- Abra la puerta y pulse "2" durante 5 segundos. Un pitido sonará y el display reflejara "OP_ _". 2.- Pulse cualquier botón del 0 al 9 para entrar a las distintas opciones. Ejemplo (Seleccionar el sonido del pitido al pitido medio): 1.- Pulse "2"... - Page 11 Tiempos de cocción: BOTÓN TIEMPO POTENCIA FACTORES COCCIÓN 0:10 100% 0:20 100% 0:30 100% 0:45 100% 1:00 100% 1:30 100% 2:00 100% 3:00 100% 4:00 100% 5:00 100% Cinco niveles de potencia disponibles: NIVEL Alto M. alto Medio Descongelar Mantener 100% POTENCIA PANTALLA...
- Page 12 TIME ENTRY 1.- Pulse "Time Entry" y el display mostrara "00:00". Seleccione el tiempo deseado utilizando los números del panel de control. 2.- Selecciones la potencia que desee, pulsando "hold 0%"; "Defrost 20%; "Med-Hi 50%" y "Med-Hi 70%". Cuanto mayor sea el porcentaje, mayor será el nivel de calentamiento. La potencia por defecto se sitúa en el 100% (PL10).
- Page 13 6.- Pulse "Start" para guardar el programa. 7.- Para utilizar el programa, pulse "3" en el modo preparado. 8.- Cuando el programa haya terminado, sonaran 3 pitidos y el microondas mostrara "END". 9.- Si durante el proceso de ajuste se pulsa el botón "Stop" el ajuste quedara cancelado. 10.- Pulsando "Stop"...
-
Page 14: Limpieza
13.- Pulsando "Stop" durante el proceso de cocinado, el microondas entrara en pausa. Pulsa "Start" para continuar con el proceso o "stop" para cancelar y volver al modo preparado. MODO SERVICIO Para verificar la cantidad de veces que se ha abierto y cerrado la puerta del microondas: 1.- Abra la puerta y pulse "3"... -
Page 15: Solución De Problemas
SOLUCIÓN DE PROBLEMAS Revise su problema utilizando la siguiente tabla y pruebe las soluciones para el problema en concreto. Si el horno microondas sigue sin funcionar correctamente, póngase en contacto con el centro de servicio autorizado más cercano Normal Es posible que la radio o la TV presenten interferencias si el El horno microondas horno microondas está... - Page 16 Problema Posible causa Remedio El horno no se pone en El cable de alimentación Vuelva a conectarlo en la toma marcha no se ha conectado bien. de corriente La puerta esta abierta Cierre la puerta e intentelo denuevo Mal funcionamiento Consulte las instrucciones Use el microondas con Se utilizaron materiales...
-
Page 17: Consignes De Securité Importantes
CONSERVEZ CES INSTRUCTIONS Ce manuel contient une importante information de sécurité concernant la maintenance, l'utilisation et la manipulation de ce produit. Ne pas suivre les instructions contenues dans ce manuel peut provoquer de sérieuses blessures. Si vous ne comprenez pas les contenus de ce manuel, veuillez le soumettre à... -
Page 18: Característiques Techniques
CARACTERISTIQUES TECHNIQUES MODELE: 69325 TENSION: 220-240V/50Hz PUISSANCE ENTRÉE: 1550W PUISSANCE SORTIE: 1000 W CAPACITE DU FOUR: 25Lts. DIMENSIONS: 51x36,3x31 Cm. POIDS: 14,6 Kgr. INFORMATION UTILE Information de garantie Ce manuel informe sur l'installation, la sécurité et les instructions du four micro-ondes pour viande. - Page 19 PRÉCAUTIONS D'EMPLOI 1.- Situez l'appareil à la hauteur du plan de travail, dans une zone qui convient à cet effet. L'emplacement devrait être plat pour éviter que l'appareil ou son contenu ne tombent accidentellement, et assez fort pour supporter le poids de l'appareil. 2.- Ne posez rien sur le haut dufour micro-ondes pour viande sur pied car cela pourrait endommager celui-ci ou exposer le personnel à...
- Page 20 AVERTISSEMENT 1.- Les liquides ou autres aliments ne doivent pas être chauffés dans des récipients hermétiques ; ils pourraient exploser. 2.- Il est dangereux pour quiconque n'est pas formé à ce effet de démonter un couvercle qui protège de l'exposition à l'énergie des micro-ondes. 3.- N'autorisez les enfants à...
-
Page 21: Installation
19.- La température des surfaces accessibles peut être très élevée lorsque l'appareil fonc tionne.Tenez le cordon d'alimentation à l'écart de toute surface chauffer, et ne couvrez pas les orifices d'aération du four. 20.- Ne laissez pas le câble électrique traîner au bord de la table ou du plan de travail. 21.- Maintenez toujours le four en parfait état de propreté... -
Page 22: Nomenclature Des Pieces
NOMENCLATURE DES PIECES A.- Panneau de commandes B.- Fenêtre d'observation C.- Porte D.- Syst. de verrouillage de sécurité 0.- Écran 1.- Touche puissance 2.- Touche temps de cuisson 3.- Touche X2 4.- Touche arrêt/annulation 5.- Touche de mise en marche 6.- Touches chiffres/durée... -
Page 23: Le Materiel Que Vous Pouvez Utiliser
LE MATERIEL QUE VOUS POUVEZ UTILISER AU FOUR A MICRO-ONDES Remarques sur les Ustensiles Ustensiles - Observations Plat à brunir Suivez les instructions du fabricant. La partie inférieure du plat à brunir doit être placée à au moins 5 mm au-dessus du plateau tournant. -
Page 24: Fonctionement
FONCTIONEMENT MODE UTILISATEUR Cette fonction permet de paramétrer/ajuster les différentes fonctions disponibles sur le micro-ondes : 1.- Ouvrez la porte et appuyez sur "2" pendant 5 secondes. Un bip retentira et l'écran indiquera "OP_ _". 2.- Appuyez sur n'importe quelle touche de 0 à 9 pour accéder aux différentes options. Exemple (Sélectionnez le son du bip au bip moyen): 1.- Appuyez sur "2"... - Page 25 Temps de cuisson: BOUTON TEMPS PUISSANCE FACTEURS DE CUISSON 0:10 100% 0:20 100% 0:30 100% 0:45 100% 1:00 100% 1:30 100% 2:00 100% 3:00 100% 4:00 100% 5:00 100% Cinq niveaux de puissance disponibles: NIVEAU Èlevé Très élevé Medium Dégivrage Maintenir 100% PUISSANCE...
- Page 26 TIME ENTRY 1.- Appuyez sur "Time Entry" et l'écran indiquera "00 :00". Sélectionnez la durée souhaitée en utilisant les chiffres du tableau de contrôle. 2.- Sélectionnez la puissance souhaitée en appuyant sur "hold 0%"; "Defrost 20%; "Med-Hi 50%" et "Med-Hi 70%". Plus le pourcentage sera élevé, plus le niveau de réchauffement sera élevé.
- Page 27 Exemple (cuisiner avec la puissance à 70% pendant 1 minute et 25 secondes): 1.- Ouvrez la porte et appuyez sur "1" pendant 5 secondes. 2.- Appuyez sur "3" pour enregistrer le programme sur le numéro "3". 3.- Appuyez sur "Time Entry" et l'écran indiquera "00 :00". 4.- Appuyez sur "1", "2"...
-
Page 28: Nettoyage
4.- Appuyez sur "1", "2" et "5" pour introduire le temps de cuisson. 6.- Appuyez sur "Med-Hi 70%", l'écran indiquera "PL7". 7.- Appuyez à nouveau sur "Time Entry" pour programmer la seconde étape. 8.- Appuyez sur "5", "4" et "0" pour introduire la durée de cuisson. 9.- Appuyez sur "Medium 50%", l'écran indiquera "PL7". -
Page 29: Depannage
DEPANNAGE Vérifiez votre problème en utilisant le tableau suivant et essayez les solutions proposées pour le problème correspondant. Si le four à micro-ondes continue de ne pas fonctionner correctement, contactez le centre de service agréé le plus proche. Normal La radio et la TV peuvent faire des interférences sur le Le four à... - Page 30 Problème Cause possible Recours Le four ne démarre Le câble d'alimentation Rebranchez la prise de courant mars n'est pas bien connecté La porte est ouverte Fermez la porte et essayer à nouveau mauvais fonctionnement Voir les instructions Utilisez le droit ustensiles Les matériaux utilisés ne Arc ou d'une étincelle sont pas approprié...
-
Page 31: Wichtige Sicherheitsvorkehrungen
BEDIENUNGSANLEITUNG GUT AUFBEWAHREN Diese Anleitung enthält wichtige Sicherheitshinweise zu Wartung, Benutzung und Bedienung des Gerätes. Das Nicht-Beachten der Anweisungen kann zu schweren Verletzungen führen. Falls Sie den Inhalt dieser Anleitung nicht verstehen, wenden Sie sich bitte an Ihren Vorgesetzten. Vor Inbetriebnahme des Gerätes muss die Bedienungsanleitung unbedingt gelesen und verstanden werden. -
Page 32: Wichgste Technische Daten
TECHNISCHE DATEN MODELL: 69325 NENNSPANNUNG: 220-240V/50Hz NENNEINGANGSLEISTUNG (Eintrag): 1550W NENNEINGANGSLEISTUNG (Ausgabe): 1000 W GARRAUMINHALT: 25Lts. AUSSENMASSE: 51x36,3x31 Cm. NETTOGEWICHT: 14,6 Kgr. WICHTIGE INFORMATION Garantie In dieser Bedienungsanleitung werden Hinweise zu Aufbau, Sicherheit und Bedienung des Mikrowelle. Wir empfehlen Ihnen, alle Aufbau-, Bedienungs- und Sicherheitshinweise in der Bedienungsanleitung vor dem Aufbau oder der Benutzung sorgfältig durchzulesen. - Page 33 ACHTUNG 1.- Stecken Sie den Stecker des Gerätes in eine geeignete geerdete Steckdose mit der richtigen Voltanzahl, Größe und Art. Falls die Steckdose und der Stecker nicht aufeinander passen, lassen Sie von einem Elektriker die geeignete Voltzahl und Größe bestimmen und die entsprechende Steckdose installieren.
- Page 34 ACHTUNG! 1. Achtung: Flüssigkeiten und andere Lebensmittel dürfen nicht in verschlossenen Behältern erhitzt werden, da sie sonst explodieren könnten. 2. Achtung: Es besteht Gefahr bei Entfernung einer Schutzabdeckung gegen Bestrahlung durch Mikrowellenenergie durch eine nicht hinreichend qualifizierte Person. 3. Achtung: Kindern sollte die unbeaufsichtigte Nutzung der Mikrowelle nur nach entsprechender Anleitung erlaubt werden, so dass diese zu einem sicheren Umgang mit dem Gerät in der Lage sind und die Gefahr einer falschen Nutzung verstehen.
-
Page 35: Aufbau
19. Die zugänglichen Oberflächen können sich erhitzen, wenn das Gerät in Betrieb ist. Achten Sie darauf, dass das Stromkabel nicht mit heißen Oberflächen in Berührung kommt und decken Sie die Mikrowelle nicht ab. 20. Lassen Sie das Kabel nicht über den Tisch- oder Küchentresenrand hängen. 21. -
Page 36: Beschreibung Der Maschinenteile
BEZEICHNUNGEN VON GERÄTETEILEN UND ZUBEHÖR A.- Bedienfeld B.- Sichtfenster C.- Baugruppe D.- Sicherheitsverriegelungen 0.- Display 1.- Leistungstaste 2.- Garzeittaste 3.- X2-Taste 4.- Pause-/Abbruchtaste 5.- Starttaste 6.- Nummern-/Zeittasten... -
Page 37: Materialen Die Sie In Der Mikrowelle Verwenden Können
MATERIALIEN, DIE SIE IN DER MIKROWELLE VERWENDEN KÖNNEN Hinweise zu Geschirr/Material Bräunungsgeschirr Gemäß Herstellerangaben. Die Unterseite des Bräunungsgeschirrs muss sich mindestens 5 mm über dem Drehteller befinden. Unsachgemäße Anwendung kann die Beschädigung des Drehtellers zur Folge haben. Keramik Nur mikrowellenfestes Geschirr. Gemäß Herstellerangaben. Kein gesprungenes oder gesplittertes Geschirr verwenden. - Page 38 BEDIENUNG BENUTZERMODUS Mit dieser Funktion können die Parameter der verschiedenen Funktionen des Mikrowellenherds eingestellt werden. 1.- Tür öffnen und "2" für 5 Sekunden drücken. Ein Piepton erklingt und auf dem Display wird "OP_ _" angezeigt. 2.- Eine Taste von 0 bis 9 drücken, um die verschiedenen Optionen aufzurufen. Beispiel (Den Piepton auf mittlere Lautstärke einstellen): 1.- "2"...
-
Page 39: Funktionsweise
Kochzeit: KNOPF TEMPUS POTENZ FACTORS KOCHEN 0:10 100% 0:20 100% 0:30 100% 0:45 100% 1:00 100% 1:30 100% 2:00 100% 3:00 100% 4:00 100% 5:00 100% Fünf Leistungsstufen zur Verfügung: LEVEL Hoch Sehr hoch Medium Auftauenr Pflegen 100% POTENZ SCREEN PL10 FUNKTIONSWEISE DES MIKROWELLENHERDS 1.- Den Mikrowellenherd aus seiner Verpackung entnehmen und an einer Steckdose mit... - Page 40 TIME ENTRY 1.- Time Entry" drücken, sodass das Display "00:00" anzeigt. Mithilfe der Zahlen des Steuerfelds die gewünschte Zeit auswählen. 2.- Die gewünschte Leistung durch Drücken auf "hold 0%", "Defrost 20%", "Med-Hi 50%" oder "Med-Hi 70%" auswählen. Je höher der Prozentsatz umso stärker die Erwärmung. Standardmäßig ist eine Leistung von 100 % (PL10) eingestellt.
- Page 41 Beispiel (Garen bei einer Leistung von 70 % während 1 Minute und 25 Sekunden): 1.- Tür öffnen und "1" für 5 Sekunden drücken. 2.- Um das Programm in Nummer "3" zu speichern, drücken Sie "3". 3.- "Time Entry" drücken, sodass das Display "00:00" anzeigt. 4.- "1", "2"...
-
Page 42: Reinigung
1.- Tür öffnen und "1" für 5 Sekunden drücken. 2.- "3" drücken, um das Programm in Nummer "3" zu speichern. 3.- "Time Entry" drücken, sodass das Display "00:00" anzeigt. 4.- "1", "2" und "5" drücken, um die Garzeit einzugeben. 6.- "Med-Hi 70%" drücken, sodass das Display "PL7" anzeigt. 7.- Erneut "Time Entry"... -
Page 43: Fehlersuche
4.- VORSICHT: Die Maschine darf keinesfalls direkt in einen Behälter mit Wasser getaucht werden. Dafür ist die Maschine nicht geeignet. 5.- Falls das Gerät nicht stets in sauberem Zustand gehalten wird, können seine Oberflächen leiden und somit die Lebensdauer des Geräts beeinträchtigt oder Gefahrensituationen hervorgerufen werden. - Page 44 Problem Mögliche Ursache Abhilfe Der Backofen startet Das Netzkabel ist nicht Schließen Sie die Steckdose nicht angeschlossen gut. Die Tür ist offen Schließen Sie die Tür und ver- suchen Sie es erneut Störung Betrieb Lesen Sie die Anweisungen Verwenden Sie die richtigen Geschirr sollte nicht Arc oder Funken Utensilien...
-
Page 45: Important Safety Measures
SAVE THESE INSTRUCTIONS This manual contains important safety information concerning the maintenance, use and operation of this product. Failure to follow the instructions contained in this manual may result in serious injury. If you are unable to understand the contents of this manual, please bring it to the attention of your supervisor. -
Page 46: Specification
SPECIFICATIONS MODEL: 69325 RATED VOLTAGE 220-240V/50Hz RATED INPUT POWER: 1550W RATED OUTPUT POWER: 1000 W OVEN CAPACITY: 25Lts. EXTERNAL DIMENSIONS: 51x36,3x31 Cm. NET WEIGHT: 14,6 Kgr. WORTHY INFORMATION Warranty Information This manual provides the installation, safety and operating instructions for the Microwave Oven. - Page 47 CAUTIONS 1.- Locate the unit at the proper counter height, in an area that is convenient for use. The location should be level to prevent the unit or its contents from accidentally falling, and strong enough to support the weight of the unit. 2.- Do not place anything on top of the Microwave Oven;...
- Page 48 WARNING 1. Warning: Liquids and other foods must not be heated in sealed containers since they are liable to explode. 2. Warning: It is hazardous for anyone other than a competent person to remove a cover which gives protection against exposure to microwave energy. 3.
-
Page 49: Installation
19. The temperature of accessible surfaces may be high when the appliance is operating. Keep cord away from heated surface, and do not cover any events on the oven. 20. Do not let cord hang over edge of table or counter. 21. -
Page 50: Parts List
NAMES OF OVEN PARTS A.- Control panel B.- Observation window C.- Door assembly D.- Safety interlock system 0.- Display 1.- Power button 2.- Cooking time button 3.- X2 button 4.- Stop/Cancellation button 5.- Start button 6.- Time/numbers button... -
Page 51: Materials You Can Use
MATERIALS YOU CAN USE IN MICROWAVE OVEN Utensils - Remarks Browning dish Follow manufacturer's instructions. The bottom of browning dish must be at least 3/16 inch (5mm) above the turntable. Incorrect usage may cause the turntable to break. Dinnerware Microwave-safe only. Follow manufacturer's instructions. Do not use cracked or chipped dishes. -
Page 52: Operation
OPERATION INSTRUCTIONS USER MODE This function allows setting parameters/adjusting the different functions of the microwave: 1.- Open the door and "2" for 5 seconds. You will hear a beep and the display will show "OP_ _". 2.- Press any button from 0 to 9 to enter the different options. Example (Select the beep sound to medium beep): 1.- Press "2"... - Page 53 Default cook times: BUTTON TIME POWER COOK FACTORS 0:10 100% 0:20 100% 0:30 100% 0:45 100% 1:00 100% 1:30 100% 2:00 100% 3:00 100% 4:00 100% 5:00 100% Five power levels are available: LEVEL High M. High Medium Defrost Hold 100% POWER DISPLAY...
- Page 54 TIME ENTRY 1.- Press "Time Entry" and the display will show "00:00". Select the required time using the numbers of the control panel. 2.- Select the required power, pressing "hold 0%"; Defrost 20%"; Med-Hi 50%" and "Med-Hi 70%". Higher percentage represents higher heating level. The default power is at 100% (PL10).
- Page 55 6.- Press "Start" to save the programme. 7.- Press "3" in the prepared mode to use the programme. 8.- When the program has finished, you will hear 3 beeps and the microwave will show "END". 9.- Press the "Stop" button at any time during this process to cancel any adjustment. 10.- Pressing "Stop"...
-
Page 56: Cleaning
13.- Pressing "Stop" during the cooking process puts the microwave into pause mode. Press "Start" to continue with the process or "Stop" to cancel and return to the prepared mode. SERVICE MODE To verify the quantity of times that the door of the microwave has been opened and closed: 1.- Open the door and press "3"... -
Page 57: Trouble Shootig
TROUBLE SHOOTING Revise your problem using the following tables and try the solutions for the specific problem. If the microwave continues to not function correctly, contact the nearest authorised technical service. Normal Radio and TV reception may be interfered when microwave oven Microwave oven interfe- operating. - Page 58 Trouble Possible cause Remedy Oven will not start Electrical cord for oven is Vuelva a conectarlo en la toma not plugged in de corriente Door is open Cierre la puerta e intentelo denuevo Wrong operation is set Consulte las instrucciones Use microware-safe cookware Materials to be avoided in Arcing or sparking...
-
Page 59: Importanti Misure Di Sicurezza
CONSERVARE QUESTE ISTRUZIONI Il presente manuale contiene importanti informazioni di sicurezza per la manutenzione, l'uso e la manipolazione di questo prodotto. Qualsiasi inosservanza di queste istruzioni può dare origine a gravi danni. In caso di mancata comprensione del contenuto del presente manuale, comunicarlo al supervisore. -
Page 60: Principali Specifiche Tecniche
PRINCIPALI SPECIFICAZIONI TECNICHE MODELLO: 69325 TENSIONE: 220-240V/50Hz POTENZA NOMINALE (ingresso): 1550W POTENZA NOMINALE (produzione): 1000 W CAPACITÀ FORNO: 25Lts. DIMENSIONI ESTERNE: 51x36,3x31 Cm. PESO NETTO: 14,6 Kgr. INFORMAZIONI RILEVANTI Informazioni relative alla garanzia Il presente manuale fornisce le istruzioni di installazione, funzionamento e sicurezza di microonde. - Page 61 PRECAUZIONI 1.- Collocare l'unità in una base all'altezza adeguata, in una zona adatta per il relativo uso. E' necessario valutare nell'ubicazione che l'unità o il suo contenuto non cadano accidentalmente e che la forza dell'unità stessa sia tale da sopportare il peso dell'unità. 2.- Non collocare nulla sopra microonde;...
- Page 62 AVVERTENZE 1.- Liquidi e altri cibi non devono essere riscaldati in contenitori sigillati perché possono esplodere. 2.- Attenzione: E' pericoloso per le persone non competenti rimuovere il rivestimento di protezione contro l'esposizione a energia microonde. 3.- Attenzione: Consentire l'utilizzo del forno ai bambini soltanto in presenza di un adulto e avendo fornito loro adeguate istruzioni per utilizzare il forno in modo sicuro e avendo compreso i rischi dell'utilizzo improprio.
-
Page 63: Installazione
19.- La temperatura di superfici accessibili può essere elevata quando l'apparecchio è in funzione. Tenere il cavo lontano da superfici calde, e non coprire il forno. 20.- Evitare che il cavo penda dal tavolo o dal bancone. 21.- La mancata regolarità nella pulizia del forno può determinare un deterioramento della superficie riducendo la durata dell'apparecchio e causando situazioni di pericolo. -
Page 64: Descrizione Delle Parti
DESCRIZIONE DELLE PARTI A.- Pannello di controllo B.- Finestra di osservazione C.- Montaggio porta D.- Sist. di chiusura di sicurezza 0.- Display 1.- Pulsante potenza 2.- Pulsante tempo di cottura 3.- Pulsante X2 4.- Pulsante di arresto/cancellazione 5.- Pulsante di avvio 6.- Pulsante numeri/tempo... -
Page 65: Materiali Che Possono Essere Utilizzati
MATERIALI CHE POSSONO ESSERE UTILIZZATI NEL FORNO A MICROONDE Osservazioni relative a utensili Utensili - Osservazioni Piatto per brunitura Seguire le istruzioni del fabbricante. L'altezza della parte inferiore del piatto deve essere pari ad almeno 5 mm sulla piattaforma girevole. Un utilizzo non corretto può causare la rottura della piattaforma girevole. -
Page 66: Funzionamento
ISTRUZIONI DI FUNZIONAMENTO MODALITÁ UTENTE Questa funzione consente di parametrizzare/regolare le varie funzioni di cui dispone il microonde: 1.- Aprire lo sportello e premere "2" per 5 secondi. L'apparecchio emetterà un suono e il display visualizzerà "OP_ _". 2.- Premere qualsiasi pulsante da 0 a 9 per accedere alle varie opzioni. Esempio (selezionare il suono sul suono medio): 1.- Premere "2"... - Page 67 Tempo di cottura: BUTTON TEMPO POTENZA FATTORI DI CUCINA 0:10 100% 0:20 100% 0:30 100% 0:45 100% 1:00 100% 1:30 100% 2:00 100% 3:00 100% 4:00 100% 5:00 100% Cinque livelli di potenza disponibili: LIVELLO Arresto M. Arresto Media Sbrinamento Mantenere 100% POTENZA...
- Page 68 TIME ENTRY 1.- Premere "Time Entry" e sul display comparirà "00:00". Selezionare il tempo desiderato utilizzando i numeri presenti sul pannello di controllo. 2.- Selezionare la potenza desiderata premendo "hold 0%"; "Defrost 20%; "Med-Hi 50%" e "Med-Hi 70%". Più alta è la percentuale, maggiore sarà il livello di riscaldamento. La potenza predefinita è...
- Page 69 4.- Premere "1", "2" e "5" per inserire il tempo di cottura. 5.- Premere "Med-Hi 70%", il display mostrerà "PL7". 6.- Premere "Start" per salvare il programma. 7.- Per utilizzare il programma premere "3" in modalità preparazione. 8.- Quando il programma sarà terminato, verranno emessi 3 suoni e sul microonde comparirà "END".
-
Page 70: Pulizia
9.- Premere "Medium 50%" e sul display comparirà "PL7". 10.- Premere "Start"per salvare il programma. 11.- Per utilizzare il programma, premere "3" in modalità preparazione. 12.- Se durante la procedura di regolazione viene premuto il pulsante "Stop", la regolazione verrà cancellata. 13.- Premendo "Stop"... -
Page 71: Localizzazione Guasti
LOCALIZZAZIONE GUASTI Determinare la natura del problema utilizzando la seguente tabella e provare ad adottare le soluzioni suggerite. Se il forno a microonde continua a non funzionare correttamente, contattare il più vicino centro di assistenza. Normale Le microonde interferiscono spesso con la ricezione del segnale Le microonde televisivo. - Page 72 Problema Possibile causa Rimedio Il forno non si avvia Il cavo di alimentazione Ricollegare la presa di alimen- non è collegato bene tazione La porta è aperta Chiudere la porta e riprovare Malfunzionamento Vedere le istruzioni Utilizzare utensili adeguati Materiali sono stati utiliz- Arco o scintilla zati per evitare il microon- NON utilizzare il forno a micro-...
-
Page 73: Medidas De Segurança Importantes
GUARDE ESTAS INSTRUÇÕES Este manual contém informação sobre segurança relevante para a manutenção, utilização e manipulação deste aparelho. A não observação destas instruções poderia resultar em lesões pessoais graves. Se não compreender o conteúdo deste manual, comunique-o ao seu supervisor. Não ponha este equipamento a funcionar até ter lido e compreendido correctamente o conteúdo deste manual. -
Page 74: Principais Características Técnicas
PRINCIPAIS CARACTERÍSTICAS TÉCNICAS MODELO: 69325 VOLTAGEM: 220-240V/50Hz POTÊNCIA DE ENTRADA: 1550W POTÊNCIA DE SAÍDA: 1000 W CAPACIDADE DO FORNO: 25Lts. DIMENSÕES EXTERIORES: 51x36,3x31 Cm. PESO: 14,6 Kgr. INFORMAÇÃO RELEVANTE Informação sobre a garantia Este manual contém as instruções de instalação, funcionamento e segurança da Forno Microondas. - Page 75 PRECAUÇÕES 1.- Situe a unidade numa base à altura adequada, numa zona conveniente para a sua utilização, assegurando-se de que a unidade ou o seu conteúdo não se encontram expostos a uma queda acidental e que a superfície de apoio é suficientemente forte para suportar o peso da unidade.
- Page 76 ADVERTÊNCIA 1. Os líquidos e outros alimentos não devem ser aquecidos em recipientes herméticos, uma vez que estes poderiam explodir. 2. É perigoso para qualquer pessoa que não esteja devidamente qualificada para o fazer remover uma tampa de protecção contra a exposição à energia das microondas. 3.
-
Page 77: Instalação
20. Não deixe o cabo de alimentação suspenso sobre a borda da mesa ou da bancada de trabalho. 21. A falta de manutenção das correctas condições de limpeza do forno microondas poderia levar ao deterioro da superfícies, o que afectaria negativamente a vida útil do electrodoméstico, e poderia dar origem a eventuais riscos de acidente. -
Page 78: Descrição Dos Componentes
DESCRIÇÃO DOS COMPONENTES A.- Painel de Controlo B.- Janela de observação C.- Conjunto da porta D.- Sist. de segurança inter-bloqueio 0.- Display 1.- Botão potência 2.- Botão tempo de cozedura 3.- Botão X2 4.- Botão de paragem/cancelamento 5.- Botão início 6.- Botões números/tempo... -
Page 79: Materiais Que Se Podem Utilizar
MATERIAIS QUE SE PODEM UTILIZAR NO FORNO MICROONDAS Observações sobre os utensílios Utensílios - Observações Siga as instruções do fabricante. A base do prato para dourar deverá estar pelo menos 5mm acima do prato do Prato para dourar microondas. Uma utilização incorrecta poderia fazer com que o prato do microondas se partisse. -
Page 80: Funcionamento
INSTRUÇÕES DE FUNCIONAMENTO MODO UTILIZADOR Esta função permite parametrizar/ajustar as distintas funções disponíveis no micro-ondas: 1.- Abra a porta e prima "2" durante 5 segundos. Um apito soará e o display mostrará "OP_ _". 2.- Prima qualquer botão do 0 ao 9 para aceder às distintas opções. Exemplo (Selecionar o som do apito como apito médio): 1.- Prima "2"... - Page 81 O tempo de cozimento: BUTTON TEMPO POTENZA FATORES DE COZINHA 0:10 100% 0:20 100% 0:30 100% 0:45 100% 1:00 100% 1:30 100% 2:00 100% 3:00 100% 4:00 100% 5:00 100% Cinco níveis de potência: LEVEL Pare M. Pare Médio Descongelar Manter 100% POTENZA...
- Page 82 TIME ENTRY 1.- Prima "Time Entry" e o display mostrará "00:00". Selecione o tempo pretendido utilizando os números do painel de controlo. 2.- Selecione a potência que desejar premindo "hold 0%"; "Defrost 20%; "Med-Hi 50%" e "Med-Hi 70%". Quanto maior for a percentagem, maior será o nível de aquecimento. A potência por defeito situa-se em 100% (PL10).
- Page 83 6.- Prima "Start" para guardar o programa. 7.- Para utilizar o programa, prima "3" no modo Pronto. 8.- Quando o programa concluir, ouvirá 3 apitos e o micro-ondas mostrará "END". 9.- Se durante o processo de ajuste carregar no botão "Stop", o ajuste será cancelado. 10.- Premindo "Stop"...
-
Page 84: Limpeza
13.- Premindo "Stop" durante o processo de cozedura, o micro-ondas entrará em pausa. Prima "Start" para continuar o processo ou "Stop" para cancelar e voltar para o modo Pronto. MODO SERVIÇO Para verificar o número de vezes que a porta do micro-ondas foi aberta ou fechada: 1.- Abra a porta e prima "3"... -
Page 85: Localizzazione Guasti
RESOLUÇAO DE PROBLEMAS Revise o seu problema utilizando a tabela abaixo e prove as soluções para o problema em concreto. Se o forno micro-ondas continuar sem funcionar corretamente, contacte o centro de serviço autorizado mais próximo. Normal Interferências do forno Interferências do forno microondas na recepção do microondas na recepção do sinal sinal de TV... - Page 86 Problema Causa possível Remédio O forno não inicia O cabo de alimentação Reconectar alimentação marcha não está bem conectado A porta está aberta Feche a porta e tente nova- mente Funcionamento defeituoso Consulte as instruções Use utensílios adequados Os materiais que não Arc ou faísca podem ser utilizados Não use o micro-ondas no...
-
Page 87: Belangrijke Veiligheidsvoorschriften
BEWAAR DEZE GEBRUIKSAANWIJZING Deze handleiding bevat belangrijke veiligheidsinstructies voor het onderhoud, het gebruik en de bediening van het apparaat. Het niet naleven van deze aanwijzingen kan ernstige schade tot gevolg hebben. Indien men de inhoud van deze gebruiksaanwijzing niet verstaat, gelieve dit te melden aan de opzichter. -
Page 88: Voornaamste Technische Gegevens
TECHNISCHE GEGEVENS MODEL: 69325 SPANNING: 220-240V/50Hz NOMINAAL UITGANGSVERMOGEN: 1550W UITGANGSVERMOGEN: 1000 W OVENCAPACITEIT: 25Lts. UITWENDIGE AFMETINGEN: 51x36,3x31 Cm. NETTOGEWICHT: 14,6 Kgr. BELANGRIJKE INFORMATIE Informatie over de garantie Deze handleiding bevat de aanwijzingen voor de installatie, de werking en de veiligheid van de Microgolfoven. - Page 89 VOORZORGSMAATREGELEN 1.- Plaats de eenheid op een aangepaste hoogte op een basis in een zone die is geschikt om te werken. Men moet tijdens de plaatsing evalueren of het apparaat of de inhoud per ongeluk zouden kunnen vallen en of de basis voldoende sterk is om het gewicht van het toestel te kunnen dragen.
- Page 90 WAARSCHUWING 1. Waarschuwing: Vloeistoffen en andere voedingswaren mogen niet in een gesloten verpakking worden opgewarmd, omdat die zouden kunnen exploderen. 2. Waarschuwing: Niemand, behalve een geschoolde technicus, mag een afscherming verwijderen die bescherming biedt tegen de blootstelling aan microgolfenergie. 3. Waarschuwing: Kinderen mogen de oven enkel zonder toezicht gebruiken wanneer ze aangepaste instructies hebben gekregen betreffende het veilig gebruik van de oven en de gevaren van een slechte toepassing.
-
Page 91: Installatie
18. Gebruik de oven nooit in de nabijheid van water, een natte kelder of in de buurt van een zwembad. 19. De temperatuur van toegankelijke oppervlakken kan hoog zijn wanneer het apparaat aan het werken is. Houd het snoer uit de buurt van warme oppervlakken en plaats niets op de oven. -
Page 92: Beschrijving Van De Onderdelen
NAMEN VAN DE ONDERDELEN EN HULPSTUKKEN VAN DE MICROGOLFOVEN A.- Controlepaneel B.- Kijkvenster C.- Deur D.- Grendelsysteem 0.- Display 1.- Aan/uit knop 2.- Knop kooktijd 3.- Knop X2 4.- Knop om te stoppen/annuleren 5.- Startknop 6.- Genummerde knoppen/Tijd... -
Page 93: Materialen Die Men
MATERIALEN DIE MEN IN DE MICROGOLFOVEN KAN GEBRUIKEN Opmerkingen betreffende gereedschappen Browning dish Volg de aanwijzingen van de fabrikant. De bodem van de browning dish moet tenminste 5mm boven de draaitafel uitsteken. Slechte toepassing kan leiden tot het breken van de draaitafel. - Page 94 BEDIENINGSINSTRUCTIES GEBRUIKERSMODUS Deze functie stelt u in staat de verschillende beschikbare functies van de magnetron te parametriseren/aan te passen: 1.- Open de deur en druk gedurende 5 seconden op "2". Er klinkt een piep en het display toont "OP_ _". 2.- Druk op een van de 0 t/m 9 knoppen om de verschillende opties binnen te gaan.
-
Page 95: Werking
Bereidingstijd: KNOP TIJD MACHT FACTORS KOKEN 0:10 100% 0:20 100% 0:30 100% 0:45 100% 1:00 100% 1:30 100% 2:00 100% 3:00 100% 4:00 100% 5:00 100% Vijf vermogen niveaus beschikbaar: NIVEAU Hoog M. Hoog Medium Ontdooien Handhaven 100% MACHT SCHERM PL10 WERKING VAN DE MAGNETRON 1.- Haal de magnetron uit zij verpakking en sluit hem aan op een elektriciteitsnet van... - Page 96 TIME ENTRY 1.- Druk op "Time Entry" en het display toont "00:00". Kies de gewenste tijd door gebruik te maken van de cijfers op het besturingspaneel. 2.- Kies het vermogen dat u wenst door te drukken op "hold 0%"; "Defrost 20%; "Med-Hi 50%" en "Med-Hi 70%".
- Page 97 Voorbeeld (koken bij een vermogen van 70% gedurende 1 minuut en 25 seconden): 1.- Open de deur en druk op "1" gedurende 5 seconden. 2.- Druk op "3" om het programma onder nummer "3" op te slaan. 3.- Druk op "Time Entry" en het display toont "00:00". 4.- Druk op "1", "2"...
-
Page 98: Reiniging
4.- Druk op "1", "2" en "5" om de kooktijd in te stellen. 6.- Druk op "Med-Hi 70%" en het display toont "PL7". 7.- Druk opnieuw op "Time Entry" om de tweede stap te programmaren. 8.- Druk op "5", "4" en "0" om de kooktijd in te voeren. 9.- Druk op "Medium 50%"... -
Page 99: Voorkomende Problemen
5.- Indien dit apparaat niet in een goede staat van zuiverheid wordt onderhouden, dan kan het oppervlak gebreken beginnen te vertonen wat een invloed zou kunnen hebben op de levensduur van het toestel en leiden tot een gevaarlijke situatie. 6.- Voor eenvoudige reiniging van de spouwmuren, halve citroen in een container, toevoeging van 300 ml. - Page 100 Probleem Mogelijke oorzaak Remedie De oven niet start Het netsnoer is niet goed Sluit het stopcontact aangesloten De deur staat open Sluit de deur en probeer het opnieuw Storing operatie Zie de instructies Gebruik de juiste keukengerei Het gebruik van onges- Vlamboog of vonk chikte materialen in de magnetron...
- Page 101 DÉMONTEZ RIEN, consultez votre vendeur. L'INTERVENTION TECHNIQUE PAR LE CLIENT OU PAR DU PERSONNEL NON AUTORISÉ RENDRA IMMÉDIATEMENT NON VALISE LA GARANTIE. * LACOR MENAJE PROFESIONAL, S.L. ne se rend pas responsable des pannes produites par une installA tion ou une utilisation incorrecte de l'appareil.
- Page 102 NON smontare NULLA, e consultare il venditore. L'INTERVENTO TECNICO DA PARTE DEL CLIENTE O DA PARTE DI PERSONALE NON AUTORIZZATO COMPORTA LA CESSAZIONE IMMEDIATA DELLA VALIDITA' DELLA GARANZIA. * LACOR MENAJE PROFESIONAL, S.L. non si assume alcuna responsabilità per avarie derivanti da un'installazione inadeguata o da uno scorretto utilizzo dell'apparecchiatura.
- Page 103 LACOR MENAJE PROFESIONAL S.L Bº San Juan, s/n - Apdo. 18 Telf.: 943 769030 - Fax: 943 765387 Telf. Export: +34 943 769174 - Fax Export: +34 943 769222 comercial@lacor.es - www.lacor.es 20570 BERGARA (Gipuzkoa) - SPAIN GRUPO MARCOS LARRAÑAGA Y CIA...
Need help?
Do you have a question about the 69325 and is the answer not in the manual?
Questions and answers
Necesito descargar manual uso microondas 69325 lacor