Table of Contents
Advertisement
Available languages
Available languages
Quick Links
Advertisement
Chapters
Table of Contents

Subscribe to Our Youtube Channel
Related Manuals for Explore Scientific WSH4102


Summary of Contents for Explore Scientific WSH4102
- Page 1 Weather station • Stazione meteo • Wetterstation Smart Multi-Channel Weather Station With Wireless Sensor Art.No.: WSH4102 (EU/AUS/US Version) INSTRUCTION MANUAL .....2 ISTRUZIONI PER L’USO .....34 BEDIENUNGSANLEITUNG ..64...
-
Page 2: About This Instruction Manual
material, like plastic bags and rubber bands, out EN INSTRUCTION MANUAL of the reach of children, as these materials pose a choking hazard. ABOUT THIS INSTRUCTION MANUAL • Risk of chemical burn — Keep batteries out of These operating instructions are to be considered the reach of children! Make sure you insert the a component of the device. -
Page 3: Scope Of Delivery
- This product is not to be used for medical purposes recommend using lithium batteries. or for public information. • Avoid using rechargeable batteries. (Rechargeable - Do not subject the unit to excessive force, shock, batteries cannot maintain correct power dust, temperature or humidity. -
Page 4: Table Of Contents
TABLE OF CONTENTS ABOUT THIS INSTRUCTION MANUAL GENERAL WARNINGS PRECAUTIONS SCOPE OF DELIVERY BEFORE YOU BEGIN INTRODUCTION OVERVIEW CONSOLE WIRELESS THERMO-HYGRO SENSOR INSTALLATION AND SETUP INSTALL WIRELESS THERMO-HYGRO SENSOR SETUP THE CONSOLE ADDITIONAL WIRELESS SENSOR(S) (OPTIONAL) SMART LIFE APP ACCOUNT REGISTRATION CONNECT WEATHER STATION TO WIFI NETWORK DEVICE SCREEN OVERVIEW IOT APPLICATIONS... - Page 5 TO VIEW MAX / MIN CALIBRATION BACK LIGHT SET LCD DISPLAY CONTRAST MAINTENANCE BATTERY REPLACEMENT TROUBLESHOOT SPECIFICATIONS CONSOLE WIRELESS THERMO-HYGRO SENSOR EC DECLARATION OF CONFORMITY RCM DECLARATION OF CONFORMITY FCC DECLARATION OF CONFORMITY NOTES ON CLEANING DISPOSAL WARRANTY & SERVICE...
-
Page 6: Introduction
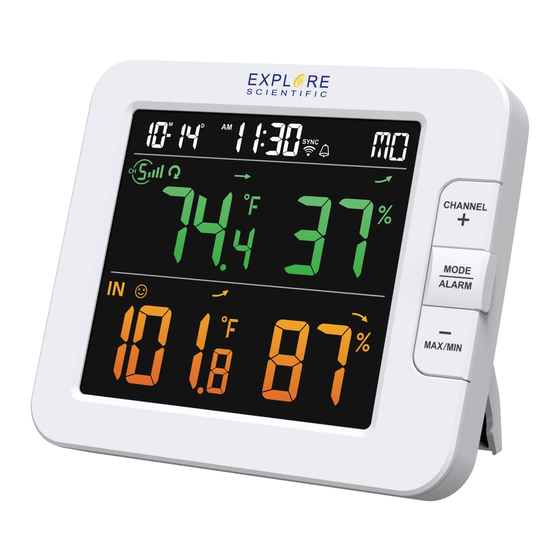
INTRODUCTION Thank you for selecting SMART multi-channel weather station. The console has Wi-Fi module built-in and through its smart system is compatible with Tuya® IOT platform. Through the Smart Life App, you can view the temperature and humidity of main console and wireless sensor(s), check history records, set high / low alarm and trigger tasks in anywhere. - Page 7 [ CHANNEL / + ] key [ MODE / ALARM ] key [ MAX / MIN / - ] key [ HI / LO ] slide switch / CAL ] key [ TIME SET ] key Table stand 10. Battery door 11.
-
Page 8: Wireless Thermo-Hygro Sensor
WIRELESS THERMO-HYGRO SENSOR 1. LED indicator 2. Wall mounting holder 3. Channel slide switch 4. [ RESET ] key 5. Battery compartment INSTALLATION AND SETUP INSTALL WIRELESS THERMO-HYGRO SENSOR 1. Remove the battery door of the sensor. 2. Use the channel slide switch to set the channel number for the sensor (e.g. -
Page 9: Setup The Console
- To avoid the sensor/s and console pairing failure during new console setup, please power up the sensor(s) first, and then press [ SENSOR/WiFi ] key on the main unit. PLACING THE WIRELESS THERMO-HYGRO SENSOR Place a screw on the wall that you wish to hang the sensor on. Hang the sensor onto the screw by the wall mounting holder. - Page 10 2. Once the console is power up, all the segments of the LCD will be shown. 3. The console will automatically enter AP mode and sensor synchronization mode automatically. Flashing: Console currently in Access Point (AP) mode Blinking: Sensor synchronization Blinking: process Trying to connect to router...
-
Page 11: Additional Wireless Sensor(S) (Optional)
synchronization mode hold the [ RESET ] key for 6 seconds. 4. Wait for the new sensor(s) to pair up with the console. (about 1 minute) CHANGING BATTERIES AND MANUAL 5. Once the new sensor(s) are connected PAIRING OF SENSOR to the console successfully, their Whenever you changed the batteries of the temperature and humidity will be shown... -
Page 12: Smart Life App
NOTE: REMOVE WIRELESS SENSOR - There is no Registration code needed if User may manually delete any sensor from the email method is chosen. console. - The App may be subject to change without 1. Press the [ CHANNEL ] key until the console notice. -
Page 13: Connect Weather Station To Wifi Network
console will automatically enter and stay at CONNECT WEATHER STATION TO WIFI AP mode. NETWORK 2. Open Smart Life App and follow the in- 1. Press and hold the [ SENSOR / WI-FI ] key instructions connect weather for 6 seconds to enter AP mode manually, station your Wi-Fi... - Page 14 Step 6: Step 7: Step 5: Once it success, the console icon The console will appears on your There will auto scan and register will shown, and you can customize Home Screen. Tap to see the your device. its information. readings.
-
Page 15: Device Screen Overview
DEVICE SCREEN OVERVIEW The device screen can show the IN and (CH) Channel's readings, max / min records, and access to graphs, alert setting, alert history and unit conversion. 1. Temperature and humidity reading with max/min records for INDOOR 2. Temperature and humidity reading with max/min records for wireless sensor (CH1 - CH7) 3. - Page 16 TO VIEW HISTORY GRAPH You can view the history graph by tapping the INDOOR or CH region in "device page". Download Select IN or other CH graph Select the period data by email Hourly graph, tap to view "data curve" page History graph Select date...
- Page 17 TO SET ALERT NOTIFICATION You can set the temperature and humidity high / low alarm. Step 1: Step 2: Step 3: Tap the "Setting" on the bottom Tap the "Temperature Alarm" or Tap the "INDOOR" or "CH 1 ~ 7 ". of the "device Screen".
- Page 18 AUTOMATION WITH OTHER DEVICE USING SMART LIFE Smart Sockets Wireless Sensor (s) Console Smart Life Smart Switch Devices Heater Fans Bulbs Dehumidifier Humidifier...
-
Page 19: Iot Applications
IOT APPLICATIONS Through the Smart life App, you can create the temperature and humidity trigger conditions to control other Smart Life compatible device(s) automatically. Step 1: Step 2: Step 3: Tap one of below tag to set different Tap the " "... -
Page 20: Other Feature In Smart Life App
reliability and completeness of IOT applications. OTHER FEATURE IN SMART LIFE APP Smart Life have many advance features, please check the FAQ in the App to know more about Smart Life. Tap "Me" in home page then tap the FAQ & Feedback for more detail. FIRMWARE UPDATE The console can be updated through your WI-FI network. -
Page 21: Other Setting & Functions Of The Console
- When the update process start, do not operate ] key for 2 seconds to enter setting. the PC and console until the update finished. 2. The setting sequence: 12/24 hour format - During firmware update the console will Hour Minute Year M-D/D-M... -
Page 22: Activating Alarm Function
When clock reach the alarm time, alarm sound adjust. will start. 3. Press [ MODE / ALARM ] key again to step Where it can be stopped by following operation: the setting value to Minute with the Minute digit - Auto-stop after 2 minutes alarming if flashing. -
Page 23: Temperature / Humidity Function
Signal strength of wireless sensor channel No signal Weak signal Good signal 2. If the signal has discontinued and does not recover within 15 minutes, the signal icon will disappear. The temperature and humidity will display “Er” for the corresponding channel. 3. -
Page 24: To View Max / Min
The comfort indication is a pictorial indication based on indoor air temperature and humidity in an attempt to Too cold Comfortable Too hot determine comfort level. NOTE: - Comfort indication can vary under the same temperature, depending on the humidity. - There is no comfort indication when temperature is below 0°C (32°F) or over 60°C (140°F). -
Page 25: Calibration
6. User can also check records of different 2. Press [ + ] or [ - ] key to select IN or any sensor by pressing [ CHANNEL ] key. Channels. 3. Press [ MODE / ALARM ] key to select TO RESET THE MAX/MIN RECORDS between: Temperature Humidity. -
Page 26: Maintenance
MAINTENANCE BATTERY REPLACEMENT When low battery indicator “ ” is displayed in CH section of the LCD display, it indicates that the current channel sensor battery power give wireless sensor shown is low respectively. Please replace with new batteries. TROUBLESHOOT Problems Solution Indoor wireless... - Page 27 Weight 220g (with batteries) Main power DC 5V, 1A adaptor Backup battery CR2032 Operating temperature range -5˚C ~ 50˚C Operating Humidity range 10~90% RH - 1 Wireless Thermo-hygro sensors (included) Support sensors - Support Up to 7 Wireless Thermo-hygro sensors (optional) RF frequency 915Mhz (US version) / 868Mhz (EU or UK version) / (Depend on country version)
-
Page 28: Wireless Thermo-Hygro Sensor
1 ~ 20% RH ± 6.5% RH @ 25°C (77°F) Accuracy 21 ~ 80% RH ± 3.5% RH @ 25°C (77°F) 81 ~ 99% RH ± 6.5% RH @ 25°C (77°F) Resolution WI-FI Communication Specification Standard 802.11 b/g/n Operating frequency : 2.4GHz Supported router security type WPA/WPA2, OPEN, WEP (WEP only support Hexadecimal password) - Page 29 Operating range -40 ~ 60°C (-40 ~ 140°F) Lithium batteries required Operating humidity range 1 ~ 99% RH CH (wireless sensor) Temperature Temperature unit °C and °F 5.1 ~ 60°C ± 0.4°C (41.2 ~ 140°F ± 0.7°F) Accuracy -19.9 ~ 5°C ± 1°C (-3.8 ~ 41°F ± 1.8°F) -40 ~ -20°C ±...
-
Page 30: Ec Declaration Of Conformity
Hereby, Bresser GmbH (Folux GmbH) declares that the equipment type with part FCC DECLARATION OF CONFORMITY number: WSH4102 is in compliance with Directive: 2014/53/EU. The full text of the EU declaration of conformity is available at the This device complies with Part 15 of the FCC following internet address: Rules. -
Page 31: Notes On Cleaning
-- Consult the dealer or an experienced radio/TV friendly manner. technician for help. FCC responsible party: Explore Scientific, LLC In accordance with the regulations concerning Company name: Explore Scientific, LLC batteries and rechargeable batteries, disposing... -
Page 32: Warranty & Service
of them in the normal household waste is explicitly MANUAL DOWNLOAD: forbidden. Please make sure to dispose of your used batteries as required by law — at a local collection point or in the retail market. Disposal in domestic waste violates the Battery Directive. Batteries that contain toxins are marked with a sign and a chemical symbol. -
Page 34: Informazioni Sul Manuale Di Istruzioni
possono utilizzare il dispositivo solo sotto la ISTRUZIONI PER L’USO vigilanza di un adulto. I materiali di imballaggio, i sacchetti di plastica e le fasce in gomma possono INFORMAZIONI SUL MANUALE DI ISTRUZIONI causare soffocamento e, pertanto, devono essere Il presente manuale è parte integrante del conservati in modo che i bambini non riescano a prodotto. -
Page 35: Precautions
altezze superiori a 2 metri. • Utilizzare solo le batterie consigliate. Le batterie scariche o esaurite devono essere sempre sostituite CONTENUTO DELLA CONFEZIONE con una serie completa di batterie nuove di capacità Stazione base, sensore termoigrometrico wireless, massima. Non utilizzare batterie di marche o capacità adattatore CA/ CC (5V), manuale di istruzioni, diverse. - Page 36 TABLE OF CONTENTS INFORMAZIONI SUL MANUALE DI ISTRUZIONI AVVERTENZE GENERALI PRECAUTIONS CONTENUTO DELLA CONFEZIONE PRIMA DI INIZIARE INTRODUZIONE PANORAMICA CONSOLE SENSORE TERMOIGROMETRICO WIRELEISS INSTALLAZIONE E CONFIGURAZIONE CONFIGURAZIONE DELLA CONSOLE SENSORI WIRELESS AGGIUNTIVI (OPZIONALI) APP SMART LIFE REGISTRAZIONE DELL'ACCOUNT CONNESSIONE DELLA STAZIONE METEO ALLA RETE WI-FI STAZIONE METEO ALLA PROPRIA RETE WI-FI PANORAMICA DELL'APP APPLICAZIONI IOT...
- Page 37 FUNZIONE TEMPERATURA/UMIDITÀ VISUALIZZAZIONE DEI VALORI MINIMI E MASSIMI CALIBRAZIONE RETROILLUMINAZIONE CONTRASTO DEL DISPLAY MANUTENZIONE SOSTITUZIONE DELLE BATTERIE RISOLUZIONE DEI PROBLEMI SPECIFICHE CONSOLE SENSORE INTERNO TERMOIGROMETRICO WIRELESS DICHIARAZIONE DI CONFORMITÀ CE NOTE SULLA PULIZIA SMALTIMENTO GARANZIA E ASSISTENZA...
-
Page 38: Introduzione
INTRODUZIONE Grazie per aver scelto questa stazione meteo multicanale intelligente. L'unità di controllo integra un modulo Wi-Fi, e il suo sistema intelligente è compatibile con la piattaforma IoT Tuya®. Tramite l'app Smart Life è possibile visualizzare i valori di temperatura e umidità rilevati dall'unità principale e dai sensori wireless, controllare lo storico dei dati, impostare l'allarme per i valori massimi e minimi e avviare le attività... - Page 39 Display LCD Tasto [ CHANNEL / + ] Tasto [ MODE / ALARM ] Tasto [ MAX / MIN / - ] [ HI / LO ] Interruttore a scorrimento Tasto [ / CAL ] Tasto [ TIME SET ] Supporto da tavolo 10.
-
Page 40: Sensore Termoigrometrico Wireleiss
SENSORE TERMOIGROMETRICO WIRELEISS 1. Indicatore luminoso 2. Supporto per montaggio a parete 3. Interruttore a scorrimento canali 4. Tasto [ RESET ] 5. Vano batterie INSTALLAZIONE E CONFIGURAZIONE INSTALLAZIONE DEL SENSORE TERMOIGROMETRICO WIRELESS 1. Rimuovere lo sportello del vano batterie del sensore. 2. -
Page 41: Configurazione Della Console
numero di canale diventi effettivo, premere il tasto [ RESET ] sul sensore. - Evitare di esporre i sensori a luce solare diretta, pioggia o neve. - Per evitare errori nell’associazione tra sensore e console durante la configurazione della nuova console, accendere prima il sensore e quindi premere il tasto [ SENSOR/WiFi ] sull’unità... - Page 42 ACCENSIONE DELLA CONSOLE 1. Collegare l'adattatore di corrente per accendere l'unità principale. 2. Quando l'unità principale è accesa, tutti i segmenti del display LCD saranno visibili. 3. L'unità principale entrerà automaticamente in modalità AP e si abbinerà automaticamente ai sensori. Indicatore lampeggiante: l'unità...
-
Page 43: Sensori Wireless Aggiuntivi (Opzionali)
(OPZIONALI) RIPRISTINO E HARD RESET ALLE L'unità principale supporta fino a 7 sensori IMPOSTAZIONI DI FABBRICA wireless. Per ripristinare l'unità principale, premere il pulsante [ RESET ] con un oggetto appuntito 1. Portare l'interruttore del canale sul nuovo o rimuovere la batteria di emergenza e sensore in corrispondenza di un nuovo scollegare l'adattatore. -
Page 44: App Smart Life
sensore di umidità del suolo. Se si desidera REGISTRAZIONE DELL'ACCOUNT associare sensori aggiuntivi, consultare il L'unità principale è compatibile con l'app Smart rivenditore per ulteriori dettagli. Life, disponibile per gli smartphone Android e iOS. RISINCRONIZZAZIONE DEI SENSORI Scansionare il codice QR per accendere alla Premere una volta il tasto [ SENSOR / WI-FI pagina di download dell'app Smart Life. -
Page 45: Stazione Meteo Alla Propria Rete Wi-Fi
ALLA RETE WI-FI principale entrerà automaticamente in modalità 1. Tenere premuto il pulsante [ SENSOR / WI-FI ] per 6 secondi per accedere manualmente alla 2. Aprire l'app Smart Life e seguire le istruzioni modalità AP. Le icone AP e lampeggeranno a schermo per connettere la stazione meteo alla sul display. - Page 46 Passaggio 6: Passaggio 7: Passaggio 5: Al termine della registrazione Sulla schermata principale L'app rileverà e registrerà apparirà l'icona dell'unità apparirà l'icona dell'unità automaticamente l'unità principale. principale, e sarà possibile principale. Toccarla per accedere alle relative informazioni. visualizzare i valori rilevati. 3.
-
Page 47: Panoramica Dell'app
PANORAMICA DELL'APP L'app permette di visualizzare i valori rilevati dall'unità principale e dai sensori wireless (CH), i valori massimi e minimi, i grafici, le impostazioni e lo storico degli allarmi e di selezionare le l'unità di misura. 1. Valori di temperatura e umidità INTERNE con massime e minime 2. - Page 48 VISUALIZZAZIONE DEI GRAFICI È possibile visualizzare i dati sotto forma di grafico toccando l'area INDOOR o CH nella schermata del dispositivo. Invio dei dati Selezione della data Selezione del grafico INDOOR o CH tramite e-mail Grafico orario (premere per visualizzare la "curva dei dati") Grafico orario (premere...
- Page 49 IMPOSTAZIONE DEGLI ALLARMI È possibile impostare gli allarmi per i valori minimi/massimi di temperatura e umidità. Passaggio 1: Passaggio 2: Passaggio 3: Toccare "Impostazioni" sulla parte Toccare "Allarme di temperatura" Toccare "INDOOR" o "CH 1 ~ 7 ". inferiore della schermata del dispositivo. o "Allarme di umidità".
- Page 50 COMPATIBILITÀ DI SMART LIFE CON ALTRI DISPOSITIVI IOT Prese intelligenti Sensori wireless Unità principale Smart Life Interruttori intelligenti Radiatori Ventilatori Lampadine Umidificatori Deumidificatori...
-
Page 51: Applicazioni Iot
APPLICAZIONI IOT L'app Smart Life permette di impostare condizioni di temperatura e umidità che causano l'attivazione automatica di altri dispositivi compatibili con Smart Life. Passaggio 1: Passaggio 3: Passaggio 2: Toccare l'icona "Smart" sulla schermata Toccare una delle seguenti etichette Toccare l'icona "... -
Page 52: Altre Funzioni Dell'app Smart Life
ALTRE FUNZIONI DELL'APP SMART LIFE L'app Smart Life dispone di molte funzioni avanzate. Consultare la sezione Domande frequenti nell'app per saperne di più Toccare l'icona "Me" nella schermata principale, quindi toccare l'icona Domande frequenti e Feedback per maggiori dettagli. AGGIORNAMENTO DEL FIRMWARE Il firmware dell'unità... -
Page 53: Altre Impostazioni E Funzioni Della Console
alla rete Wi-Fi. CONSOLE - Non usare l'unità principale finché il processo IMPOSTAZIONE MANUALE DELL’OROLOGIO di aggiornamento non è terminato. L'unità principale è progettata per sincronizzarsi - L'aggiornamento può comportare la perdita con l'ora locale. Se si desidera utilizzarla offline, è delle impostazioni e dei dati. -
Page 54: Impostazione Della Sveglia
- La funzione sveglia si attiva SET ] per eseguire la commutazione fra display automaticamente dopo avere impostato anno e data. l'ora della sveglia. - Durante l’impostazione, è possibile premere il tasto [ TIME SET ] per 2 secondi per tornare in ATTIVAZIONE DEGLI ALLARMI modalità... -
Page 55: Ricezione Del Segnale Del Sensore Wireless
- Tenendo premuto il tasto [ALARM / SNOOZE] per 2 secondi si interrompe la sveglia, che sarà attivata di nuovo il giorno successivo - Premendo il tasto [ MODE / ALARM ], si interrompe la sveglia che sarà attivata di nuovo il giorno successivo. -
Page 56: Funzione Temperatura/Umidità
Questa console è in grado di associarsi con 7 sensori wireless. Se si dispone di 2 o più sensori interni, è possibile premere il tasto [ CHANNEL ] per eseguire la commutazione fra diversi canali wireless in modalità normale, oppure tenere premuto il tasto [ CHANNEL ] per 2 secondi per attivare/disattivare la modalità... -
Page 57: Visualizzazione Dei Valori Minimi E Massimi
INDICATORE DI TENDENZA L'indicatore dell'andamento visualizza l'andamento dei valori di temperatura e umidità in base ai dati rilevati negli ultimi 15 minuti. In aumento Stazionario In calo REGISTRAZIONE DATI MAX / MIN L'unità principale memorizza i valori minimi e massimi, sia giornalieri che dall'ultimo ripristino. -
Page 58: Calibrazione
NOTE: lampeggia, premere il pulsante [ + ] or [ - ] per regolare il valore. L’LCD mostra inoltre l’icona " " / " 5. Quindi premere il pulsante [ MODE / ALARM e l’ora e la data delle registrazioni dati. ] per passare alla calibrazione successiva e ripetere i passaggi 2–4 elencati in CALIBRAZIONE... -
Page 59: Risoluzione Dei Problemi
RISOLUZIONE DEI PROBLEMI Problema Soluzione Il sensore wireless interno è 1. Assicurarsi che il sensore si trovi all’interno del raggio di trasmissione intermittente o non è connesso. 2. Assicurarsi che il canale visualizzato corrisponda al canale impostato sul sensore. 3. Se ancora non funziona, ripristinare il sensore e risincronizzarlo con la console. - Page 60 Peso 220g (con batterie) Alimentazione principale Adattatore CA da 5 V, 1 A Batteria di riserva CR2032 Intervallo temperatura di esercizio -5˚C ~ 50˚C Intervallo umidità di esercizio 10~90% RH - 1 sensore termoigrometrico wireless (incluso) Sensori supportati - Supporta fino a 7 sensori termoigrometrici wireless (opzionali) Radiofrequenza 915 Mhz (versione USA) / 868 Mhz (versione UE o UK) / (dipende dalla versione del Paese)
-
Page 61: Sensore Interno Termoigrometrico Wireless
1 ~ 20% RH ± 6.5% RH a 25°C (77°F) Precisione 21 ~ 80% RH ± 3.5% RH a 25°C (77°F) 81 ~ 99% RH ± 6.5% RH a 25°C (77°F) Risoluzione WI-FI Communication Specification Standard 802.11 b/g/n Frequenza operativa 2,4 GHz WPA/WPA2, OPEN, WEP (codifica WEP supportata solo con Tipo di sicurezza router supportato... -
Page 62: Dichiarazione Di Conformità Ce
2014/53/UE. Il testo integrale della utilizzare alcun tipo di fluido detergente. dichiarazione di conformità UE è disponibile all’indirizzo • Tenere il dispositivo al riparo da polvere e Internet: umidità. www.bresser.de/download/WSH4102/CE/WSH4102_ SMALTIMENTO CE.pdf... -
Page 63: Garanzia E Assistenza
GARANZIA E ASSISTENZA I materiali di imballaggio devono essere smaltiti nel modo appropriato, a seconda del tipo, ad Il normale periodo di garanzia è di 5 anni con esempio carta o cartone. Contattare il servizio di decorrenza dal giorno dell’acquisto. È possibile smaltimento rifiuti locale o l’autorità... -
Page 64: Zu Dieser Anleitung
Verpackungsmaterialien (Plastiktüten, DE BEDIENUNGSANLEITUNG Gummibänder, etc.) von Kindern fernhalten! Es besteht ERSTICKUNGSGEFAHR! ZU DIESER ANLEITUNG • VERÄTZUNGSGEFAHR! Batterien gehören nicht Lesen Sie vor der Benutzung des Geräts in Kinderhände! Achten Sie beim Einlegen der aufmerksam die Sicherheitshinweise und die Batterie auf die richtige Polung. Ausgelaufene Bedienungsanleitung. -
Page 65: Vorsichtsmassnahmen
Batterien mit voller Kapazität. Verwenden Sie keine LIEFERUMFANG Batterien unterschiedlicher Marken, Typen oder Basisstation, Thermo-Hygro sensor, Netzteil (5V), unterschiedlich hoher Kapazität. Entfernen Sie CR2032 Knopfzellenbatterie Batterien aus dem Gerät, wenn es längere Zeit nicht benutzt wird! VOR DEM GEBRAUCH • Wir empfehlen die Verwendung von Alkali-Mangan- VORSICHTSMASSNAHMEN Batterien. -
Page 66: Inhaltsverzeichnis
INHALTSVERZEICHNIS ZU DIESER ANLEITUNG ALLGEMEINE SICHERHEITSHINWEISE VORSICHTSMASSNAHMEN LIEFERUMFANG VOR DEM GEBRAUCH INHALTSVERZEICHNIS EINFÜHRUNG ÜBERBLICK KONSOLE KABELLOSER HYGRO-THERMOSENSOR INSTALLATION UND EINRICHTUNG KABELLOSEN SENSOR INSTALLIEREN ZUSÄTZLICHE KABELLOSE SENSOREN (OPTIONAL) SMART LIFE APP KONTOREGISTRIERUNG VERBINDEN DER WETTERSTATION MIT DEM WLAN-NETZWERK ÜBERSICHT DES GERÄTE-DISPLAYS IOT-APPS SONSTIGE FUNKTIONEN DER SMART LIFE APP FIRMWARE-UPDATE... - Page 67 DRAHTLOSER SENSOR-SIGNALEMPFANG TEMPERATUR- / LUFTFEUCHTIGKEITSFUNKTION AUFRUFEN VON MAX/MIN WERTEN KALIBRIERUNG AUSSENTEMPERATUR UND LUFTFEUCHTIGKEIT KALIBRIEREN: HINTERGRUNDBELEUCHTUNG AUSWÄHLEN DES LCD-KONTRASTS WARTUNG FEHLERBEHEBUNG SPEZIFIKATIONEN BASISSTATION KABELLOSER THERMO-HYGRO SENSOR FÜR DEN INNENBEREICH EG-KONFORMITÄTSERKLÄRUNG HINWEISE ZUR REINIGUNG ENTSORGUNG GARANTIE & SERVICE...
-
Page 68: Einführung
EINFÜHRUNG Vielen Dank, dass Sie die SMART Mehrkanal-Wetterstation ausgewählt haben. Das Basisgerät besitzt ein eingebautes WLAN-Modul und ist dank seines intelligenten Systems mit der Tuya® IoT-Plattform kompatibel. Über die Smart Life App können Sie von überall die Temperatur und Luftfeuchtigkeit vom Basisgerät und dem kabellosen Sensor ansehen sowie gespeicherte Verlaufsdaten prüfen, Alarm für Maximal- und Minimalwerte und Funktionen aktivieren. - Page 69 [ ALARM/SNOOZE ] Taste LCD-Anzeige [ CHANNEL / + ] Taste [ MODE / ALARM ] Taste [ MAX / MIN / - ] Taste [ HI / LO ] Schiebeschalter / CAL ] Taste [ TIME SET ] Taste Tischständer 10.
-
Page 70: Kabelloser Hygro-Thermosensor
KABELLOSER HYGRO-THERMOSENSOR 1. LED-Anzeige 2. Wandhalterung 3. Kanal-Schiebeschalter 4. [ RESET ] Taste 5. Batteriefach INSTALLATION UND EINRICHTUNG KABELLOSEN SENSOR INSTALLIEREN 1. Entfernen Sie die Batteriefachabdeckung des Sensors. 2. Verwenden Sie den Kanal-Schiebeschalter, um die Kanalnummer für den Sensor einzustellen (z.B. - Page 71 - Um den Ausfall der Sensorik und der Konsolenpaarung bei der neuen Konsoleneinrichtung zu vermeiden, schalten Sie bitte zuerst die Sensorik ein und drücken Sie dann die Taste [ SENSOR/WiFi ] am Hauptgerät. PLATZIEREN DES KABELLOSEN SENSORS Setzen Sie eine Schraube an die Wand, an der Sie den Sensor befestigen möchten.
- Page 72 EINSCHALTEN DER KONSOLE 1. Verbinden Sie das Netzteil mit der Steckdose, um das Basisgerät zu starten. 2. Sobald das Basisgerät aktiviert ist, werden alle Segmente des LC-Display angezeigt. 3. Das Basisgerät öffnet automatisch den AP-Modus (Access Point, Zugriffspunkt) und synchronisiert den Sensor. Blinkt: Basisstation ist derzeit im AP-Modus.
-
Page 73: Zusätzliche Kabellose Sensoren (Optional)
(OPTIONAL) RESET UND FACTORY HARD RESET Das Basisgerät kann bis zu sieben kabellose Zum Zurücksetzen und erneuten Starten des Sensoren unterstützen. Basisgeräts drücken Sie die Taste [ RESET ] 1. Schieben Sie am neuen kabellosen einmal oder entfernen Sie die Notstrombatterie und Sensor den Kanal-Schalter auf eine neue trennen Sie dann das Netzteil von der Steckdose. -
Page 74: Smart Life App
KONTOREGISTRIERUNG INSTALLIEREN". Das Basisgerät kann mit der Smart Life App für - Diese Basisstation kann verschiedene Android und iOS- Arten von zusätzlichen drahtlosen Sensoren Smartphones bedient werden. unterstützen, z.B. Bodenfeuchtigkeitssensor. Wenn Sie weitere Sensoren koppeln möchten, 1. Scannen Sie den QR-Code, wenden Sie sich bitte an Ihren Händler. -
Page 75: Verbinden Der Wetterstation Mit Dem Wlan-Netzwerk
Sie den Zugriff nicht zulassen. blinkende AP und angezeigt wird. Wenn das Basisgerät zum ersten Mal eingeschaltet wird, aktiviert das Basisgerät automatisch den AP- VERBINDEN DER WETTERSTATION MIT DEM Modus und bleibt in diesem Modus. WLAN-NETZWERK 2. Öffnen Sie die Smart Life App und folgen Sie den 1. - Page 76 Schritt 6: Schritt 7: Sobald Ihr Gerät registriert ist, Das Basisgerät wird auf Ihrer Schritt 5: wird das Basisgerät-Symbol Startseite angezeigt. Berühren Sie Eine automatische Suche startet angezeigt und Sie können seine das Symbol, um die Messdaten und Ihr Gerät wird registriert. Informationen einstellen.
-
Page 77: Übersicht Des Geräte-Displays
ÜBERSICHT DES GERÄTE-DISPLAYS Das Display des Geräts kann die Messdaten von IN (Innenbereich) und CH (Kanal), die gespeicherten max./min. Messdaten anzeigen und bietet Zugang zu Kurvendiagrammen, Alarm-Einstellungen, Alarm-Historie und Änderung der Einheiten. 1 . Temperatur- und Luftfeuchtigkeitsdaten mit gespeicherten max./min. Werten für den INNENBEREICH 2 . - Page 78 ANZEIGEN EINER VERLAUFSDIAGRAMMS Sie können das Verlaufsdiagramm aufrufen, indem Sie „INDOOR“ (Innenbereich) oder „CH Region“ (Kanalregion) auf der „Device Page“ (Geräteseite) berühren. Daten per Zeitraum E-Mail IN oder ein anderes CH-Diagramm wählen auswählen herunterladen Stündliches Diagramm, zum Anzeigen der Seite „data curve“...
- Page 79 EINSTELLEN VON ALARM-BENACHRICHTIGUNGEN Sie können den Alarm für max./min. Temperatur- und Luftfeuchtigkeitswerte einstellen. Schritt 1: Schritt 2: Schritt 3: Berühren Sie „Setting“ (Einstellungen) Berühren Sie „Temperature Alarm“ Berühren Sie „INDOOR“ (Innen) oder „CH 1 ~ 7“. am Rand der Seite „Device“ (Gerät). (Temperatur-Alarm) oder „Humidity Alarm“...
- Page 80 AUTOMATISCHE BEDIENUNG ANDERER GERÄTE PER SMART LIFE Kabellose(r) Smart Steckdosen Sensor(en) Basisgerät Smart Life Smart Schaltgeräte Heizung Ventilatoren Glühlampen Luftbefeuchter Luftentfeuchter...
-
Page 81: Iot-Apps
IoT-APPS Über die Smart Life App können Sie die Temperatur- und Luftfeuchtigkeitsbedingungen einstellen, um andere mit Smart Life kompatible Geräte automatisch zu steuern. Schritt 1: Schritt 3: Schritt 2: Berühren Sie das „Smart“ Symbol Berühren Sie eines der unten Berühren Sie das „ “... -
Page 82: Sonstige Funktionen Der Smart Life App
und das Risiko des Benutzers. - Bitte nehmen Sie zur Kenntnis, dass die Richtigkeit, Genauigkeit, Aktualität, Zuverlässigkeit und Vollständigkeit von IoT-Apps nicht gewährleistet werden kann. SONSTIGE FUNKTIONEN DER SMART LIFE APP Die Smart Life App verfügt über viele fortschrittliche Funktionen. Bitte lesen Sie die FAQs in der App, um mehr über Smart Life zu erfahren. -
Page 83: Andere Einstellungen & Funktionen Der Basisstation
Basisgeräts ausgeführt werden kann und die die Lokalzeit durch Synchronisation mit der Anzeige auf dem Display normal ist. Zeit an Ihrem Standort einstellt. Wenn Sie es offline verwenden möchten, können Sie WICHTIGER HINWEIS: Uhrzeit und Datum manuell einstellen. Halten - Bitte stellen Sie sicher, dass die WLAN- Sie während der ersten Inbetriebnahme die Verbindung Ihres Basisgeräts stabil ist. -
Page 84: Einstellung Der Weckzeit
- Im Alarmmodus wird das Symbol " " auf HINWEIS: der LCD-Anzeige angezeigt. - Drücken Sie im Normalmodus die Taste [ TIME Die Weckfunktion schaltet sich automatisch SET ], um zwischen Jahres- und Datumsanzeige ein, sobald Sie die Weckzeit eingestellt zu wechseln. -
Page 85: Drahtloser Sensor-Signalempfang
- Durch Drücken der Taste [ALARM / SNOOZE] wird die Schlummerfunktion aktiviert und der Alarm nach 5 Minuten wieder ausgelöst. - Durch Drücken und Halten der Taste [ALARM / SNOOZE] für 2 Sekunden wird der Alarm gestoppt und am nächsten Tag wieder aktiviert. - Durch Drücken der Taste [ MODE / ALARM ] wird der Alarm gestoppt und am nächsten Tag wieder aktiviert. -
Page 86: Temperatur- / Luftfeuchtigkeitsfunktion
ANSICHT DER ANDEREN INDOOR-KANÄLE (OPTIONALE FUNKTION MIT ZUSÄTZLICHEN SENSOREN) Diese Basisstation ist in der Lage, sich mit 7 drahtlosen sensor zu verbinden. Wenn Sie über 2 oder mehr Innensensoren verfügen, können Sie die Taste [ CHANNEL ] drücken, um zwischen verschiedenen Funkkanälen im Normalmodus zu wechseln, oder Sie können die Taste [ CHANNEL ] 2 Sekunden lang gedrückt halten, um den automatischen Zyklusmodus umzuschalten, um die angeschlossenen Kanäle im 4-Sekunden-Intervall anzuzeigen. -
Page 87: Aufrufen Von Max/Min Werten
TREND-ANZEIGE Die Trendanzeige der Temperatur oder Luftfeuchtigkeit beruht auf Veränderungen in den nächsten 15 Minuten steigend stabil fallend MAX / MIN DATA RECORD The console can record MAX / MIN readings both daily and since last reset. Daily MAX Daily MIN MAX reading MIN reading reading... -
Page 88: Kalibrierung
Luftfeuchtigkeit blinkt, drücken Sie die Symbol zu sehen, wenn das LCD die gespeicherten Daten anzeigt. Taste [ + ] oder [ - ], um den Offset-Wert KALIBRIERUNG einzustellen. Außentemperatur und Luftfeuchtigkeit 5. Drücken Sie [ MODE / ALARM ], wenn Sie kalibrieren: fertig sind, um Sie die nächste Kalibrierung 1. -
Page 89: Wartung
WARTUNG BATTERIEWECHSEL Wenn die Batterieanzeige “ ” im CH-Bereich des LC-Displays angezeigt wird, weist dies darauf hin, dass der Batteriestand des kabellosen Sensors des aktuellen Kanals niedrig ist. Bitte wechseln Sie die Batterien aus. FEHLERBEHEBUNG Lösung Probleme Der kabellose Sensor 1. -
Page 90: Spezifikationen
SPEZIFIKATIONEN BASISSTATION Allgemeine Spezifikation Abmessungen (B x H x T) 130 x 112 x 27.5mm (5.1 x 4.4 x 1.1 in) mit Batterien Gewicht 220g ( Hauptstrom DC 5V, 1A adaptor Backup-Batterie CR2032 Betriebstemperaturbereich -5˚C ~ 50˚C Betriebsfeuchtigkeitsbereich 10~90% RH - 1 kabelloser Thermo-Hygro-Sensor (inbegriffen) Unterstützende Sensoren - Unterstützt bis zu 7 kabellose Thermo-Hygro-Sensoren... -
Page 91: Kabelloser Thermo-Hygro Sensor Für Den Innenbereich
Temperatureinheit °C und °F <0°C or >40°C ± 2°C (<32°F or >104°F ± 3.6°F) Genauigkeit 0~40°C ±1°C (32~104°F ± 1.8°F) Auflösung (1 Dezimalstelle) °C / °F Raumfeuchtigkeit Feuchteeinheit 1 ~ 20% RH ± 6.5% RH @ 25°C (77°F) Genauigkeit 21 ~ 80% RH ± 3.5% RH @ 25°C (77°F) 81 ~ 99% RH ±... -
Page 92: Eg-Konformitätserklärung
2 x AA Batterien 1,5V Größe Hauptstrom (Lithium-Batterien empfohlen) Wetterdaten Temperatur und Luftfeuchtigkeit HF-Übertragungsbereich 150m RF-Frequenz (abhängig von 915Mhz (US) / 868Mhz (EU, UK) / 917Mhz (AU) der Landesversion) Übertragungsintervall 60 Sekunden für Temperatur und Luftfeuchtigkeit Betriebsbereich -40 ~ 60°C (-40 ~ 140°F) Lithium-Batterien erforderlich Betriebsfeuchtigkeitsbereich 1 ~ 99% RH CH (kabelloser Sensor) Temperatur... -
Page 93: Hinweise Zur Reinigung
Hiermit erklärt die Bresser GmbH (Folux kommunalen Entsorgungsdienstleistern oder GmbH), dass der Funkanlagentyp mit dem Umweltamt. Artikelnummer: WSH4102 der Richtlinie Werfen Sie Elektrogeräte nicht in den 2014/53/EU entspricht. Der vollständige Text Hausmüll! Gemäß der Europäischen der EG-Konformitätserklärung ist unter der Richtlinie 2002/96/EG über Elektro- und... -
Page 94: Garantie & Service
GARANTIE & SERVICE MANUAL DOWNLOAD: Die reguläre Garantiezeit beträgt 5 Jahre und beginnt am Tag des Kaufs. Die vollständigen Garantiebedingungen und Serviceleistungen können Sie unter www.explorescientific.com/warranty. Sie wünschen eine ausführliche Anleitung zu diesem Produkt in einer bestimmten Sprache? www.explorescientific.com/weather-clock-manuals Dann besuchen Sie unsere Website über nachfolgenden Link (QR Code) für verfügbare SERVICE AND WARRANTY: Versionen. - Page 96 MANUAL DOWNLOAD: SERVICE AND WARRANTY: www.explorescientific.com/ www.explorescientific.com/warranty Folux GmbH Gutenbergstr. 2 · DE-46414 Rhede · Germany www.bresser.de · service@bresser.de Explore Scientific, LLC 1010 S. 48th Street, Springdale, AR 72762 www.explorescientific.com...
Need help?
Do you have a question about the WSH4102 and is the answer not in the manual?
Questions and answers