Table of Contents
Advertisement
Quick Links
Advertisement
Table of Contents

Summary of Contents for NVision NV8256-Plus
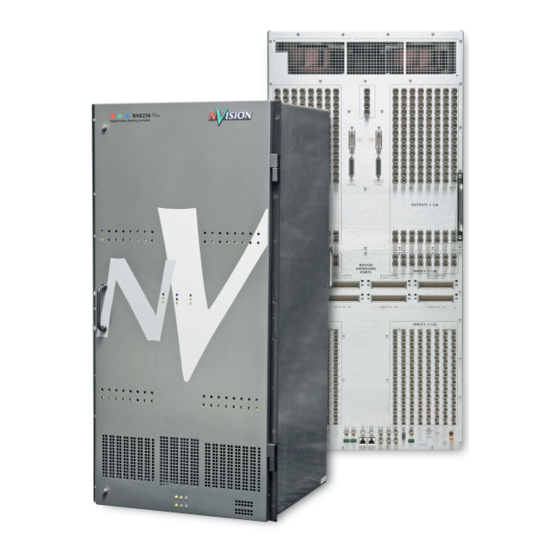
- Page 1 NV8256-Plus Digital Video Router User’s Guide...
- Page 2 The information and intellectual property contained herein is confidential between NVISION and the client and remains the exclusive property of NVISION. If you find any problems in the documentation, please report them to us in writing. NVISION does not warrant that this document is error-free.
- Page 3 Contact NVISION for details on the software license agreement and product warranty. Technical Support Contact Information NVISION has made every effort to ensure that the equipment you receive is in perfect working order and that the equipment fits your needs. In the event that problems arise that you cannot...
- Page 4 Change History The table below lists the changes to the NV8256-Plus Digital Video Router User’s Guide. • User’s Guide Part # UG0017-02 • Software version: -none- Rev # Date ECO # Description Approved By 09 Apr 07 12960 New document.
- Page 5 The fuse symbol indicates that the fuse referenced in the text must be replaced with one having the ratings indicated. The presence of this symbol in or on NVISION equipment means that it has been designed, tested and certified as complying with applicable Underwriter’s Laboratory (USA) regulations and rec- ommendations.
- Page 6 General Warnings A warning indicates a possible hazard to personnel which may cause injury or death. Observe the following general warnings when using or working on this equipment: • Heed all warnings on the unit and in the operating instructions. •...
-
Page 7: Table Of Contents
Frame Expansion ............22 NV8256-Plus Digital Video Router • User’s Guide... - Page 8 NVISION Control Systems ........
- Page 9 ........... 75 NV8256-Plus Digital Video Router • User’s Guide...
- Page 10 Table of Contents Rev 1.2 • 20 Oct 08...
-
Page 11: Preface
1. Preface Chapter 1 provides an overview of the NV8256-Plus (Digital Video Router) User’s Guide. The fol- lowing topics are discussed: • Chapter Structure • The PDF Document • Terms, Conventions and Abbreviations Chapter Structure The following chapters provide detailed instructions for all aspects of NV8256-Plus operation: •... -
Page 12: Terms, Conventions And Abbreviations
1. Preface Terms, Conventions and Abbreviations • Use the ‘First Page’, ‘Previous Page’, and ‘Next Page’, and ‘Last Page’ buttons to go to the first, previous, next, or last page within a PDF file. Note To display the navigation buttons, right-click the Tool Bar area, and check ‘Naviga- tion’. -
Page 13: Introduction
Support for SD, HD, and 3.0 Gb/s is called “3Gig.” The NV8256-Plus is a robust system capable of supporting signal rate of 10 Mb/s up to 3.0 Gb/s. This enables you to invest in a single router to meet current routing needs and potential future growth as industry standards evolve. -
Page 14: Cooling
Converted to: PAL or NTSC analog composite video Switching Configurations The NV8256-Plus is designed to be highly flexible, enabling the creation of a variety of configura- tions for managing incoming and outgoing signals. A single router can manage a maximum of 256 inputs and 256 outputs. -
Page 15: Crosspoint Card Slots And Managed Signals
For each configuration, the table lists in which slot crosspoint cards are installed, on which router, what type of input card is used, and if the router requires output cards. For a descrip- NV8256-Plus Digital Video Router • User’s Guide... -
Page 16: Power Supply
Router 2 Power Supply The power supply for the NV8256-Plus is an external, separate frame, the NV6257. The NV6257 uses the NVISION PS6000 series power supply module. The NV8256-Plus router requires four PS6000 power supply modules. For redundancy, an additional four PS6000 modules can be installed. -
Page 17: Fuses
Front Slots Figure 2-2 on page 8 shows the front of the NV8256-Plus with the door removed. From this view, in the slots that do not have an active card installed (right-hand side), the backside of the backplate and the motherboard connections are visible. - Page 18 Card Slot Output Card Slots (8) Output Cards (8) Crosspoint Cards (3) 1 - 128 Input Input Card Cards (8) Slots (8) Router Control Cards (2) Figure 2-2. NV8256-Plus Router with Door Removed (Front View) Rev 1.2 • 20 Oct 08...
-
Page 19: Slots And Corresponding Signal Numbers
Figure 2-3. Inputs and Outputs, Numbers Assigned (Front View) If the NV8256-Plus router is used as a standalone router, up to 256 incoming signals can be received and up to 256 outgoing signals distributed. The crosspoint card installed in the left cross- point card slot manages inputs 1–256. -
Page 20: Rear Connections
Module Slots and Rear Connections Rear Connections The rear of the NV8256-Plus (Figure 2-4 on page 10) features a backplate containing BNC connec- tions: 256 for receiving signals and 256 for distributing signals. These connections are passive and pass the signals through to active, receiving connections on the input cards and output cards. -
Page 21: Router Control System Connections
Serial Control Connections The NV8256-Plus has four serial ports, as shown in Figure 2-6 on page 11. The ports are divided into two sets, one primary (‘PRIMARY CONTROL’) and one secondary (‘SECONDARY CON- TROL’). Primary control is the connection to the primary control card. Secondary control is the connection to the secondary (optional for redundancy) control card. -
Page 22: Diagnostic
Some third-party router control systems require a GSC Node Bus connection. The GSC Node Bus connection is located on the rear of the router, as shown in Figure 2-8. The NV8256-Plus has one GSC Node Bus connection, labeled ‘NVISION AUX BUS’. The connection is shared by both the primary and secondary control card. -
Page 23: Router Control System Expansion Connections
Figure 2-9. Permanent Diagnostic Connections (Rear View) Router Control System Expansion Connections In order to manage two connected NV8256-Plus routers, router control system expansion connec- tions need to be connected between the routers. Router control expansion system connections are located on the rear of the router, as shown in Figure 2-10. -
Page 24: Alarm
See Alarm Indicator Equipment on page 49. In addition to an alarm connection, the NV8256-Plus can be connected to a router control system that receives status information from the router’s control card(s). See Making Router Control Sys- tem Connections on page 37. -
Page 25: Active Cards
Active Cards Active Cards The NV8256-Plus features several active cards that manage incoming signals, process commands from the control system, perform signal switching, and distribute outgoing signals. Each card slides into a card guide and has a lever that holds the card in place and aids card ejection. -
Page 26: Standard Input Cards
2. Introduction Active Cards SWB, 3Gig or analog. For your convenience, the part number for each card has been included. For a detailed description of a card’s function, see Input Card Functions on page 16. Input Card Standard Category Signal Type (SMPTE) Rates Part Number... -
Page 27: Filler Input Cards
Figure 2-14. Filler Input Card Block Diagram Analog-to-SD Input Cards An analog-to-SD input card (EM0451) converts incoming analog PAL or NTSC composite video signals to SMPTE 259M-C digital component signals (4:2:2, 270 Mb/s). NV8256-Plus Digital Video Router • User’s Guide... -
Page 28: Crosspoint Cards
2. Introduction Active Cards The input card receives 16 signals from the local coaxial connectors. Each input is forwarded to an analog-to-digital converter that converts the signals to digital. Each digital input is forwarded to one of 16 distribution amplifiers, which distributes three copies of the signal. One copy is sent to a buffer and then the motherboard, which forwards the signal to the crosspoint card in the left slot (inputs 1–256). -
Page 29: Middle Slot Functions
The following is a list of the different output cards available. Each card is listed by the function it performs — standard or SD-to-analog — and the type of signal it manages — SD, SWB, 3Gig or NV8256-Plus Digital Video Router • User’s Guide... -
Page 30: Standard Output Cards
2. Introduction Active Cards analog. For your convenience, the part number for each card has been included. For a detailed description of a card’s function, see Output Card Functions on page 20. Output Signal Standard Card Supported (SMPTE) Re-Clock At Pass Through Part Number Mb/s... -
Page 31: Monitor Card
There are two monitor connections. Using UniConfig, each connection can correspond to a unique signal level, enabling the control system to monitor two signal rates at the same time. For more information on levels, see the UniConfig User’s Guide. NV8256-Plus Digital Video Router • User’s Guide... -
Page 32: Frame Expansion
45. Frame Expansion Two NV8256-Plus router frames can be connected together to create a switching matrix of up to 512 inputs and 512 outputs. The two frames are linked by connecting expansion connections on one router to expansion connections on a second router. - Page 33 2. Introduction Frame Expansion NV8256-Plus Digital Video Router • User’s Guide...
- Page 34 2. Introduction Frame Expansion Rev 1.2 • 20 Oct 08...
-
Page 35: Installation
Verification Summary When setting up the NV8256-Plus for the first time, or reconfiguring an existing router configura- tion, there are certain steps that must be performed. It is recommended that initial installation and later reconfiguration tasks be performed in a specific order to avoid possible complications. -
Page 36: Package Contents
User’s Guide. Package Contents When your NV8256-Plus products from NVISION arrive, immediately inspect the shipping con- tainer for any obvious damage. If the container is damaged, unpack and inspect the contents. If the contents are damaged, notify the carrier immediately. -
Page 37: Rack Mount
4 Lift the NV6257 frame into position and attach the NV6257 frame to the front of the rack with the appropriate screws. Be sure to leave room for the NV8256-Plus frame to be mounted in the rack. Place screws in all frame mounting screw holes. -
Page 38: Making Power Connections
• One, NV8256-Plus monitor cable (WC0046-00) The NV8256-Plus has a ground lug on the back of the router. Whether to ground or not is optional and failure to connect the ground does not affect normal operation. However, grounding helps pro- tect you and your equipment in case of a power anomaly such as a lightning strike. -
Page 39: Power Cords And Branch Circuits
Connecting Power to the NV6257 and the Router The NV8256-Plus uses both power connections on the NV6257. To make this connection, NVI- SION provides two power cables (WC0085-00). Caution Make power connections between the router and NV6257 before connecting the NV6257 to an AC power source. - Page 40 3. Installation Making Power Connections Output Power 1 Power Supply Output Power 2 Power Connector (Power Connector) Power supply connections PS1 through PS8 Output Output Power 1 Power 2 Power Supply Alarms Monitors Power Supply Alarms Monitors (DB25 Connector) (DB25 Connector) Figure 3-1.
- Page 41 ‘Power Supply Monitors’ DB25 connection, as shown in Figure 3-1 on page 30. 8 Facing the rear of the router, connect the other end of the monitor cable to ‘Power Supply Monitor’, as shown in Figure 3-2. NV8256-Plus Digital Video Router • User’s Guide...
-
Page 42: Installing Active Cards
AWG. The ground lug is located in the lower, right-hand corner of the frame. Installing Active Cards The NV8256-Plus router features several active cards that manage incoming signals, forwarding of control system commands, signal switching, and distribution of outgoing signals. Cards slide into a card guide such that the connectors on the rear of the card interface with the motherboard. - Page 43 For information about crosspoint cards, crosspoint card slots and outputs managed, see Crosspoint Cards on page 18. • (Optional) Monitor card — insert in the vertical, upper-middle slot. Levers are located at the top and bottom of each card. NV8256-Plus Digital Video Router • User’s Guide...
- Page 44 3. Installation Installing Active Cards Control Card—Primary Control Card—Secondary Figure 3-4. Card Locations in Router Frame (Front View) 3 On each card, press both levers inward, making sure each card is fully seated in the card guide and slot. 4 Reinstall and close the frame front door after all cards have been installed. The door must be closed for the router cooling system to work properly.
-
Page 45: Making Signal Connections
Making Signal Connections Making Signal Connections In order for the NV8256-Plus to properly manage incoming and outgoing signals, the I/O connec- tions on the rear of the router must be connected to cables that receive and distribute the signals. The NV8256-Plus contains up to 256 input connections and up to 256 output connections. -
Page 46: Signal Expansion Connections
Connections, following.) Signal Expansion Connections As a standalone router, the NV8256-Plus can manage up to 256 inputs and 256 outputs. Using the NV8256-Plus signal expansion connections two routers can be connected, increasing the number of signals managed up to 512 inputs and 512 outputs. Connected routers must be situated physically next to each other, either top to bottom or side to side. -
Page 47: Making Router Control System Connections
• Serial Control — use to connect to a third-party router control system requiring serial control connections. • Ethernet Control — use to connect to the NVISION NV9000 router control system and to create network connections. • NVISION Aux Bus — use to connect to a third-party router control system requiring a GSC Node Bus connection. -
Page 48: Serial Control Connections
Serial control connections are used to connect a router to the router control system. Serial connec- tions are often used for third-party control systems. Although serial connections can be used for the NVISION NV9000 control system, it is recommended that an Ethernet connection is used instead. (See Ethernet Control Connections on page 39.) -
Page 49: Ethernet Control Connections
6 If two NV8256-Plus routers are being connected together, connect the control system expan- sion connections. (See Control System Expansion Connections on page 41.) If the NV8256-Plus is being used as a standalone router, install 50 Ω BNC terminators on the control system expansion connections. See Terminating Unused Control System Expansion Connections on page 42. -
Page 50: Gsc Node Bus Control Connections
5 If two NV8256-Plus routers are being connected together, connect the control system expan- sion connections. (See Control System Expansion Connections on page 41.) If the NV8256-Plus is being used as a standalone router, install 50 Ω BNC terminators on the control system expansion connections. See Terminating Unused Control System Expansion Connections on page 42. -
Page 51: Control System Expansion Connections
5 If you are connecting two NV8256-Plus routers together, you need to connect the control sys- tem expansion connections. (See Control System Expansion Connections, following.) If the NV8256-Plus is being used as a standalone router, install 50 Ω BNC terminators on the control system expansion connections. See Terminating Unused Control System Expansion Connections on page 42. -
Page 52: Terminating Unused Control System Expansion Connections
Making Diagnostic Connections The diagnostic connections enable the NV8256-Plus to communicate with the UniConfig applica- tion. UniConfig is installed on a unit, separate from the router (e.g., PC), and is used to perform system setup tasks, and configure and monitor the router. For information about using UniConfig, see the UniConfig User’s Guide. -
Page 53: Router Ip Address
There are two diagnostic ports located on the rear of the router, labeled ‘DIAG’. The diagnostic ports default to 38,400 baud, RS-232, but can be set to RS-422 using UniConfig. For more informa- tion, see the UniConfig User’s Guide. NV8256-Plus Digital Video Router • User’s Guide... - Page 54 3. Installation Making Diagnostic Connections How to Make Permanent Diagnostic Connections: 1 Locate the diagnostic connections on the rear of the router, as shown in Figure 3-12. The diag- nostic connections are labeled ‘DIAG’. NVISION VIDEO VIDEO TIME ALARMS CTRL...
-
Page 55: Making Video Reference Connections
5 Connect to the ‘VIDEO REF 2’ input connection, as described in Steps 2 through 4. Making Monitor Connections The monitor connections on the rear of the NV8256-Plus enable the monitoring of outgoing sig- nals. The monitor connections forward signals from the monitor card, which receives one signal... -
Page 56: Local Monitor Connections
If connecting two NV8256-Plus routers together, only one router is connected directly to the moni- toring equipment. This router acts as the primary router. Monitor expansion connections are then made between the primary router and the secondary, connected router. - Page 57 5 Connect the other end of the cable to the ‘IN 2’ monitor connection on the primary router using a 75 Ω BNC connector, as shown in Figure 3-15. NV8256-Plus Digital Video Router • User’s Guide...
-
Page 58: Making Alarm Connections
Making Alarm Connections Making Alarm Connections The NV8256-Plus provides system alarms that notify you of a malfunction, such as when a fan or power supply is not functioning properly. Alarms can be connected to an external alarm indicator that displays visual cues when an alarm is activated. The NV6257 (power supply) and the NV8256- Plus each have alarm connections. -
Page 59: Alarm Indicator Equipment
An external alarm indicator can be created to display visual cues when a failure has occurred on the NV6257 power supply or the NV8256-Plus router frame. LEDs can be wired to specific pins on a DE9 or DB25 connector. Each LED indicates what specific router module has failed. - Page 60 Missing power supply module. Alarm_4 Video Ref Missing Video Ref 1 or Video Ref 2. Alarm_5 AES3 ref Not used in NV8256-Plus. Alarm_6 Fans or temperature Indicates a fan failure or module over temperature. Alarm_7 Control module health Any control module not “healthy.”...
-
Page 61: Verification
Check the AC fuse on the PS6000 power supply module. Check for +48 volts at each of the 5 front test points. • On the NV8256-Plus, check that the LEDs on the input cards, crosspoint cards, control cards, and output cards are lit and indicating a “healthy” system. See... - Page 62 3. Installation Verification Rev 1.2 • 20 Oct 08...
-
Page 63: Operation
• Setting Redundant Crosspoint Card Switching Overview A router control system is required to use the NV8256-Plus router. The control system provides an interface for operations and maintenance personnel. Through the control system, signal switching can be actively configured, reference inputs selected, partitions for organizing signal switching cre- ated, and certain system functions monitored. -
Page 64: Third-Party Control Systems
Setting Redundant Crosspoint Card Switching The NV8256-Plus crosspoint card features four buttons located on the front of the card. When the card is installed in the middle crosspoint card slot —the slot for the optional, redundant crosspoint card—the buttons become active and can be used to change which signals the crosspoint card man- ages. - Page 65 Replace XPT (257–512) card installed in the right crosspoint card slot. • — allows external remote control of the redundant crosspoint card. For Remote Control information on remote control, see Using Remote Control, following. NV8256-Plus Digital Video Router • User’s Guide...
-
Page 66: Using Remote Control
4. Operation Setting Redundant Crosspoint Card Switching For more information on which signals are controlled by which crosspoint card slot, see Cross- point Card Slots and Managed Signals on page 5. 3 The selected function will remain active until another button is pressed and a new function selected. -
Page 67: Configuration
Chapter 5 is a place-holder, essentially a pointer to UniConfig. UniConfig Before being placed into service, the NV8256-Plus router needs to be configured for your particular facility and router control system. Configuration includes initializing ports so that the router and UniConfig can communicate, setting up partitions, switch point settings, and testing switching con- figurations. - Page 68 5. Configuration UniConfig Rev 1.2 • 20 Oct 08...
-
Page 69: Chapter 6 Maintenance
Obtaining Service General Maintenance The NV8256-Plus does not require any periodic electrical or physical maintenance. Other than cleaning the fan air intake filter, all that is required is periodic inspection of the system to make sure no failures have occurred. -
Page 70: Indicator Leds
The LEDs indicate the following: LED Indicator Indicator Function Red (alarm) Normally OFF. If lit, it indicates a problem. Replace the card or call NVISION Technical Support. For contact information, see Technical Support Contact Information on page iii. -
Page 71: Air Flow
Intake Filter Screen Cleaning The NV8256-Plus has three fan filters. Two intake filters are located on the front door assembly. To access the filters, open the router door by releasing the two thumbscrew locks and then slide the fil- ters up and to the right to remove. -
Page 72: Troubleshooting
In the event that a problem is caused by a bad circuit board, swapping the bad board with a replace- ment circuit board is the quickest solution. To order replacement boards or other components, con- tact NVISION. For contact information, see Technical Support Contact Information on page iii. -
Page 73: Obtaining Service
NVISION at your company’s expense. 4 When repair or replacement of in-warranty equipment is complete, NVISION return ships the items at our expense. For out-of-warranty equipment NVISION charges a shipping and han- dling fee. - Page 74 6. Maintenance Obtaining Service Rev 1.2 • 20 Oct 08...
-
Page 75: Chapter 7 Glossary
SMPTE 344M at 540 Mb/s. SMPTE Society of Motion Picture and Television Engineers. www.smpte.org. An international professional association, based in the United States of America, of engineers working in the motion imaging industries. NV8256-Plus Digital Video Router • User’s Guide... - Page 76 Super wide band. The combination of SD and HD signal rates up to 1.5 Gb/s. Underwriters Laboratory Incorporated. Develops standards and test procedures for materials, com- ponents, assemblies, tools, equipment and procedures, chiefly dealing with product safety and util- ity. UniConfig Software used to configure the router control system.
-
Page 77: Chapter 8 Technical Details
8. Technical Details Chapter 8 provides technical specifications for the NV8256-Plus router and the NV6257 power supply. • Power Specifications (NV6257 PS6000) • Physical Specifications • Environmental Specifications • Audio Specifications • Video Specifications • Time Code Specifications Power Specifications (NV6257 PS6000) Power is supplied through a separate frame, the NV6257 Power Supply. -
Page 78: Physical Specifications
Operating temperature: 0 to 40°C. Relative humidity: 0 to 90%, non-condensing. Regulatory compliance UL listed and CE compliant. Physical Specifications The following table provides physical specifications for the NV8256-Plus. Specification Detail Dimensions 22RU (38.47 inches, 997.1 mm) high. 19.0 inches (482.6 mm) wide. -
Page 79: Environmental Specifications
Connectors: 2, BNC, loop-through. Impedance: 50 Ω. Redundant crosspoint control Connectors: DB25. Power supply monitor Connectors: DB25. Environmental Specifications The following table provides environmental specifications for the NV8256-Plus. Specification Detail Operating temperature 0–40°C. Relative humidity 0 to 90%, non-condensing. Audio Specifications The following table provides audio specifications for the NV8256-Plus. -
Page 80: Video Specifications
8. Technical Details Video Specifications Video Specifications The following table provides video specifications for the NV8256-Plus. Specification Detail Video reference input Type: analog video reference. Standard: PAL, NTSC, or tri-level sync. Connectors: loop-through, BNC. Impedance: 75 Ω or Hi-Z (> 20 kΩ), not selectable. - Page 81 Differential gain: < 0.3%. Differential phase: < 0.3 degrees. Pedestal (input): > 75 dB unweighted. Pedestal (output): > 75 dB unweighted. Ramp (input): > 50 dB unweighted. Ramp (output): > 62.5 dB unweighted. NV8256-Plus Digital Video Router • User’s Guide...
-
Page 82: Time Code Specifications
8. Technical Details Time Code Specifications Time Code Specifications The following table provides time code specifications for the NV8256-Plus. Specification Detail Time-code reference input Type: 1 BNC, 1 Phoenix. Standard: SMPTE 12M. Connectors: BNC (terminating), Phoenix. Data rates: 1/30 to 80 times normal. -
Page 83: Chapter 9 Part Numbers
9. Part Numbers Chapter 9 provides a list of parts provided by NVISION for the NV8256-Plus router and NV6257 power supply: • Power Supply • Frame Expansion • Cards Cards EM0374 Control card. EM0437 Input card — standard for SWB signals. - Page 84 9. Part Numbers Frame Expansion Rev 1.2 • 20 Oct 08...
-
Page 85: Index
Combining I/O cards ......5 Bookmarks, Acrobat ......1 NV8256-Plus Digital Video Router • User’s Guide... - Page 86 Index Configuration ......57 DC, defined ......65 Configuration, introduction .
- Page 87 Mounting the frame ..... . . 27 HD .......16–17 NV8256-Plus Digital Video Router • User’s Guide...
- Page 88 RS-232, MCPM ..... . . 27 NVISION Power connection ......28 email, sales .
- Page 89 ..... .2 System alarm connections ....50 NV8256-Plus Digital Video Router • User’s Guide...
- Page 90 Index XP, Windows ......26 Rev 1.2 • 20 Oct 08...
Need help?
Do you have a question about the NV8256-Plus and is the answer not in the manual?
Questions and answers