Table of Contents
Advertisement
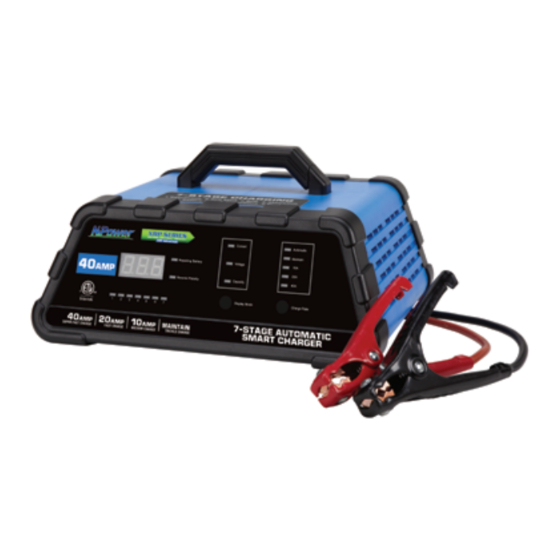
7-Stage Automatic
Smart Charger
OWNER'S MANUAL
Model number-28507
Important
For safe and optimum performance, charger must be used
properly. Carefully read and follow all instructions and
guidelines in this manual and give special attention to the
CAUTION and WARNING statements.
Please keep this manual for future reference.
Advertisement
Table of Contents

Related Manuals for NPower XPR Series

Summary of Contents for NPower XPR Series
- Page 1 7-Stage Automatic Smart Charger OWNER’S MANUAL Model number-28507 Important For safe and optimum performance, charger must be used properly. Carefully read and follow all instructions and guidelines in this manual and give special attention to the CAUTION and WARNING statements. Please keep this manual for future reference.
-
Page 2: Table Of Contents
TABLE OF CONTENTS INTRODUCTION................IMPORTANT SAFETY INSTRUCTIONS................PERSONAL SAFETY PRECAUTIONS ..........AC ELECTRICAL CONNECTIONS ..............PLUGGING IT IN .......... USING AN EXTENSION CORD ............PREPARING TO CHARGE CHARGER LOCATION......................BATTERY PREPARATION ... CHARGING A BATTERY INSTALLED IN VEHCILE CHARGING A BATTERY REMOVED FROM VEHCILE.. -
Page 3: Introduction
INTRODUCTION Thank you for purchasing 7-Stage Automatic Smart Charger. This innovative c harger will keep your AGM 12V batteries charged while maintaining top performance. This unit was specially designed to charge and maintain your batteries without having to disconnect them from your boat or vehicle. - Page 4 Stage One - Desulfation : Pulse charges the battery to break down the build up of lead sulfate crystals. Lead sulfate crystals can occur when a battery has been discharged or left unused for a period of time, seriously afffecting the performance and lifetime of the battery. Stage Two - Soft Start: A slow steady build up of the charging process that limits the power supplied to protect the battery.
-
Page 5: Important Safety Instructions
Stage Six - Recondition : An additional charge stage to recover deeply discharged batteries. Stage Seven - Float: Maintains the battery at 100% charge without overcharging or damaging the battery, allowing the unit to be left connected to the battery indefinitely. Ideal for batteries used intermittently such as seasonally used vehicles including classic car, motorcycles and RVs. - Page 6 Read all instructions and cautions printed on the battery charger, battery and vehicle or equipment using battery. Use the charger for charging lead-acid batteries only such as those used in cars, trucks, motorcycles, boats, etc. It is not intended to supply power to a low-voltage electrical system or to charge dry-cell batteries commonly used in household appliances such as radios, toys, camera, etc.
-
Page 7: Personal Safety Precautions
PERSONAL SAFETY PRECAUTIONS Make sure that someone is within range of your voice to come to your aid if needed while you work with or are near a lead-acid battery. Wear complete eye and clothing protection when working with lead-acid batteries. Avoid touching your eyes while working with a battery. -
Page 8: Ac Electrical Connections
AC ELECTRICAL CONNECTIONS PLUGGING IT IN According to local codes and ordinances, your charger requires the use of 120 Volt AC electrical wall outlet receptacles. WARNING: Never alter AC cord or plug provided. If it does not fit the outlet, have a proper outlet installed by a qualified electrician. -
Page 9: Preparing To Charge
WARNING: Use of an improper extension cord could result in a risk of fire and electric shock. PREPARING TO CHARGE CHARGER LOCATION Do not expose charger to extreme weather and temperatures. Keep away from moist and wet areas. Place the charger as far from the battery being charged as the cables will permit. -
Page 10: Charging A Battery Installed In Vehcile
prevent sparks. Be sure that the area around the battery is well ventilated while being charged. Clean the battery terminals. Be careful to keep corrosion or battery acid from getting in or around your eyes. For batteries with removable vent caps, if required, add distilled water to each cell until the battery fluid reaches the level specified by the battery manufacturer. - Page 11 FOLLOW THESE STEPS WHEN BATTERY IS INSTALLED IN VEHICLE. A SPARK NEAR BATTERY MAY CAUSE A BATTERY EXPLOSION. TO REDUCE THE RISK OF A SPARK NEAR BATTERY: Position AC and DC cords to reduce the risk of damage by hood, door, or moving engine part. Stay clear of fan blades, belts, pulleys, and other parts than can cause injury to persons.
-
Page 12: Charging A Battery Removed From Vehcile
Connect charger AC supply cord to electric outlet. Charge battery as outlined in OPERATION INSTRUCTIONS section. When disconnecting charger, disconnect AC cord, remove clip from vehicle chassis, and then remove clip from battery terminal. CHARGING A BATTERY REMOVED FROM VEHCILE Connect and disconnect the DC output clamps only after removing the AC plug from the electrical outlet. -
Page 13: Charger Controls
Do not face battery when making final connection. Connect charger AC supply cord to electric outlet. Charge battery as outlined in OPERATING INSTRUCTIONS section. When disconnecting chargers, always do so in reverse sequence of connecting procedure and break first connection while standing as far away from battery as practical. - Page 14 CHARGE RATE SELECTION Press the Charge Rate button to select desired charge rate as follows: Optimal Automatic Charge – To help extend the life of your battery and ensure it is delivering its maximum potential, it is important to charge the battery at a rate that is appropriate and safe for its capacity.
-
Page 15: Charging Features
CHARGER FEATURES CONNECTION METHOD This charger comes with 6ft. heavy-duty, 8-ga booster cables. CHARGE STATUS INDICATOR A blinking green on the 7-stage LED indicates that the battery is being charged at specific stage. Please refer to the sticker on the top of the unit for more detail information. AUTOMATIC SHUT OFF The battery charger is designed to automatically shut off once battery charging is complete to prevent overcharging. - Page 16 the DC clamps will automatically out of power. REVERSE POLARITY PROTECTION If the cables are incorrectly connected to the battery, the Reverse Polarity indicator will illuminate. Note: the charger will not begin charging if the Reverse Polarity indicator is lit. BATTERY REPAIRING MODE If a battery is left discharged for an extended period of time, it could become sulphated, unable to accept a charge.
- Page 17 The charger continuously monitors battery condition and may report certain charging failures as fault codes. Refer to the section called “FAULT CODES” for a complete list. COOLING FAN OPERATION The charger is designed to control its high speed cooling fan for efficient operation.
- Page 18 Front panel view 1. Desulfation LED --When green light flashing, it indicates the unit is in Desulfation stage. 2. Soft Start LED --When green light flashing, it indicates the unit is in Soft Start stage. 3. Bulk Charge LED --When green light flashing, it indicates the unit is in Bulk Charge stage.
- Page 19 9. Display Panel—It can indicate present voltage, present current, present battery capacity or wrong condition code. With AC power input, when not connected to the battery, the charger shows that there is no power output with the display panel present moving “8”. After connected to the battery, the panel will display the battery information according to what you choose.
- Page 20 Code Condition low Battery 60~90 Current battery level Full Battery 14. Display Button Switch--You can choose what to display on the panel by pressing the button. The default display is the current charging rate. 15. Automatic charging indicator -it indicates the charging rate you choose is automatic.
-
Page 21: Battery Charging Times
BATTERY CHARGING TIMES The built-in intelligent microprocessor will continuously monitor and adjust the charger to provide a fast, safe and efficient charge. Note that battery charge times will vary depending on several factors including: 1. Battery State – If a battery has been only slightly discharged, it can be charged in less than a few hours. -
Page 22: Maintenance And Care
The current you choose to The capacity of the battery charge the battery recommended 40AH~80AH 80AH~120AH 120AH ≥ NOTE: If battery size is not known, charge at the maintenance rate. DO NOT overcharge batteries. MAINTENANCE AND CARE Clean cords and clamps each time you are finished using the charger. -
Page 23: Trouble Shooting
TROUBLESHOOTING FAULT CODES FAULT CODES Code Condition Possible Cause Solution Go to a Maybe there is professional The battery short circuit in Lab to test the voltage is less the battery. battery. than 10 V after Disconnect the 10 minutes of A load may be load and charging. -
Page 24: Specification
low, can’t fully charge the battery Go to the Maybe there is specialist to short circuit in check the Maintenance the battery. battery. mode after being The battery is charged for 24 Disconnect the used during hours. load. charging The self- discharging Please select higher charging... -
Page 25: Warranty
WARRANTY The limited warranty program is the only one that applies to this unit, and it sets forth all the responsibilities of There is no other warranty, other than those described herein. Any implied warranty of merchant ability of fitness for a particular purpose on this unit is limited in duration to the duration of this warranty. - Page 26 RETURN/REPAIR POLICY: If you are experiencing any problems with your unit, please contact our customer service department at 800-222-5381 before returning product to retail store. After speaking to a customer service representative, if products are deemed non- working or malfunctioning, the product may be returned to the purchasing store with 30 days of original purchase.
- Page 27 tear (including chips, scratches, abrasions, discoloration or fading due to usage or exposure to sunlight), accidents, damage during shipping to our service facility, alterations, unauthorized use or repair, neglect, misuse, abuse, failure to follow instructions for care and maintenance, fire and flood. If your problem is not covered by his warranty, call our Customer Service Department toll free at 800-222-5381 for general information if applicable.
Need help?
Do you have a question about the XPR Series and is the answer not in the manual?
Questions and answers