Advertisement
Table of Contents
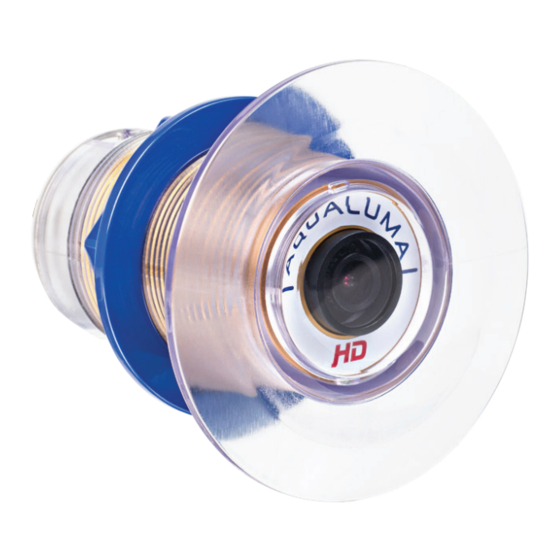
LUMA-VU
Camera
TECHNICAL SPECIFICATIONS
•
2 Megapixel Full HD 1080 Camera;
•
1080p – 25/30 fps
•
1080i – 50/60 fps
•
2 year warranty
•
Colour CCTV camera
•
Low Light 1/3" high sensitivity CMOS 12bit sensor
•
3300 mv/lux-sec
•
Front face and sealing flange 110mm/4.33"
•
Overall length 110.5mm/4.35"
•
Aperture f1.8 fixed
•
No video distortion or latency
•
1920 x 1080, 2.2um active pixels
124 Siganto Drive, Helensvale, 4212, QLD, Australia
www.aqualuma.com
FOR THOSE CURIOUS TO FIND OUT WHAT LIES BELOW THE OCEAN'S
GLASSY SURFACE, LET THE LUMA-VU CAMERA SHOW YOU.
The Luma-Vu Camera gives you a crystal clear (HD) view of what's happening in
the ocean beneath you. Simply flick the switch and a kaleidoscope of colour will
be revealed. Manufactured with Aqualuma's famous corrosion-proof, injection-
moulded polymer housing, this high definition resolution colour CCTV camera
is virtually bullet proof (and definitely shark proof!). The Aqualuma Luma-Vu HD
camera continues Aqualuma's commitment to enhance your boating experience.
•
Hole saw size 60mm/2 3/8"
•
Supplied with 15 metre (49 feet) of video and
power supply cable.
•
Power consumption 180mA
•
Scratch resistant polymer housing
•
Auto iris lens
•
Luma Vu Camera is mounted in a
6 Series housing (60mm 2 3/8" cut out)
•
HD output up to 100m (328 feet)
Advertisement
Table of Contents

Summary of Contents for Aqualuma LUMA-VU
- Page 1 FOR THOSE CURIOUS TO FIND OUT WHAT LIES BELOW THE OCEAN’S GLASSY SURFACE, LET THE LUMA-VU CAMERA SHOW YOU. The Luma-Vu Camera gives you a crystal clear (HD) view of what’s happening in the ocean beneath you. Simply flick the switch and a kaleidoscope of colour will be revealed.
Need help?
Do you have a question about the LUMA-VU and is the answer not in the manual?
Questions and answers
How to connect an Aqualuma thruhull camera to a Garmin GPSMAP 1242XSV plotter
To connect an Aqualuma LUMA-VU thru-hull camera to a Garmin GPSMAP 1242XSV plotter, follow these steps:
1. Check Compatibility – Ensure the Garmin GPSMAP 1242XSV supports video input, typically via a composite video (RCA) connection.
2. Connect the Video Cable – The LUMA-VU camera comes with a 15-meter (49 feet) video and power supply cable. Connect the video output (likely a BNC or RCA connector) to the Garmin GPSMAP 1242XSV’s video input port.
3. Use an Adapter if Needed – If the camera uses a BNC connector and the Garmin plotter has an RCA input, use a BNC-to-RCA adapter.
4. Power the Camera – Connect the camera’s power supply cable as per the manufacturer’s power requirements.
5. Configure the Display – On the Garmin GPSMAP 1242XSV:
- Go to the settings menu.
- Select the video input source.
- Adjust brightness, contrast, and other settings if necessary.
6. Test the Feed – Turn on the system and verify that the live underwater video appears on the plotter screen.
Ensure all connections are secure and waterproof to prevent damage.
This answer is automatically generated
How to connect an Aqualuma thru hull camera aqllvhd to a Garmin GPSMAP 1242XSV plotter
The document does not provide specific instructions for connecting the Aqualuma VU thru-hull camera to a Garmin GPSMAP 1242XSV plotter. However, based on the camera's specifications, it outputs HD video via a supplied 15-meter cable and is a colour CCTV camera. To connect it to the Garmin GPSMAP 1242XSV:
1. Identify the video input on the Garmin GPSMAP 1242XSV. It typically accepts composite video input (RCA).
2. Check the video output connector type on the Luma-Vu camera's cable.
3. If needed, use an appropriate adapter to convert the camera's output to RCA composite video.
4. Connect the camera's video output to the Garmin's video input.
5. Power the camera using the supplied power cable.
6. On the Garmin display, select the video input source to view the camera feed.
Ensure compatibility of video formats and connector types.
This answer is automatically generated