
Related Manuals for CADO STEM 620

Summary of Contents for CADO STEM 620
- Page 1 Quick Start Guide Guide de démarrage rapide Schnellstartanleitung Guida Rapida Skrócona Instrukcja Obs ugi Humidi er...
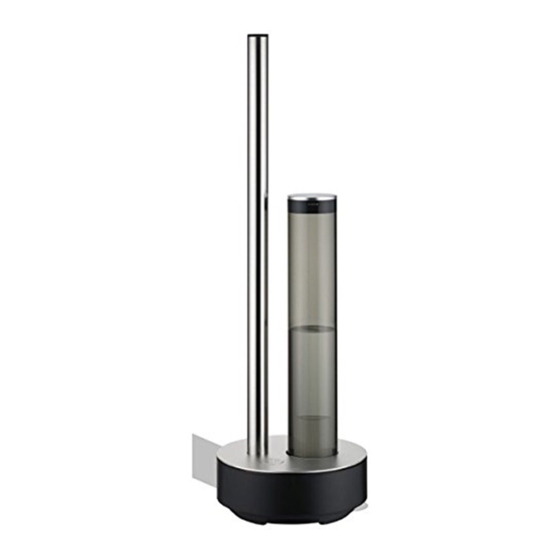
- Page 2 Parts Mist outlet Water tank lid (water inlet) Top panel Water tank Duct pipe holder Duct pipe Base unit Air fi lter Filter cartridge Air fi lter cover...
- Page 3 Inside Fan blowout port Power cord Power cord connecting port Atomizer Lower tank indicator Water outlet Control panel Tank component Illumination intensity sensor Bottom Air fi lter cover (air inlet) Water drain hole...
- Page 4 Assembly 1. Install the duct pipe holder in the direction of the arrow. 2. Pass the top panel through the duct pipe holder, then align the top panel in position with the protrusions on the base unit and install the top panel. Back side of the top panel Projection part...
- Page 5 3. With the mist outlet facing upward, install 4. Insert the fi lter cartridge in the tank by the duct. twisting until it locks. Note: • Failure to install the fi lter cartridge properly can result in water leakage.
- Page 6 5. Gently insert the tank into the end of the 6. Connect the power cord to the power base unit. cord connecting port. 7. Plug the power code into the outlet. All indicators on the operation panel and the lower tank indicator turn on, for about 2 seconds when power is connected properly.
-
Page 7: Adding Water
Adding water Note: • Only tap water, water fi ltered with a water purifi er, and soft water can be used. With pure water or distilled water, the water level detection cannot be performed normally, which can cause water leakage. •... -
Page 8: Installing The Unit
Installing the unit Note: • When uing the unit, ensure there is a proper distance between the unit and wallsor its surroundings, as shown in the illustration. In particular, be sure to leave at least 1 m of space above the mist outlet. More than 1 m •... -
Page 9: How To Operate
How to operate Control panel Timer button Timer indicator Power button Auto operation button Rapid button Auto operation indicator Rapid indicator Humidity output Humidity output button indicator Starting the unit Press the power button. Water supply starts from the tank. Once a suffi... - Page 10 Auto mode Press the Auto button while the unit is in operation. It detects the temperature and humidity of the room with the sensor and automatically switches the humidity output in operation. Rapid mode Press the rapid button while the unit is in operation. The operating mode switches to Auto mode after about 2 hours of operation.
- Page 11 Humidity indicator The color of the lower tank indicator changes according to the humidity level of the room. The indicated level may differ from the actual humidity level depending on the environment of the room as well as where the unit is installed. Indicator color Current humidity level Yellow...
-
Page 12: Maintenance
Maintenance • Continuing to use the appliance without cleaning it can result in the accumulation of contaminations such as water spots, which can propagate mold and bacteria. Clean the appliance periodically (once or more per week is recommended). • Failure to clean the appliance periodically may void the manufacturer warranty if any malfunction occurs due to contamination or similar issues. - Page 13 2. Remove the water tank and the duct pipe. 3. Remove the top panel and duct pipe holder.
- Page 14 4. Drain the water remaining in the tank via the water outlet, following the drainage direction arrow. Note: • Be sure to drain the remaining water from the tank component in the illustrated direction. • Be careful to prevent any water from entering into the fan blowout port. 5.
- Page 15 6. Rinse the tank component well with tap water, then drain the water. Repeat a number of times to remove the contamination if it is not cleaned in one attempt. Note: • Be sure to drain the remaining water from the tank component in the illustrated direction. •...
- Page 16 8. Wash off any contamination inside the 9. Drain the water remaining in the tank duct using a brush with a long handle. and rinse the tank a number of times with Wash off contamination on the mist outlet tap water. If inside the tank is considerbly with a soft brush.
- Page 17 10. Wipe the base unit, top panel, duct holder, duct and tank with a dry cloth and remove all contamination and moisture.
- Page 18 11. Take out the air fi lter at the bottom of the base unit and wash it with water. Once it is washed, drain the water and let it dry fully, then reinstall it again. OPEN LOCK...
- Page 19 12. Reassemble the base unit. Refer to the “Assembly” for procedures to assemble again.
- Page 20 Replacing the fi lter cartridge 1. Drain the water remaining in the tank and remove the fi lter cartridge. 2. Install a new fi lter cartridge. Refer to “Assembly” for procedures to install the fi lter cartridge.
- Page 21 Filter cartridge • The fi lter cartridge fi t on the water tank has a function for lowering the hardness of water by removing calcium ions which are included in tap water. • The fi lter cartridge is a consumable part. The life span of the cartridge may be shorter depending on the hardness of the water used.
-
Page 22: Safety Function
Safety function Duct pipe holder detection If operation is started without the duct pipe holder installed, or if the duct pipe holder is removed during operation, operation will stop, all operation panel indicators fl ash, and the alarm will sound fi ve times. Abnormal water level detection If the water level in the tank componet exceeds the normal water level, operation stops, all operation panel... -
Page 23: Specifications
Specifi cations STEM Model name HM-C620 Power supply 100 - 240 V 50 - 60 Hz Applicable fl oor area * 27 m Rapid Operation mode Intermittent High (2 hours) Current consumption [W] Humidifi er capacity [mL/h] * Operating sound [dBA] * External dimensions [mm] ∅... - Page 24 Safety Precautions Précautions de sécurité Sicherheitsvorkehrungen Misure di sicurezza rodki ostro no ci Humidi er...
-
Page 25: Safety Precautions
Safety Precautions About this document This Instruction Manual features important precautions to prevent accidents. Please read these “Safety Precautions” and the separately attached Quick Start Guide carefully before using the appliance to ensure correct and safe use. Please keep these documents after reading. Make sure you observe these safety precautions Make sure you observe all precautions described in this document to prevent damage to property or prevent harm to yourself or others. - Page 26 Warning Prohibited ■ Do not touch the power plug with wet hands. inside the base unit can cause electrocution or fi re from short circuiting. It may cause electric shock. ■ Do not insert any foreign objects, such as fi ngers ...
- Page 27 Warning Required ■ Plug the power plug in all the way. ■ During cleaning, inspection, and moving, If it is not plugged in all the way, it may cause make sure to stop operation and unplug the electric shock or fi re. power plug.
- Page 28 Caution Prohibited ■Do not sit or stand on the unit. The unit may not operate properly due to the effects of the magnetism. Falling down from the unit or toppling may cause injury or malfunction. ■Do not use the unit with the tank or duct ...
- Page 29 Caution Required ■Dispose of water inside the tank according to ■Keep the unit at least 1 m away from television the draining direction markings. sets, radio equipment, video players, cordless When water enters and has contact with telephones, air conditioners and the like. components inside the base unit such as the The unit may cause electromagnetic interference circuit board, it may cause short circuit or...
- Page 30 Co., Ltd. Tokyo cado.com JA-00035-0301...
Need help?
Do you have a question about the STEM 620 and is the answer not in the manual?
Questions and answers