
Summary of Contents for Elkron ELR600RT/10
- Page 1 ELR600RT/10 ELR600RT/15 ELR600RT/20 BARRIERE RADIO A INFRAROSSI CON PORTATA 10 m RADIO INFRARED BARRIERS WITH 10 m RANGE DS80EL30-001B LBT81046...
-
Page 2: Table Of Contents
USING THE OPTIONAL ROTATION KIT ......................... 22 CONFIGURING THE BARRIER ............................24 POSITIONING THE BARRIERS ............................25 BATTERIES ..................................26 10. SUPERVISION FUNCTION ............................... 26 11. BATTERY TAMPER CONNECTIONS WITH STANDARD MOUNTING ................27 12. TECHNICAL SPECIFICATIONS ............................27 13. F.A.Q....................................28 ELR600RT/10-15-20... -
Page 3: Avvertenze Generali
Elkron declina ogni responsabilità per guasti conseguenti ad errata installazione; mancata manutenzione, errato montaggio o uso. Elkron inoltre non è responsabile per errato o incompleto funzionamento del prodotto o mancata rilevazione di intrusione. AVVERTENZE PER L’INSTALLAZIONE ... -
Page 4: Descrizione Del Prodotto
ALLARME Una barriera ad infrarosso attivo può contenere più stadi trasmittenti e riceventi all'interno di apposite colonne. Le barriere ad infrarosso hanno molteplici controlli che limitano notevolmente i falsi allarmi. ELR600RT/10-15-20... -
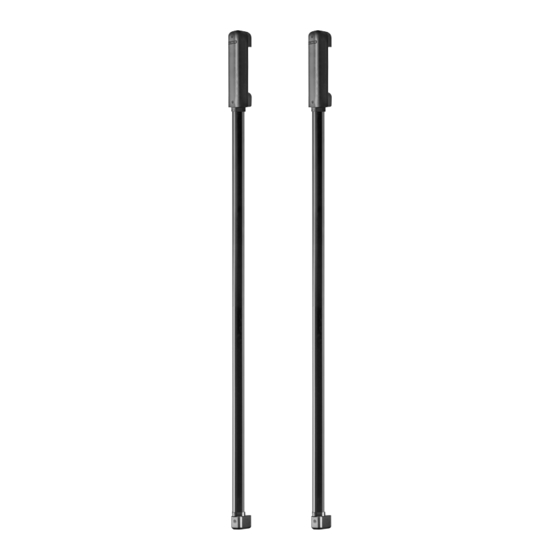
Page 5: Elenco Componenti Principali
Coperchio porta trasmettitore Cavo flat scheda Scheda Profilo Alluminio Tamper Profilo Plastica Base porta trasmettitore Batterie Spessore rotazione (opzionale*) Scheda madre Sostegno rotazione Tappo Standard Ottica Tappo per rotazione (opzionale*) * incluso nel kit distanziali per rotazione cod. 80SP5G00113 ELR600RT/10-15-20... -
Page 6: Predisposizione Dei Dispositivi
Tra il porta trasmettitore e la barriera, è presente un cablaggio filare che unisce i due elementi. Prima di far scorrere il profilo in plastica superiore, si raccomanda di impugnare la barriera nel punto indicato dal disegno 1: SÌ ELR600RT/10-15-20... - Page 7 Togliere gli isolatori delle batterie all’interno della barriera TX e verificare il lampeggio del LED rosso DL1 sulla scheda madre. OPERAZIONI DI CONFIGURAZIONE PER UNA PRIMA VERIFICA DI ALLINEAMENTO E FUNZIONAMENTO Alzare DIP1 di TEST della scheda madre TX Alzare DIP1 di TEST della scheda madre RX ELR600RT/10-15-20...
- Page 8 Per fare ciò sfilare il porta trasmettitore e far scorrere il profilo in plastica per qualche centimetro in direzione del porta trasmettitore. Eseguire la stessa operazione con la barriera TX ELR600RT/10-15-20...
-
Page 9: Installazione A Parete
Inserire lo spessore di rotazione presente nel KIT sulla base del porta trasmettitore delle barriere RX e TX Svitare le viti sui coperchi dei tappi standard delle barriere RX e TX e asportare i coperchi Rimuovere i tappi standard ELR600RT/10-15-20... - Page 10 Per apprendimento, test e installazione fare riferimento ai capitoli 4 e 5. Una volta installate le barriere, sarà possible regolare l’angolo d’inclinazione del profilo e fissare l’angolazione scelta con i grani. Indi ripetere i test di allineamento. ELR600RT/10-15-20...
-
Page 11: Configurazione Della Barriera
N.B. L’abilitazione dell’opzione FAST determina un notevole incremento della sensibilità di rilevazione della barriera COLONNA TX TEST In posizione ON sarà possibile effettuare l’allineamento delle barriere Non utilizzato ALL’USCITA DALLA FABBRICA TUTTI I DIP SWITCH SONO IN POSIZIONE OFF. ELR600RT/10-15-20... -
Page 12: Posizionamento Delle Barriere
3) NON posizionare le barriere a ridosso di strade: le luci dei fanali dirette sull’RX potrebbero creare disturbi 4) NON posizionare le barriere vicino a cancelli automatici: i segnali di fotocellule possono creare interferenze. ELR600RT/10-15-20... -
Page 13: Batterie
DURATA DELLE BATTERIE MODELLO NUMERO RAGGI NUMERO BATTERIE DURATA 4 + 4 2 ANNI ELR600RT/10 6 + 6 2 ANNI ELR600RT/15 8 + 8 2 ANNI ELR600RT/20 In caso di batteria bassa, il dispositivo provvederà ad inviare una segnalazione all’unità di controllo e a dare un’informazione acustica durante gli eventi di allarme. -
Page 14: Collegamenti Tamper Delle Barriere Con Montaggio Standard
Alimentazione Relè con contatti liberi NC (su colonna RX) Uscita allarme Tamper apertura colonna (su entrambe le colonne) Uscita antimanomissione 0° / +65° Temperatura di funzionamento ELR600RT/10 ELR600RT/15 ELR600RT/20 DIMENSIONI Altezza completa del porta 113 cm 163 cm 213 cm... - Page 15 CON PORTATA 10 m EL600RT/10 - EL600RT/15 - EL600RT/20 sono conformi alla direttiva 2014/53/UE. Il testo completo della dichiarazione di conformità UE è disponibile al seguente indirizzo Internet: www.elkron.com. DIRETTIVA 2012/19/UE DEL PARLAMENTO EUROPEO E DEL CONSIGLIO del 4 luglio 2012 sui rifiuti di apparecchiature elettriche ed elettroniche (RAEE).
-
Page 16: General Precautions
Elkron accepts no liability for failures due to incorrect installation, lack of maintenance or improper assembly or use. In addition, Elkron is not liable for incorrect or incomplete functioning of the product or its failure to detect intrusion. -
Page 17: Product Description
ALARM An active infrared barrier can contain several transmitting and receiving levels inside specific columns. The infrared barriers have multiple controls that considerably reduce false alarms. ELR600RT/10-15-20... -
Page 18: List Of Main Components
Transmitter holder cover Circuit board ribbon cable Circuit board Alluminium profile Tamper Plastic profile Transmitter holder base Batteries Rotation spacer (optional*) Motherboard Rotation support Standard cap Optics Rotation cap (optional*) * included in the rotation spacer kit code 80SP5G00113 ELR600RT/10-15-20... -
Page 19: Preparing The Devices
Plastic profile CAUTION! There is a wire cable between the transmitter holder and the barrier that connects the two parts. Before sliding the upper plastic profile, it is advisable to hold the barrier at the point shown in figure 1: ELR600RT/10-15-20... - Page 20 Remove the battery insulators from inside the TX barrier and check that the red DL1 LED is flashing on the motherboard. CONFIGURATION STEPS FOR AN INITIAL ALIGNMENT AND OPERATION TEST Switch on TEST DIP1 on the TX motherboard. Switch on TEST DIP1 on the RX motherboard. ELR600RT/10-15-20...
- Page 21 To do this, remove the transmitter holder and slide the plastic profile a few centimeters in the direction of the transmitter holder. Do the same with the TX barrier. ELR600RT/10-15-20...
-
Page 22: Wall Installation
Insert the rotating spacers included in the KIT in the transmitter holder bases of the RX and TX barriers. Undo the standard tap cover screws on the RX and TX barriers and remove the covers. Remove the standard caps. ELR600RT/10-15-20... - Page 23 For learning, testing and installation, see sections 4 and 5. Once the barriers are installed, the profile inclination angle can be adjusted and the chosen angle secured with the grub screws. Then repeat the alignment tests. ELR600RT/10-15-20...
-
Page 24: Configuring The Barrier
Note: Enabling the FAST option considerably increases the detection sensitivity of the barrier TX COLUMN TEST In the ON position, alignment of the barriers can be carried out. Not used. WHEN LEAVING THE FACTORY, ALL THE DIP SWITCHES ARE IN THE OFF POSITION. ELR600RT/10-15-20... -
Page 25: Positioning The Barriers
7) DO NOT place the barriers along the side of roads: headlights pointing towards the RX could create disturbances. 8) DO NOT place the barriers close to automatic gates: signals from photocells could create interference. ELR600RT/10-15-20... -
Page 26: Batteries
BATTERY LIFE MODEL NUMBER OF BEAMS NUMBER OF BATTERIES LIFE 4 + 4 2 YEARS ELR600RT/10 6 + 6 2 YEARS ELR600RT/15 8 + 8 2 YEARS ELR600RT/20 If the battery is low, the device will send a signal to the control unit and give an acoustic signal during alarm events. -
Page 27: Battery Tamper Connections With Standard Mounting
ER14505H 3.6 Volt - 2.7 Ah batteries Power supply Relay with free NC contacts (on RX column) Alarm output Column opening tamper (on both columns) Anti-tampering output 0° / +65° Operating temperature ELR600RT/10 ELR600RT/15 ELR600RT/20 DIMENSIONS Height complete with 113 cm 163 cm 213 cm... - Page 28 EL600RT/10 - EL600RT/15 - EL600RT/20 in compliance with Directive 2014/53/EU. The full text of the EU declaration of conformity is available at the following internet address: www.elkron.com. DIRECTIVE 2012/19/EU OF THE EUROPEAN PARLIAMENT AND OF THE COUNCIL of 4 July 2012 on waste electrical and electronic equipment (WEEE).
Need help?
Do you have a question about the ELR600RT/10 and is the answer not in the manual?
Questions and answers