Table of Contents
Advertisement
Advertisement
Table of Contents

Summary of Contents for VisionTek VT7000 Series
- Page 1 VT7000 Series TRIPLE 4K DISPLAY DOCKS USER MANUAL...
-
Page 2: Table Of Contents
TABLE OF CONTENTS lntroduction ................Features ................... Contents .................. System Requirements ............Docking Station Configuration ........... Driver Installation (Windows)..........Windows Setup ..............Driver Installation (macOS) ..........Managing Multiple Displays (macOS) ....... Configuring Displays from the Menu Bar (macOS) ..Warranty .................. -
Page 3: Lntroduction
INTRODUCTION Your new 4K Docking Station can connect to any host with Type C connectors providing a fully future-proof docking solution. Allowing you to connect up to three additional monitors through a single USB cable. The 4K Docking Station Software allows full configuration of all additional USB displays, including: •... -
Page 4: Features
FEATURES • Compatible with both Type-C Laptops and Desktop Computers • Supports resolutions up to 4K (3840 x 2160 @60Hz) • Supports Extend and Mirror Display Mode • Supports 5.1 Channel Surround Sound • Built-in USB 3.0 GPU, Plug and Display •... -
Page 5: System Requirements
SYSTEM REQUIREMENTS DisplayLink USB Graphics Software for Windows Windows 11 (64-bit edition) Windows 10 (32-bit and 64-bit edition) Windows 8.1 Update 2015 (32-bit and 64-bit editions) Windows 8 (32-bit and 64-bit editions) Windows 7 (32-bit and 64-bit editions) DisplayLink USB Graphics Software for macOS Big Sur 11 Yosemite 10.10 Catalina 10.15... -
Page 6: Docking Station Configuration
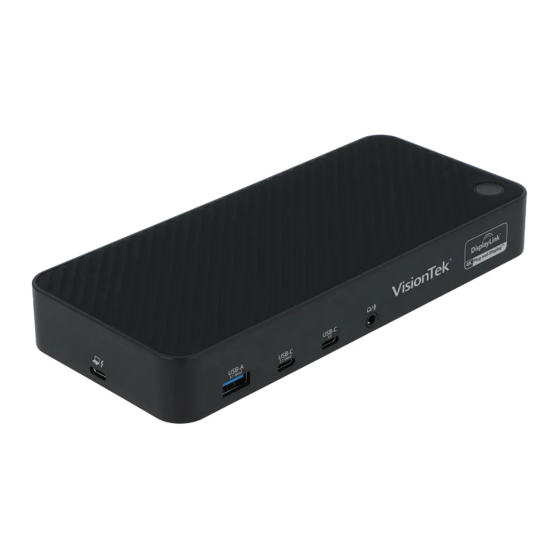
DOCKING STATION CONFIGURATION Step 1 For Illustrative Purposes Connect the USB-C to USB-C cable to the Docking Station. Plug the USB cable into your Laptop/ Desktop Computer, Connect the power adapter. - Page 7 DOCKING STATION CONFIGURATION (Continued) Step2 Connect your displays to the Docking Station, display connections vary by dock For Illustrative Purposes Display 1 Display 2 Display 3 (DisplayLink) (DisplayLink) (DP Alt Mode) HDMI DisplayPort HDMI Cable DisplayPort Cable (Not Included) (Not Included) Connect to HDMI Monitor Connect to DisplayPort Monitor Display 1 and 2 function via DisplayLink when connected with USB-A or USB-C.
-
Page 8: Driver Installation (Windows)
DRIVER INSTALLATION (Windows) Step 1 The following section shows you how to install the Docking Station software on different operating systems. Download and install the latest Displaylink software. Select the driver according to your operating system. Please visit displaylink.com/downloads and download the latest drivers. Displaylink-provided drivers are always compatible with the USB Docking Station. - Page 9 DRIVER INSTALLATION (Windows Continued) Step2 Select the downloaded file double click to begin the DisplayLink software installer Step3 Once the installer begins a window will pop up and verify that your system is compatible with DisplayLink USB Graphics.
- Page 10 DRIVER INSTALLATION (Windows Continued) Step4 Click ”Install”...
- Page 11 DRIVER INSTALLATION (Windows Continued) Step 5 Once the “Finish” button appears the install is complete and your system will may need to reboot. If the option pops up click “Reboot” to finalize the driver installation.
-
Page 12: Windows Setup
WINDOWS SETUP Audio setting for Windows 10 Step 1 Click the DisplayLink “Icon” at the lower right corner to set up audio and video, click “Audio setup” Step 2 Step 3 Choose Speaker Choose Microphone... - Page 13 WINDOWS SETUP (Continued) Video Setting: Windows 10 Display mode • Click video setup • Select Display and choose Orientation then select Extend desktop to this display.
-
Page 14: Driver Installation (Macos)
DRIVER INSTALLATION (macOS) Introduction: This guide applies to software version 1.3 and above of the Mac software. What is the macOS Driver? The macOS driver is designed for macOS 10.4 - 11 to enable you to add an additional monitor to your mac using Displaylink technology. - Page 15 DRIVER INSTALLATION (macOS) Step 1 Download and install the latest Displaylink software. Select the driver according to your operating system. Please visit displaylink.com/downloads and download the latest drivers. Displaylink-provided drivers are always compatible with the USB Docking Station. DisplayLink USB Graphics Software supports macOS 10.4 - 11. M1 macs are supported on software version 1.3 or later.
- Page 16 DRIVER INSTALLATION (macOS) Step 2 Click “Continue” to start the installation process. Step 3 Once prompted input your account password and click “Install Software” Step 4 After installation is complete restart your system. Your dock should now be working. If not, make sure the Displaylink Manager application is running by entering “Displaylink”...
-
Page 17: Managing Multiple Displays (Macos)
MANAGING MULTIPILE DISPLAYS (macOS) When a new display is connected to your Mac, it will default to being extended to the right of the main display. To configure the settings for each of your displays, select “Displays” from the “System Preferences” menu. - Page 18 MANAGING MULTIPLE DISPLAYS (mac OS Continued) To arrange displays and configure mirrored or extended displays click on the arrangement tab. To move a display, click and drag the display in the arrangements window. To change primary display, click on the small bar on top of the main monitor and drag in onto the monitor you want to be the primary.
-
Page 19: Configuring Displays From The Menu Bar (Macos)
CONFIGURING DISPLAYS FROM THE MENU BAR (macOS) If you have checked the “Show Displays” ON menu bar in “Display Preferences” then you can configure the displays by clicking the display icon in the menu bar. This menu allows you to perform the following actions: Detect all displays connected to the Mac Turn display mirroring on/off Set the resolution of both the primary display, and the additional display(s) -
Page 20: Warranty
VisionTek’s liability under this warranty, or in connection with any other claim relating to the Product, is limited to the repair or replacement, at VisionTek’s option, of the product or portion of the product which is defective in manufacturing material. Warrantee assumes all risk of loss in transit. The returned products shall be the sole property of VisionTek.
Need help?
Do you have a question about the VT7000 Series and is the answer not in the manual?
Questions and answers