
Related Manuals for Smartwares WDVR840S


Summary of Contents for Smartwares WDVR840S
- Page 1 High Definition Wireless Digital Video Recorder Installation and Operating Instructions Model: WDVR840S PLEASE READ THESE INSTRUCTIONS CAREFULLY BEFORE USING THIS PRODUCT AND KEEP THIS MANUAL FOR FUTURE REFERENCE.
-
Page 2: Table Of Contents
CONTENTS IMPORTANT SAFETY PRECAUTIONS ..................2 OVERVIEW .............................4 FRIENDLY REMINDER ........................5 KIT CONTENT ..........................6 KNOWING YOUR DEVICES ......................7 Wireless Digital Receiver ......................7 Wireless Digital Outdoor Camera ....................9 Motion Detection ........................10 INSTALLING YOUR DEVICES ...................... 11 Installing Your Camera ......................11 Setting up Your Receiver ...................... -
Page 3: Important Safety Precautions
IMPORTANT SAFETY PRECAUTIONS Damages caused by non-compliance with this operating manual will void the warranty! We will not assume any liability for damages to items or persons caused by improper handling or non- compliance with the safety notices! Any warranty claim will be null and void in such cases. 1. - Page 4 FCC/CE WARNING This equipment has been tested and found to comply with limits for a Class B digital device, pursuant to Part 15 of the FCC rules and ETSI(EN) 300328. These limits are designed to provide reasonable protection against harmful interference in residential installations. This equipment generates, uses, and can radiate radio frequency energy, and if not installed and used in accordance with the instructions, may cause harmful interference to radio communications.
-
Page 5: Overview
OVERVIEW The WDVR840S which can receive video and audio data from Hight Definition Digital Wireless Cameras (supports up to 4 cameras), and is able to store received data to the HDD. You are able to view the data in real-time, or at later time. Remotely have live-view via mobile device(s) with Internet connection. -
Page 6: Friendly Reminder
For best performance, please keep the camera and monitor minimum 1 meter away form the receiver and Wi-Fi router. * Make sure the WDVR840S is operating with sufficient internet bandwidth, 1.5Mbps (upload speed) is suggested. * For best performance, the smart-mobile device(s) need to be on Wi-Fi or 4G mobile network in order to receive maximum download speed. -
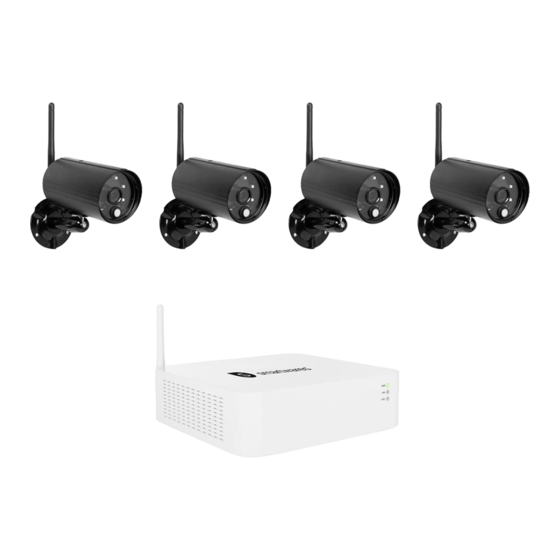
Page 7: Kit Content
Ethernet Cable HDMI Cable Mouse *Quantity varied subject to configuration Minimum System Requirement for WDVR840S: *For Networking: - DHCP enabled router - 1.5Mbps or above upload bandwidth (both home and mobile device) - iPhone 5 / Mini iPad 2 or above... -
Page 8: Wireless Digital Receiver
KNOW YOUR DEVICES Wireless Digital Receiver Item Name Function Power Indicator Indicate Power On/Off Status Link Indicator Indicate Wireless Data Transfer Status HDD Indicator Indicate HDD Storage Operation Status Antenna Transmit/Receive Digital Wireless Audio/Video Data... - Page 9 Item Name Function HDMI Port Video & Audio Output (TV) USB Port Mouse RJ45 Port Internet Connection (Router) Power Input DC 12V Adaptor Reset Button Reset System Micro Memory Card Slot Micro Memory Card Insert Location Power On/Off Switch Power On/Off Digital Wireless Receiver Console SMA Connector Receiver Antenna Installation (Twist On) Note:...
-
Page 10: Wireless Digital Outdoor Camera
Wireless Digital Outdoor Camera Front View Back View Item Name Function Power Indicator Indicate Power On/Off Status Wireless Indicator Indicate the monitor and cameras are connected Lens Capture Image Passive Infrared sensor for detecting heat emission from biomass (human, animals, etc.) IR LEDs Night View Antenna... -
Page 11: Motion Detection
Motion Dectection Keep active locations in the camera’s field of view. The camera has a 90-degree viewing angle. Position your camera so that the space that you want to monitor is within the camera’s field of view. The best area for motion detection is 3 to 5 meters from the camera position. Avoid false triggers, please note this device is equipped with a PIR Motion Sensor that detecting temperature changes in the area in front of the device;... -
Page 12: Installing Your Devices
INSTALLING YOUR DEVICES Installing your camera 1. Locate a suitable location to mount the camera. 2. Secure the camera stand to a stable surface, celling or wall using the three screws. 3. Loosen the thumb screw of the camera stand and secure the camera body to the bracket. Make sure the camera is in an upright position (relative to your viewing environment). - Page 13 4. Screw the antenna into rear of the camera. Ceiling Mount Wall Mount 5. Connect the supplied power adaptor to the camera and the power source. The RED LED will light up which indicate the camera is ready for setup. Please refer to page 17 for pairing camera.
- Page 14 ‧Max USB power supported to HDD/flash disk is 5V/1000mA. Please use the external power supply for the HDD/flash disk, if the HDD/flash disk require power supply higher than 1000mA. ‧Format your HDD/flash disk and/or SD card on WDVR840S first before using, following steps as shown in "storage setup" section.
- Page 15 RESET ON / OFF Before formatting and connecting the HDD to WDVR840S, please make sure the HDD is partitioned to single partition, as some HDD are pre-partitioned to multiple partitions. You may refer to HDD vendor official website description regarding to partition the HDD to single partition.
- Page 16 3. Connect the Ethernet cable from the BACK of the console to your router. In order to having live- view video from your WDVR840S anywhere in the world on your 4G/Wi-Fi enable smart devices. You will need to connect WDVR840S to the home router with an Ethernet cable.
-
Page 17: Live Screen Displays
Live Screen Displays This function allows you to change the camera views are displayed on-screen in Live View mode. Live View with Quad Display During LIVE VIEW in QUAD DISPLAY mode,tap any channel or screen for full screen display. * The red "V" sign shows which channel is currently selected. The camera audio will be displayed. Tap one channel Live-view full screen Tap again to return... -
Page 18: Quick Select Menu
QUICK SELECT MENU The WDVR840S system is controlled through mouse operation or touch screen. Tap on the Arrow icon, it brings up menu options that allow you change the settings on the monitor and camera. Quick Select Menu Function Tap screen or left-... -
Page 19: System Operation
SYSTEM OPERATION Main Menu This section allows you control the various actions and options that are availableon your WDVR840S. Tap screen or left-click the mouse. Tap or right-click the mouse to return live view. Main Menu Camera Setup Icon Left Mouse Button Available Options ‧... -
Page 20: Camera Setup
‧ Purchase of additional camera(s). ‧ Change original camera channel. Enable/Disable camera connection for camera(s) paired to the WDVR840S. If you disable the camera connection, live video streaming of that particular camera will no longer be available during the LIVE VIEW mode and there won’t be any recording... - Page 21 The WDVR840S system supports High and Normal resolution: RESOLUTION ‧ Normal resolution setting provides better frame rate and optimized for mobile device display. Select quality of video image: ‧ High quality for better video display quality, the system will lower the display frame rate as QUALITY compensation.
-
Page 22: Recorder Setup
‧ Make sure the memory card is inserted into the SD Card slot before recording video. ‧ You need to complete schedule setup first so that the system will allow motion record/ schedule REC. No schedule means WDVR840S will not perform the recording. Schedule Recording 1. - Page 23 Icon Main Function Setup Description Setup the recording schedule for any or all cameras: ‧ Select camera 1, 2, 3 or 4 to setup record method, date and time period individually. CAMERA SELECT ‧ Select camera all to setup, recording for all cameras connecting to the system.
-
Page 24: Detection Sensitivity
Motion Detection Sensitivity This function allows you setup the motion sensitivity for each camera. You have the selection of low, medium and high. 1. Select one camera that you would like to setup. 2. Choose motion sensitivity range. Motion Detection Sensitivity Enter Camera Select Icon Main... -
Page 25: Motion Area
Motion Area This section allows you to setup the motion area for each camera. By default, the entire view of the camera has been enabled to detect motion. You can click the checkbox to disable.Select the camera for MOTION AREA setup by clicking on camera 1, 2, 3 or 4. Tap on the grid to remote. The check sing where motion detection is no needed. - Page 26 Icon Main Function Setup Description Configure the length of record period upon motion trigger event: MOTION RECORD ‧ 30 seconds ‧ 60 seconds ‧ 120 seconds PERIOD Note: REC Time may be extended if the motion continues. Configure the length of alarm sound period upon MOTION ALARM motion trigger event: ‧...
-
Page 27: Event List
Event List This function allows you to search and play previously recorded videos that are stored on your hard drive. 1. Tap main menu icon to access event list screen. Main Menu Event List 2. Tap one or more camera(s) that you would like to display for playback. 3. - Page 28 4. The recording videos will display on screen. Then click a file to play the event. Main Function Setup Description EVENT PERIOD Predefine event search period by month/year. Use left/right arrow SEARCH to change search period. Touch screen available recorded video file(s) by camera. The system will indicate available recorded video file(s) of the camera selected within the search period via date highlight.
-
Page 29: System Setup
SYSTEM SETUP This function allows you to setup the system, including date setup, language, display, and power saving. Main Menu System Setup Date and Time You can configure the date and time using Up/Down arrows to adjust YEAR/MONTH/DATE/HOUR/ MINUTES. When done setting, tap the return icon or use the mouse to save and exit. Language This section allows you to setup the system language. - Page 30 Display Setup This section allows you to activate/deactivate the following icons on screen display: ‧ Signal Strength Indicator ‧ Time Stamp IDLE Display This section allows you to setup display mode during system idle. You can select Quad or Smart Quad screen display, and the time setup for auto-scan.
-
Page 31: Storage Setup
Storage Setup This section allows you to managemernt your storage. You can formate or overwrite your HDD or memory card. Storage Status Main Menu Select Storage Device for Recording Stroage Setup Security Code 1. Tap Network setup to access your security code. 2. - Page 32 The Network Connection status will be displayed on the view screen via the following icons: Network Connection is normal No Network Connection available. Please make sure the WDVR840S receiver is connected to the router via the Ethernet cable provided. Abnormal Network Connection.
-
Page 33: Setting Up Your Device
SETTING UP YOUR DEVICE The WDVR840S system allows you to remotely access the live video from your iPhone, iPad or Android mobile device. Add device 1. Download and install the "WDVR Cam" app from Google play or the App Store. Then launch the app. - Page 34 3. Tap the "scan QR code" to scan code located on the rear of the monitor. You can also enter ID directly. Then give the device a new name. Eenter the default password"123456" and save the setting once you have finished it. Android...
-
Page 35: App Introduction
APP INTRODUCTION The Home screen in the WDVR app provides easy access to all of your devices settings. Android Device List Live View 1. New: Tap the “New” icon to add new device 2. More: Tap the "MORE" icon, the more setting menu will display on screen 3. - Page 36 Tap to ddd new device/device list. Tap to enter the remote setting. Tap to access the push notification setting. Tap to access event list for video playback. Tap to starting recording video. Tap again to stop recording. Tap to connect/disconnect the device. Tap the icon to save a snapshot of your smartphone or tablet.
-
Page 37: App Main Control Menu
APP Main Control Menu You can access the app menu to control your device. Section Android Camera Setup Recorder Setup System Setup Storage Setup System Info Push Nitifcation... - Page 38 Modify the default password You can modify or delete the device from this section. For Android 1. Tap the device you would like to edit. Then the menu will display on screen. 2. Tap "Modify" the change the default password. 3.
-
Page 39: Push Notification
Push Notification This function allows you to enable/disable the push notification. For Android 1. Tap the Push Notification Setting 2. Click/unclick to enable/disable the push notification 3. Enter user name 4. Tap ”OK” when you're done. For iOS 1. Tap the icon 2. - Page 40 Playback You can access your device to playback the event video.The recorded video will store to the HDD or SD card. To select one storage you would ilke to playback video as well as choose one of the channel. 1. Choose either the HDD device or SD Card for video playback 2.
- Page 41 Record ON/OFF This section allows you to remotely record a video clip. Choose the one channel you would like to record. The clip video is saved to your storage(HDD device or SD card). Android...
-
Page 42: Remote Setting
Remote Setting This section allows you to control your device, including camera setup, record schedule, system setup, storage management, system information, and push notification setting. Pairing camera 1. Tap to pair a new camera. 2. Press the pair button at the back of the camera. 3. -
Page 43: Recorder Setup
Recorder Setup You can access and change the recording schedule for one or all cameras as well as enabling a schedule when holiday taken. The app offers 2 recording types, including time schedule and motion detection. Schedule 1. Tap one or all cameras that you would like to setup 2. - Page 44 Motion Sensitivity This section allows you can change the motion sensitivity for each camera. Regarding motion detection range, please refer to page 24. 1. Select one camera that you would like to edit. 2. Select motion sensitivity. Android...
- Page 45 Motion Area This function can be used to obscure all or part of your image for privacy. By default, the entire view of the camera has been enabled to detect motion. 1. Select a camera that you would like to edit. 2.
- Page 46 Recording Options This section allows you to setup the recording time for each recording file, which will save to your storage. Motion alarm function allows you to adjust the time duration between each alert. Record Length You can setup the recordng time for each recording file. Motion Alarm This function allows you to setup the time duration between each alert.
-
Page 47: System Setup
System Setup This section allows you to setup the system, including date, language, and display setting. Date Setup If the date and time is not correct, click the calendar icon to select the correct date. Android Lauguage Select a language you would like the system menus. Note: After you reset the language, all the system settings will be restored into factory default. - Page 48 Display You can enable/disenable setup signal indicator, and add recording time on video. Andriod ldle Display You can setup display mode during system idle. To select Quad or Smart Quad screen display, and the time setup for auto-scan. Android...
- Page 49 Power Saving This section allows you to setup power saving mode. There are 3 options you can setup ‧ Enter Power Saving mode after system idle for 5 minutes ‧ Enter Power Saving mode after system idle for 10 minutes ‧...
-
Page 50: Storage Setup
Storage Setup This function allows you select the recording files will be saved to the HDD drive or SD card. And if you would like to overwrite files when the card is full. Format the HDD drive or SD card, all files will be removed. -
Page 51: Push Notification Setting
Push Notification Seeting This section allows you enable/disable the push. Disable the push notification when you're sleeping or at work. For Android 1. Go to the more section to tap Push Notification Setting. 2. Click/unclick to enable/disable the push notification. 3. - Page 52 Interval This function allows you to setup interval time of the push. There are four options you can select how long you’ll receive the push. Your smart phone will receive the push immediately after first triggered. After that the camera will send the push according to interval time you setup. To avoid receiving the push frequency.
-
Page 53: Factory Default Setting
List From list section, you can see which smart devices currently receive push from the system. The app allows max 8 devices to receive the push. You may remove all devices from the push list by resetting the language. Factory Default Setting The system setting will go back to factory default after language reseted. -
Page 54: Trouble Shooting
TROUBLE SHOOTING Problem Possible Cause / Possible Solution ‧No Power supply to camera → Check power adapter and power cord connection ‧The camera is not paired with HDVR or signal disconnected → Unplug camera power then plug on again to reconnect. →... - Page 55 ‧Record schedule does not setup properly → Set proper schedule to each camera to enable recording ‧Storage media not ready → Use recommeded storage media brand/model/spec, check HDVR can not record appendix → Install/uninstall storage media AFTER HDVR is powered off. →...
-
Page 56: Product Specification
PRODUCT SPECIFICATION Receiver Unit Compression Format H.264 Video Resolution High Definition 1080P Viewing Options Full Screen/QUAD/Smart-QUAD Storage Media Internal 500GB SATA HDD x 1 (Optional, support upto 2TB); SSD compatible (not included) Memory card slot (up to ; for footage backup only; memory card not included) Motion Detection PIR On/Off setting for each camera... - Page 57 APPENDIX 1: COMPATIBLE LIST Wireless DVR Hard Disk Compatible List (External USB HDD) Category Manufacturer Model No. Form Factor USB Standard Capacity USB HDD Silicon Power 2.5” USB 3.0 500GB Transcend storejet 2.5” USB 3.0 500GB Toshiba 593400-A 2.5” USB 2.0 500GB WD Elements Elements portable...
- Page 58 APPENDIX 2: RECORDING CAPACITY 1CH VGA@High TF Card Flash Drive Hard Drive 11 hours 11 hours 22 hours 22 hours 16GB 45 hours 45 hours 32GB 92 hours 92 hours 500GB 60 days 120 days 4CH VGA@High TF Card Flash Drive Hard Drive 3 hours 3 hours...
Need help?
Do you have a question about the WDVR840S and is the answer not in the manual?
Questions and answers