
Subscribe to Our Youtube Channel
Related Manuals for DCS RF24TR2

Summary of Contents for DCS RF24TR2
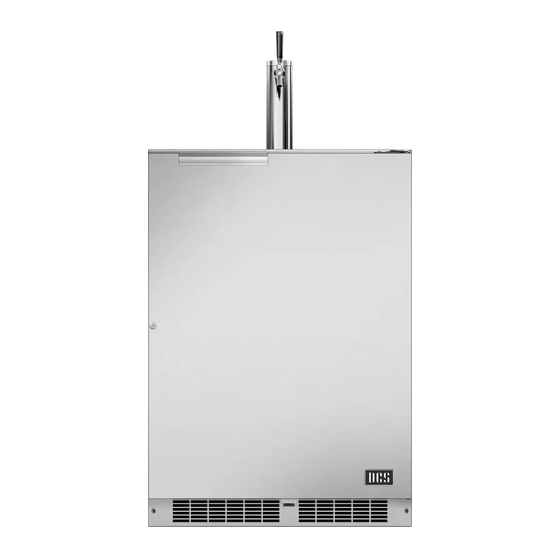
- Page 1 OUTDOOR BEER DISPENSER RF24TR2, RF24TL2, RF24BTR2, RF24BTL2 USER/INSTALLATION GUIDE US CA...
-
Page 2: Table Of Contents
CONTENTS Contents: Important Safety Instructions Safety information ...............2 Warnings and safety instructions appearing in this guide Unpacking your appliance ...........3 are not meant to cover all possible conditions and situa- Warranty registration............3 tions that may occur. Common sense, caution, and care Installing your appliance ............4 must be exercised when installing, maintaining, or operat- Cabinet clearances ............4... -
Page 3: Unpacking Your Appliance
NOTE: Inspect the product to verify that there is no ship- ping damage. If any damage is detected, call the shipper CAUTION and initiate a damage claim. DCS by Fisher & Paykel is not responsible for shipping damage. Dispose of the plastic bags which can be a suffocation DO NOT discard any packing material (box, pallet, straps) hazard. -
Page 4: Installing Your Appliance
INSTALLING YOUR APPLIANCE Select Location The proper location will ensure peak performance of your appliance. We recommend a location where the unit will Front Grille, be out of direct sunlight and away from heat sources. To keep this area ensure your product performs to specifications, the recom- open. -
Page 5: Electrical Connection
INSTALLING YOUR APPLIANCE WARNING Do not remove ground prong Electrical Shock Hazard • Do not use an extension cord with this appliance. They can be hazardous and can degrade product performance. • This appliance should not, under any circumstanc- es, be installed to an un-grounded electrical supply. •... -
Page 6: Installing The Anti-Tip Device
INSTALLING THE ANTI TIP DEVICE FOR FREESTANDING INSTALLATIONS Anti-Tip WARNING Bracket Leveling Leg • ALL APPLIANCES CAN TIP RESULTING IN INJURY. • INSTALL THE ANTI-TIP Bottom View of ⁄ " BRACKET PACKED WITH Beer dispenser (54.6 cm) THE APPLIANCE. • FOLLOW THE INSTRUC- TIONS BELOW Front of cabinet... - Page 7 INSTALLING THE ANTI TIP DEVICE FOR FREESTANDING INSTALLATIONS NOTE When the floor mounted anti-tip bracket is used the mini- mum adjusted height of the cabinet is increased by ⁄ " (9 mm). "V" notches Rear Leveling leg in bracket Figure 7a Screw ⁄...
-
Page 8: Product Dimensions Rf24T
24 ½" (62 cm) (86.4 to 88.9 cm) RF24BT (60.7 cm) (85.7 to 88.3 cm) (60.2 cm) (66.7 cm) (117.9 cm) (66.7 cm) (with optional DCS side trim kit) "H" PRODUCT DATA ELECTRICAL PRODUCT MODEL REQUIREMENTS*** WEIGHT 140 lbs RF24T, RF24BT 115V/60Hz/15A (63.6 kg) -
Page 9: Using Your Electronic Control
Time to reach set point varies based upon ambient temperature, temperature of product loaded, door openings, etc. DCS recommends allowing the unit to reach set points before loading. -
Page 10: Using Your Beer Dispenser
USING YOUR BEER DISPENSER Tools required for installation: This beer dispensing unit will support ⁄ barrel or ⁄ bar- rel. The double draft tower units can support two sixth ( ⁄ Flat bladed screwdriver barrels of beer. See chart below for quantity of beer in each Phillips screwdriver barrel size. - Page 11 USING YOUR BEER DISPENSER Single Dispense Tower Kit Double Dispense Tower Kit Connect ,etc..Connect ,etc..Figure 17 Figure 16 Figure 12 Double Single Dispense Hose clamps Dispense Tower use for connections Tower Hose clamps use for connections Figure 11 Coupler Figure 18 Figure 13...
- Page 12 USING YOUR BEER DISPENSER 4. If you are installing your keg refrigerator under a Rear of counter top counter you will need to drill 5 holes in the counter top ⁄ " to mount the tower. ⁄ " diameter (3.5 cm) hole located at the center of the tower for the beer typical ⁄...
- Page 13 USING YOUR BEER DISPENSER 8. Locate the CO tank in the corner of the refrigerator as shown in Figure 25 and secure with the chain. Close the faucet handle on the tower. 9. Hooking up the keg coupler to the keg: Verify the cou- pler is in the "OFF"...
-
Page 14: Co Regulator
USING YOUR BEER DISPENSER Regulator (Double Dispense Tower) Regulator (Single Dispense Tower) Your beer dispenser comes equipped with a 5 pound CO Your beer dispenser comes equipped with a 5 pound CO tank and a dual gauge regulator. The lower gauge should tank and a single gauge regulator. -
Page 15: Drain Kit
USING YOUR BEER DISPENSER AND CARE AND CLEANING Drain kit (All Models): Push faucet handle back toward The drain kit is shipped in Removable tower to close the faucet place and ready to use. To empty: Pull drain hose out of grate for clean- bottle cap, remove bottle from unit, unscrew cap and dis- ing sump area... -
Page 16: Keg Coupler Cleaning
CARE AND CLEANING Cleaning and Maintaining Dispensing System Unscrew knurled After removing the The dispensing system needs to be cleaned between usage to cap on faucet body handle the shaft will prevent spoilage and/or foul taste in your beer. and remove handle slide out the back of the assembly faucet... -
Page 17: Long Term Storage / Winterization
CARE AND CLEANING Long term storage / winterization: 1. Time to Winterize, when the daily low ambient tempera- ture is at or below 38°F (3.3°C). CAUTION Operating of the unit at ambient temperatures below the recommended Winterization temperature will void your war- ranty. - Page 18 CARE AND CLEANING 17. Leave door open and allow to completely dry out be- fore closing door. 18. Thoroughly clean the door gasket with anti-bacterial cleaner to be followed with clean rinse water to remove any residual chemicals. 19. Thoroughly clean the exterior with a cleaner approved for stainless steel .
-
Page 19: Stainless Steel Maintenance
STAINLESS STEEL MAINTENANCE Background Note: Stainless steel products should never be installed, or stored in close proximity to chlorine chemicals. Stainless steel does not stain, corrode, or rust as easily as ordinary steel, but it is not stain or corrosion proof. Stain- Whichever cleaning product you chose, it should be used less steels can discolor or corrode if not maintained prop- in strict accordance with the instructions of the cleaner... -
Page 20: Door Alignment
DOOR ALIGNMENT AND ENERGY SAVING TIPS Door alignment: The following suggestions will minimize the The door should be parallel to the sides and top of the ap- cost of operating your refrigeration appliance. pliance. If alignment is necessary the door may be adjusted by loosening the 2 screws which secure the door adjust- 1. -
Page 21: Troubleshooting
For warranty service, please contact your local service If the appliance appears to be malfunctioning, read through provider or DCS Customer Care at (888) 936-7872. Before this manual first. If the problem persists, check the trouble- you call, please have the following information ready: shooting guide below. -
Page 22: Warranty
All service under this Limited Warranty shall be provided beeps. by Fisher & Paykel Appliances Inc. or its Authorized DCS Service Agent during normal business hours. 8. Correcting damage caused by pests e.g. rats, cock- roaches etc. - Page 23 Please read this Use and Care Guide. If you then have any questions about operating the Product, need the name of your local DCS Authorized Service Agent, or believe the Product is defective and wish service under this Limited Warranty, please contact your dealer or call us at: TOLL FREE 1-888-936-7872 or contact us through our web site: www.dcsappliances.com...
- Page 24 DCSOUTDOOR.COM © Fisher & Paykel Appliances 2021. All rights reserved. The models shown in this guide may not be available in all markets and are subject to change at any time. The product specifications in this guide apply to the specific products and models described at the date of issue.
Need help?
Do you have a question about the RF24TR2 and is the answer not in the manual?
Questions and answers