Table of Contents
Advertisement
Quick Links
Look inside for:
Safety Definitions
Important Safety Information
Product Specifications
Parts & Features
Safety Decals
A
s s
e
m
b
y l
Engine Preparation
O
p
r e
t a
o i
n
M
a
n i
e t
n
a
n
c
e
Technical Service
Troubleshooting
W
r a
a r
n
y t
F
a r
n
ç
a
s i
E
s
p
a
ñ
l o
KEEP THIS MANUAL FOR FUTURE REFERENCE
10/08/12
Operator's Manual
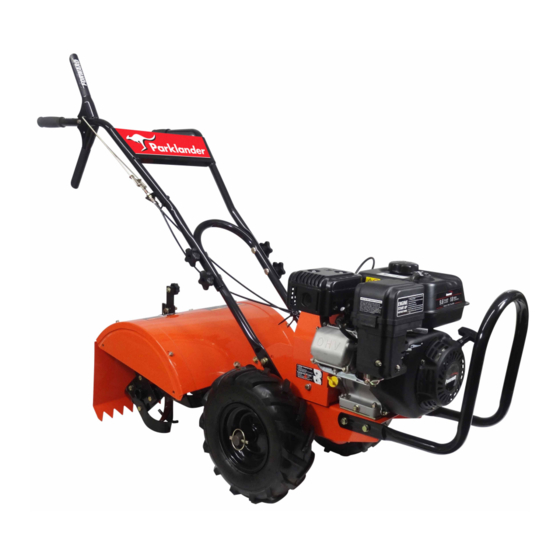
Rear Tine
Rotary Tiller
Page
1
2-4
5
5
6
7
9 -
10
1 1
1 -
5
1
6
1 -
9
19
20
2
1
2 -
4
2
5
2
6
Printed in China
MODEL NO: PRTT-460
A202393
Advertisement
Table of Contents

Summary of Contents for Parklander PRTT-460
- Page 1 Operator’s Manual Rear Tine Rotary Tiller MODEL NO: PRTT-460 Look inside for: Page Safety Definitions Important Safety Information Product Specifications Parts & Features Safety Decals Engine Preparation Technical Service Troubleshooting ç ñ KEEP THIS MANUAL FOR FUTURE REFERENCE 10/08/12 Printed in China...
-
Page 2: Safety Definitions
Safety Definitions • Save these instructions Safety Alert Symbols The following symbols are used on the product and in this manual to alert the operator of potential safety hazards. Read them carefully, and understand their meaning. Indicates an imminently hazardous situation which, if not avoided, will result in death or serious injury. DANGER Indicates a potentially hazardous situation which, if not avoided, could result in death or serious injury. -
Page 3: Important Safety Information
Important Safety Information • Save all instructions RESPONSIBILITY OF OPERATOR 1. Carefully read and follow these safety instructions. Failure to do so can result in serious injury. 2. Know your product. Read and understand this manual before use. Compare the illustrations to unit. Learn location and function of all controls. -
Page 4: Fuel Safety
Important Safety Information (Continued) • Save all instructions • It is advisable to wear protective headgear to protect against being struck by small flying particles, or being struck by low hanging branches, twigs, or other objects, which may be unnoticed by the operator. WARNING •... -
Page 5: Storage Safety
Important Safety Information (Continued) • Save all instructions STORAGE SAFETY • Always refer to the operator’s manual instructions for important details if the tiller is to be stored for an extended period. • Never store the tiller with fuel in the fuel tank inside a building where ignition sources are present such as water heaters, space heaters, clothes dryers, etc. • To reduce fire hazard, keep tiller free of grass, leaves, or other debris build-up. -
Page 6: Product Specifications
Product Specifications • Save all instructions Unit Weight ......154 lb (70 kg) Spark Plug Gap . -
Page 7: Safety Decals
Safety Decals • Save all instructions This tiller has been designed and manufactured to provide you have any questions regarding their meaning or how to you with the safety and reliability you would expect from an comply with these instructions, reread the complete safety industry leader in outdoor power equipment manufacturing. - Page 8 Assembly • Save all instructions Read and follow the assembly instructions. Do not discard any parts or materials until the unit is assembled. References to the right or left side of the tiller are from the viewpoint of the operator’s position behind the tiller. WARNING Do not operate tiller if it is damaged or not completely and correctly assembled.
-
Page 9: Install The Wheels
Assembly (Continued) • Save all instructions Assembly Instructions The tiller comes fully assembled except for a few parts. The following instructions will help you complete the tiller assembly. INSTALL THE WHEELS (See Figure 2) 1. Remove the locking pins from the axle. 2. -
Page 10: Attach Lower Handle
Assembly (Continued) • Save all instructions ATTACH LOWER HANDLE (See Figure 4) 1. Loosen the lower handle bolts. 2. Align the lower handle holes to the middle height adjustment holes in the transmission cover and install the M10 x 25mm flange head bolts, lock washers and nuts. -
Page 11: Engine Preparation
Engine Preparation (Continued) • Save all instructions Engine Oil CAUTION Engine shipped without oil. Failure to add oil will result in serious engine damage. SAE 10W-30 A bottle of engine oil is included with your tiller. Refer to the chart on the right for alternative oil types to use at different temperatures. -
Page 12: Operation
Operation • Save all instructions Pre-Start Inspection 1. Make sure all safety guards are in place and all nuts and CAUTION bolts are secure. Please do not start your tiller until you have read the 2. Check oil level in engine crankcase. See your engine manual that came with your tiller, and the sections in this manual for procedure and specifications. - Page 13 Operation (Continued) • Save all instructions Idle Speed WARNING Use the ˝low˝ position on the throttle lever to reduce stress on Temperature of muffler and near by areas may exceed 150˚F. the engine when tilling is not being performed. Lowering the Avoid these areas. Do not move choke control to choke to stop engine speed to ˝idle˝ will help extend the life of the engine, engine, backfire or engine damage may occur. To stop wheels as well as conserve fuel and reduce the noise level of the and tines at any time, release drive safety control levers to neutral equipment.
- Page 14 Operation (Continued) • Save all instructions Drive Safety Control Levers CAUTION Do not operate both ˝FORWARD˝ and ˝REVERSE˝ drive safety control levers at the same time. This information is provided here only to introduce the controls. Do not start the engine at this time. Starting and operating instructions are given on page 11. Please read this section and all operating and safety instructions before starting your tiller. •...
-
Page 15: Handlebar Height Adjustment
Operation (Continued) • Save all instructions Adjustments WARNING Engine should be off before ad- justing any controls. Extreme caution should be used when operating tiller in the reverse direction. FRONT WHEEL LOCK PINS (See Figures 2 and 11) Place wheels in tilling position. Wheel lock pin in free-wheel position 1. -
Page 16: Belt Tension Adjustment
Operation (Continued) • Save all instructions Adjustments (Cont.) BELT TENSION ADJUSTMENT (See Figure 12) Proper belt tension is critical to good performance. After 1/2 hour of operation, all cables may have to be adjusted due to initial stretch. Thereafter, check tension after every 2 hours of operation. -
Page 17: Maintenance
Maintenance • Save all instructions Maintenance Schedule WARNING Before performing any maintenance, turn engine off and remove the wire from the spark plug to prevent accidental starting and serious injury. IMPORTANT: The warranty on this tiller does not cover items that have been subjected to operator abuse or negligence. To receive full value from the warranty, the operator must maintain the tiller as instructed in this manual, and only use genuine replacement parts. -
Page 18: Transmission Pulley
Maintenance (Continued) • Save all instructions Servicing the Tiller The following information will help you make the necessary checks and perform the procedures required to follow the normal care recommendations made for your tiller unit. If you prefer, your local authorized dealer can make these checks and perform the required procedures for you. - Page 19 Maintenance (Continued) • Save all instructions Engine Maintenance ENGINE MAINTENANCE CLEAN TINE AXLE SHAFT Refer to the engine manual included in your parts packet 1. Turn off engine. Engine must be cool. for information on engine maintenance. Your engine 2. Remove spark plug wire and secure from spark plug. manual provides detailed information and a maintenance 3.
- Page 20 Maintenance (Continued) • Save all instructions How to Prepare for Storage WARNING Never store the tiller indoors with fuel in the fuel tank. Never store in an enclosed, poorly ventilated area where fumes could reach an open flame, a spark or a pilot light as on a furnace, water heater or clothes dryer. Allow engine to cool before storing unit. WARNING Do not remove gasoline while inside a building, near a fire, or while you smoke. Gasoline fumes can cause an explosion or a fire. NOTE: A yearly checkup or tune-up at an authorized service center will make sure that the tiller will provide maximum per- formance for the next season.
-
Page 21: Troubleshooting
Troubleshooting • Save all instructions PROBLEM POSSIBLE CAUSE(S) SOLUTION(S) Engine difficult to start 1. Out of fuel 1. Add fresh fuel 2. Engine Switch Off 2. Turn engine switch on 3. Engine is not primed. 3. Turn choke on 4. Attach spark plug wire to spark plug 4. -
Page 22: Warranty
Warranty (Continued) • Save all instructions Limitation of Liability (cont.): SYSTEMS COVERED BY THIS WARRANTY: PARTS DESCRIPTION: Carburetor assembly (if so equipped) and its internal compo- Fuel Metering System nents; fuel filter (if so equipped), carburetor gaskets, fuel pump (if so equipped) Air Induction System Intake pipe/ manifold, air cleaner...