Advertisement
Quick Links
a division of
Manual and
Technical
Specifications
for the
The contents of this Manual must be read and
Saviour Technical
fully understood before using the Saviour
Tactical stretcher. Incorrect use will reduce
Stretcher
service life and may endanger the casualty.
Publication reference:
BLKTECMan-001 Version 1
Advertisement

Related Manuals for Saviour Medical Saviour Technical Stretcher


Summary of Contents for Saviour Medical Saviour Technical Stretcher
- Page 1 Manual and Technical Specifications for the The contents of this Manual must be read and Saviour Technical fully understood before using the Saviour Tactical stretcher. Incorrect use will reduce Stretcher service life and may endanger the casualty. a division of Publication reference: BLKTECMan-001 Version 1...
- Page 2 • All buckles and keepers are 316 This Equipment conforms to CE 93/42/EEC Class 1 and is covered by EEC Directive 93/42/EEC CLASS 1 DEVICE. STAINLESS STEEL This Equipment is registered with the Competent Authority • Main body and inner skin are LDPE (UK) and confirms toArticle 11(5) Annex VII Section 3. • Head Hugger and Carry Bag are PVC inTRoducTion: Saviour Technical Stretcher • Head Haul Eyelet is 316 STAINLESS The Saviour Technical Stretcher is a rapid response stretcher STEEL and NYLON 66 to evacuate casualties safely from hazardous areas. Provision • Eyelets for Foot Loop are NICKLE is made for up to six persons carrying and two Head Haul PLATED BRASS Eyelets which can be used in conjunction with the lifting • Head Haul Strop is POLYPROPYLENE...
- Page 3 idenTificaTion of paRTS liST KeY To paRTS liST: Non-replaceable items OPTIONAL EAR – OPEN CUTOUTS IN HEAD A. MAIN SKIN HUGGER INNER SKIN Replaceable straps: 1. Chest strap – closure side with handle 1a. Chest strap – buckle side with handle 2. Waist strap –...
- Page 4 Saviour Technical Stretcher: GeneRal noTeS foR pacKaGinG and STRappinG Below are listed the important points to be considered before packaging and strapping the casualty. The following three pages contain illustrated guides of the sequences for packaging and strapping a casualty into the Saviour Technical stretcher. Any injuries present MUST be taken into account before packaging and transporting a casualty. If neck injuries are present, or suspected, a Cervical collar MUST be used. Medical devices should be fitted by a suitably qualified person.
- Page 5 caSualTY pacKaGinG SeQuence Saviour Technical Stretcher: Note: Any injuries present must be taken into account when packaging. Stretcher Loading: Packaging the casualty: • • All carry handles 200 kg Remove the stretcher from the carry bag and unclip the closure strap. • • Closure straps and buckles 200 kg Unroll the stretcher, folding it back on itself so that it lies flat alongside • the casualty. Head haul eyelet 200 kg • • Lay the stretcher beside the casualty with the head hugger slightly Foot loop 100 kg • higher than the casualty’s head, making sure all the straps are clear, Head haul strop 15 kN...
- Page 6 caSualTY STRappinG SeQuence Saviour Technical Stretcher: Note: Any injuries present must be taken into account when strapping. Strapping the casualty: Strapping the casualty: 1. Fasten and tighten the Chest strap first. Pass the 3. Next fasten and tighten the Hip strap. For an straps across the chest, keeping the casualty’s unconscious casualty, their hands may either be arms out. The carry handles should be located secured in their clothing or tied in place using the under the casualty’s arms as shown on Figure 3. loose end of the hip strap as shown on Figure 5. Figure 3 Figure 5 2. Next, fasten and tighten the Waist strap as shown 4. Use the foot loop to form a figure of eight around on Figure 4. the feet as shown on Figure 6. Padding around the ankles and legs should be added if required. Figure 4 Figure 6...
- Page 7 5. Once the figure of eight is complete, secure the 8. Fold up the three sides of the head hugger and final cross strap. This should be secured where it secure using the velcro strap above the forehead. lies on top of the foot loop as shown on Figure 7. Secure the top panel to the sides with the velcro tabs. DO NOT use the chin strap if a collar is not used (as shown on Figure 10) as this can choke the casualty. Figure 7 Figure 10 6. Now fasten the diagonal straps across the chest. 9. If a collar is being used, attach the velcro chin strap Secure the strap over the casualty’s left shoulder across the collar and to the head hugger as shown first. on Figure 11. Figure 8 7. Then secure the strap over the casualty’s right shoulder. Proceed to tighten up both shoulder straps remembering not to overly tighten and restrict the casualty’s ability to breathe. Figure 9 Figure 11...
- Page 8 • When evacuating up or down a steep slope a head rope should be used deployed from a suitably secured haul team. Rescuers may lift the stretcher whilst the haul party undertakes a co-ordinated haul (or lower) to ensure a smooth passage. On steep slopes the security of the individual rescuers must be addressed. • If the Saviour Technical stretcher is vertically lifted or lowered then it is recommended that the casualty is secured by a separate lifeline that is belayed separately to the haul rope. To attach the lifeline to the casualty it is recommended that is correctly attached to a full body harness fitted to the casualty. Do not use any other part or component of the stretcher to attach a security lifeline. • The Saviour Technical stretcher , with a casualty in place, may be fitted directly into a suitable basket stretcher without decanting the casualty. The life, security and safety of the casualty is in the hands of the rescue team and all steps...
- Page 9 uSe of The dRaG haRneSS Saviour Technical Stretcher: There are two drag harnesses, one at the head end and one at the foot end. On removing the protective sheath, a tape loop is released that is Forward Drag permanently attached through metal eyelets on the stretcher. Placing the loop over the head and around the shoulders will allow the direction of travel rescuer to drag or pull the casualty in the required direction while having their hands free to carry out other duties.
- Page 10 Saviour Technical Stretcher: hoRiZonTal haul The Saviour Technical stretcher is rated at 200 Kg for horizontal hauling via the four eyelets on the sides of the stretcher. Once the casualty is fully secured into the Saviour Technical stretcher, connect the lifting strop to the stretcher eyes. If using the standard fixed length lifting strop, make sure that the coloured indicator on the strop strap matches the eyelet colour.
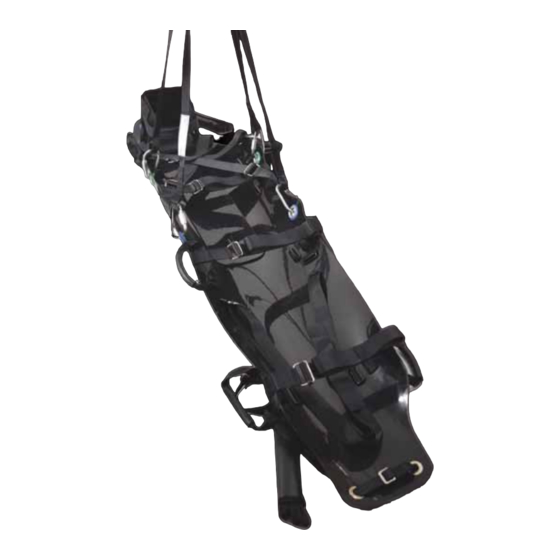
- Page 11 Saviour Technical Stretcher: VeRTical haul The Saviour Technical stretcher is rated at 200 Kg for vertical lifting from the top eyelets using a suitable strop. As this only effects a single point of contact with the casualty, a second safety line secured to the casualty is always recommended. In order to make the vertical haul easier, it is also recommended that the upper drag harness be removed from the stretcher to allow easy attachment of the strops. The lower drag harness can be used to stabilise the stretcher during vertical hauling if required.
- Page 12 Saviour Technical Stretcher: MainTenance The Saviour Technical stretcher is made from materials which will not corrode in most harsh environments but may be subjected to damage or wear and tear during practices and use. It is recommended that after each use or at intervals of not more than six months the unit is inspected by a competent person and the results recorded. Each unit has a unique serial number. • Check the outer skin for tears or worn patches. • Check the slots in the skin that attach the straps and carry handles for splits. • Check there is no distortion to the skin around the Head Haul Eyelet. • Check the edges of the skin for tears or splits. • Check all straps and carry handles for cuts or wear. Take particular notice of the strap area around buckles. If cuts or fraying is present quarantine the stretcher and replace strap(s). • Check Head Haul strop is not worn, cut or frayed. • Check that the Velcro fasteners are clean and secure correctly. • Check the Carry bag is not damaged and the attachment and closure Velcro straps are in good order.
- Page 13 Saviour Technical Stretcher: cleaninG and SToRinG • The stretcher should be stored, after cleaning and inspection, in the Carry bag provided. • It is recommended that a tagging system is used to ensure that a stored unit has been cleaned and inspected since last use. • It is recommended that the stretcher is inspected at intervals not exceeding six months. • The stretcher should thoroughly rinsed in cold fresh water after every use. A mild detergent may be used if rinsed afterwards. •...
- Page 14 a division of Publication reference: BLKTECMan-001 Version 1...
Need help?
Do you have a question about the Saviour Technical Stretcher and is the answer not in the manual?
Questions and answers