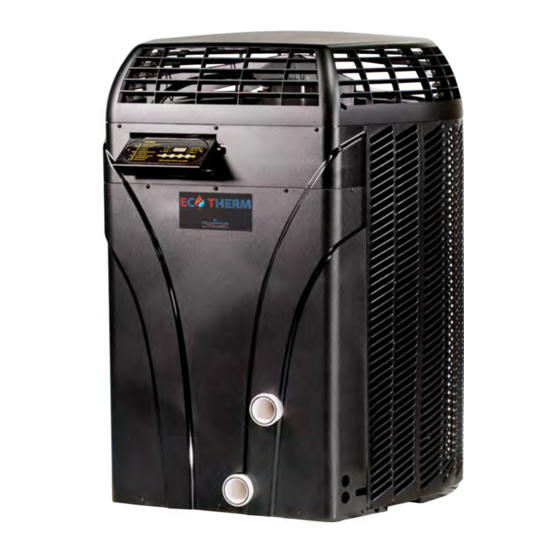

Summary of Contents for Ecotherm AquaCal AutoPilot
- Page 1 Installation Manual Important Read this document before operating / installing this product LTP0108 REV 1...
-
Page 3: Table Of Contents
Table of Contents Contacts Safety Instructions 1 - Installation 1.1 Dimensions 1.2 Positioning Equipment 1.3 Clearances 1.4 Plumbing 1.4.a Plumbing Requirements 1.4.b Plumbing Diagrams 1.4.c Water Connections to Heat Pump 1.4.d In-Line Chlorine Feeders 1.4.e Water Flow Rates 1.4.f Adjusting Water Flow Using ΔT (Delta-T) 1.4.g Adjusting Water Pressure Switch 1.5 Electrical 1.5.a Electrical Requirements... - Page 4 3.2 Planned Maintenance 3.3 Winterizing 4 - Appendix 4.1 Identifying Model Specifications 4.2 Weights 4.3 Heating Recommendations 4.4 Cooling Recommendations 4.5 Available Accessories 5 - Troubleshooting 5.1 Fault Codes 5.2 Issues and Resolutions...
-
Page 5: Contacts
Contacts For further assistance, please contact the installing dealer of this product. To better assist you, please have the heat pump model and serial number available. See "Identifying Model Specifications" on page 42. Product Information: Website http://millenniumbuyinggroup.com/our-members/ Service Information: Website www.AquaCal.com/request-heat-pump-service/ Phone (1) 727-823-5642... - Page 6 Failure to heed the following may result in injury or death. WARNING Installation and repairs must be performed by a qualified technician. The heat pump contains refrigerant under pressure. Repairs to the refrigerant circuit must not be attempted by untrained and / or unqualified individuals. Service must be performed only by qualified HVAC technicians.
-
Page 7: Installation
1 - Installation Failure to heed the following may result in injury or death. WARNING Installation of this equipment by anyone other than a qualified installer can result in a safety hazard. The information contained throughout the "Installation" section is intended for use by qualified installation technicians familiar with the swimming Pool / Spa safety standards. - Page 8 (Eco Therm ET075) (Eco Therm ET095 and ET110) Page - 4...
- Page 9 (Eco Therm ET135) (Eco Therm ET120R and ET165R) Page - 5...
-
Page 10: Positioning Equipment
1.2 Positioning Equipment Failure to heed the following may result in damage to equipment. NOTICE Do not install equipment inside of a building. Outdoor Use Only Do not install equipment inside of a room or building. Heat Pumps require unobstructed air flow for proper operation. Heat Pumps should never be installed indoors or in a location where air flow is restricted. -
Page 11: Clearances
1.3 Clearances Proper air circulation is required for the heat pump to operate efficiently. The following diagrams show the minimum clearances required for the proper operation of the heat pump. Avoid storing chemical containers near the heat pump. The chemicals can cause equipment damage. Avoid placing objects near or on top of the heat pump. -
Page 12: Plumbing
1.4 Plumbing 1.4.a Plumbing Requirements Failure to heed the following may result in damage to equipment. NOTICE Do not use glue on the threaded portion of the equipment’s unions. A glued-in- place union will prevent the equipment from being properly winterized. The heat pump must receive water flow within the specified minimum ranges under worst-case conditions such as a fouled water filter. - Page 13 Heat Pump with water flows greater than maximum listed flow rate See "Water Flow Rates" on page 13. Heat Pump with Spillover Spa (One filter Pump) Page - 9...
- Page 14 Heat Pump with Spillover Spa (Two filter Pumps) Heat Pump with Solar Panels in Plumbing Circuit Heat Pump with Gas Heater backup Page - 10...
- Page 15 Multiple Air Source Heat Pumps Multiple Air Source Heat Pumps (Reverse Return Detail) Page - 11...
-
Page 16: Water Connections To Heat Pump
1.4.c Water Connections to Heat Pump Heat Pump union sizes are specified on diagrams. Connections to site plumbing are made via PVC solvent cement to the female slip socket of the plumbing unions. Plumbing unions are available from Eco Therm. See "Available Accessories" on page 44. Failure to heed the following may result in damage to equipment. -
Page 17: In-Line Chlorine Feeders
1.4.d In-Line Chlorine Feeders Place in-line chlorinators downstream from the heat pump and as low in elevation as possible. If an erosion type feeder is used, always install a Hartford Loop to protect internal heat pump components. Heat Pump with Hartford Loop 1.4.e Water Flow Rates Maintain water flow rates as indicated. -
Page 18: Adjusting Water Flow Using Δt (Delta-T)
Check for improper valve settings. A partially closed valve after the filter, or a full-open bypass around the heat pump, will cause insufficient water flow through the heat pump. The maximum static pressure (or operating pressure) is 50 pounds-per-square-inch (PSI). These specifications relate to the heat pump only. -
Page 19: Adjusting Water Pressure Switch
MODEL TEMPERATURE ET055 2° to 5° F ET075 3° to 6° F ET095 3° to 7° F ET110 3° to 7° F ET135 3° to 7° F ET120R 3° to 7° F ET165R 3° to 8° F Table 1 - Temperature Chart PLEASE NOTE - Temperature differences are based on pool water temperatures of 69°... -
Page 20: Electrical
1. Remove heat pump access panel. See "Access Panels" on page 20. 2. Locate the water pressure switch. It will be outside and along the bottom edge of the electrical enclosure. Exact location varies by model. 3. Activate filter pump. 4. - Page 21 Electrical Standards Standards Title NFPA 70 The electrical installation must conform to the current version of the NEC, and all applicable local and state codes NFPA 70 Article 440 Standard for Safety for Electric Spas, Equipment Assemblies, and Associated Equipment NFPA 70 Article 680 Standard for Safety for Swimming Pool Pumps, Filters, and Chlorinators...
- Page 22 Minimum and Maximum Operating Voltage The heat pump must operate within specified voltages. Failure to heed the following may result in damage to equipment. NOTICE Operating equipment under higher or lower voltage conditions may result in damage to your compressor, motors or other electrical components. This damage will not be covered by product warranty.
-
Page 23: Incoming Power Access Holes
1.5.b Incoming Power Access Holes (Eco Therm ET120R and ET165R (Eco Therm ET055 and ET075) (Eco Therm ET095, ET110, ET135) Page - 19... -
Page 24: Access Panels
1.5.c Access Panels (Eco Therm ET120R and ET165R) (Eco Therm ET055 and ET075) (Eco Therm ET095, ET110, and ET135) 1.5.d Verifying Transformer Setting Transformer voltage must be confirmed and set correctly depending on the measured voltage found on the site. Incorrect settings may cause heat pump damage. The following procedure will allow the installer to set the heat pumps transformer for the appropriate site voltage. -
Page 25: Three-Phase Adjustment
1. Turn heat pump on by adjusting the thermostat to call for heating. If more Example of heat pump than one heat pump is on site, turn them all on. Allow time for all heat pump transformer compressors to activate. (Varies between models) 2. -
Page 26: Connecting An External Controller
1.5.g Connecting an External Controller To support a direct connection to an external controller, Eco Therm heat pumps are equipped with optional terminal blocks. These terminals are on the microprocessor located on the low-voltage side of the electrical enclosure. Failure to heed the following may result in injury or death. WARNING This section is only for qualified installers who are familiar with swimming pool and spa safety standards. -
Page 27: Programming For An External Controller
Three-wire controller (with "OFF" position): 1. Deactivate power to heat pump. 2. Remove heat pump electrical access panel. 3. Route the control wiring to the low voltage side of the electrical enclosure. Follow all National Electric Codes (NEC) unless State or Local guidelines supersede. 4. - Page 28 Press the "Pool / Press "Up" or Spa" button until "Down" button. JAO is displayed. "0" - none "2" - two-wire "3" - three-wire Using FS2 interface Press "Up" or Press "Up" and Press "Pool / Spa" Press "Pool / Spa" "Down"...
-
Page 29: Service Level Programming
1.6 Service Level Programming Failure to heed the following may result in damage to equipment. NOTICE Service Level Programming must only be attempted by authorized personnel. Unauthorized adjustments in the Service Menu (beyond the LOC menu) may void the heat pump's warranty. Resetting the microprocessor to access a locked keypad will reset all settings to factory default including any installer-entered configuration. -
Page 30: Service Level Factory Defaults
1.6.a Service Level Factory Defaults Certain programming options have been preset at the factory. These options can be overwritten for certain site- specific conditions. Table 3 - Default Program Parameters Chart Default Code Description Range Value Call-Flex Set to off at the factory. Options Pool Dead- Band... -
Page 31: Enter Service Level Programming
1.6.b Enter Service Level Programming Press "Up" or Press "Up" and Press "Pool / Spa" Press "Pool / Spa" "Down" to "Down" buttons button once. button until LOC is passcode. Default is simultaneously until displayed. "17". CF1 appears. Programming for a Relay Switch Configure heat pump for a relay or flow switch. -
Page 32: Cleaning Equipment After Installation
Reset to Factory Defaults Settings Failure to heed the following may result in damage to equipment. NOTICE Using this option will reset ALL settings to their factory defaults including external controller settings and sensor calibrations. DO NOT perform this operation if unsure of site specific settings or how to reset them on the heat pump. - Page 33 Cleaning 1. Wash outside cabinet using a low-pressure water hose. A high-pressure water stream will cause damage to the aluminum fins of the heat pump. This damage is not covered under product warranty. 2. While the heat pump is still wet, use an approved cleaning agent to clean the exterior of the heat pump. Do not use chemicals on the display panel.
-
Page 34: Operation
2 - Operation 2.1 Display Door (Only available on select equipment) The display panel is located in a door compartment on the front of the heat pump. This compartment is designed to protect the display against harsh weather. It can also be padlocked for extra security. Press the bottom of the panel to open the display panel door. -
Page 35: Buttons
2.4.a Buttons Buttons Description Sliding your finger across the buttons from left to right will Display Lock temporarily disable the display lock. Pool / Spa Select either the pool or the spa thermostat. Used to increase temperature set point and navigate Up Arrow though menu options. -
Page 36: Indicator Lights
2.4.c Indicator Lights Indicators Description Pool The Heat Pump is referencing the pool thermostat. The Heat Pump is referencing the spa thermostat. Indicates the unit is heating the water. Heating Please note - the compressor must be operating before this light will illuminate. -
Page 37: Selecting Celsius Or Fahrenheit
Table 6 - Factory Defaults Default Code Description Range Value Heat Pump deactivated. Heat water to point set thermostat. Cool water to point set thermostat. Set to maintain a water temperature set on the thermostat. Celsius / 0 = Celsius Fahrenheit 1 = Fahrenheit Selection... -
Page 38: Setting Operating Mode
2.5.c Setting Operating Mode 1. Press "Mode / Enter" button until desired mode is displayed. 2. After a certain amount of time, the display will show the selected mode and current water temperature. Heating Mode - After fan and compressor starts, the red "Heating" light will activate. Cooling Mode - After fan and compressor starts, the blue "Cooling"... -
Page 39: User Lock Option (Enable)
2.5.e User Lock Option (Enable) The user-lock feature allows the heat pump display panel to be "locked". This can prevent unauthorized temperature adjustments in commercial applications. Do not confuse a user-lock with the display lock. See "Wake Up Heat Pump" on page 30. If LOC is briefly displayed, followed by a "0", the heat pump is already locked. -
Page 40: User Lock Option (Disable)
2.5.f User Lock Option (Disable) Hold "UP" and Use "UP" button to Press "Pool / Spa" Press "POOL / "DOWN" buttons enter existing button to unlock. SPA" button until until CF1 is password. ULC is displayed displayed. Press "DOWN" button until "0" is displayed. -
Page 41: Operating Heat Pump (With An External Controller)
2.5.h Operating Heat Pump (With an External Controller) Controller with an internal thermostat control Activating Heat Pump 1. Set the desired temperature at the external controller. 2. Use the external controller to select either the "Pool" or "Spa" to heat. Deactivating Heat Pump Set the external controller to "OFF". -
Page 42: Maintenance
3 - Maintenance 3.1 Water Chemistry Check water chemistry regularly and maintain within recommended levels. Standards vary in different residential and commercial applications. Follow all local applicable codes. Failure to heed the following may result in damage to equipment. NOTICE Do not allow water to flow through heat pump when refinishing or acid washing a pool. -
Page 43: Winterizing
Recommended Inspection Checklist: 1. Clean Evaporator Coil 2. Check Contactor Points 3. Check Fan Capacitor Values 4. Check Fan Blade Clearances 5. Clean Heat Pump Cabinet 6. Check Flow / Pressure Switch 7. Apply Rust Inhibitors (As applicable) 8. Verify / Check Air Flow Delta 9. - Page 44 Light Freeze Conditions A light freeze is when the ambient air temperature falls below 32 degrees Fahrenheit for less than 8 hours. Typically during light freeze conditions circulating (or moving) water will not freeze. Temporarily activate the filter pump for continuous operation during light freeze conditions. Hard Freeze Conditions A hard freeze is when the ambient air temperature falls below 32 degrees Fahrenheit for more than 8 hours.
- Page 45 Titanium Tube-in-Tube Exchanger 5. Reinstall front access panel. Titanium 6. Disconnect the plumbing to the heat pump at connection unions (removal is counter- Tube-in- clockwise). Tube 7. Allow water to drain completely from the heat pump. Expect to see a lot of water drain out at first, and then a small amount to continue to drain out over a long period.
-
Page 46: Appendix
4 - Appendix 4.1 Identifying Model Specifications 1. Find Data Plate - The data plate is usually posted on the side of the equipment or the inside of the heat pump's Data Plate Example access plate. 2. Find the model number on the data plate. The first letters and numbers indicate the model type. -
Page 47: Weights
4.2 Weights NOTE: Specifications subject to change. Model Type Model Number Install Weight Eco Therm ET055 175 Pounds Eco Therm ET075 200 Pounds Eco Therm ET095 240 Pounds Eco Therm ET110 245 Pounds Eco Therm ET135 262 Pounds Eco Therm ET120R 268 Pounds Eco Therm... -
Page 48: Available Accessories
4.5 Available Accessories Accessories may be purchased through an authorized dealer of Eco Therm products. For further assistance, please see "Contacts" on page 1. 5 lb Bypass Valve Kit (# STK0135) When high flow rates are outside recommended specifications, please use this kit or an alternative bypass valve system. -
Page 49: Troubleshooting
5 - Troubleshooting 5.1 Fault Codes A fault code indicates a specific issue or condition that will require action before the equipment can resume operating. Please perform the following troubleshooting. If the issue reoccurs, please see "Contacts" on page 1. Failure to heed the following may result in injury or death. - Page 50 CEr Indicator ISSUE This can indicate a loose or damaged communication cable. RESOLUTION A qualified technician should check the cable from control board to display assembly for a loose connection or visible damage. CSE Indicator ISSUE This is a control system error. RESOLUTION Deactivate then reactivate power to reset controls.
- Page 51 HP5 Indicator ISSUE The heat pump has locked due to five HP (high-pressure) faults during one call for heating. RESOLUTION 1. Deactivate then reactivate power to the heat pump to clear error. 2. Troubleshoot the high-pressure issue causing the error. See "HP Indicator" on page 46. LP Indicator ISSUE The refrigerant system’s low-pressure switch is showing as open.
-
Page 52: Issues And Resolutions
5.2 Issues and Resolutions Failure to heed the following may result in injury or death. WARNING Repairs must not be attempted by untrained or unqualified individuals. The heat pump contains refrigerant under pressure. Repairs to the refrigerant circuit must not be attempted by untrained or unqualified individuals. Service must be performed only by qualified HVAC technicians. - Page 53 Heat Pump Won’t Shut Off PLEASE NOTE When heat pump is set to " OFF ", the display will show either the water temperature or FLO . 1. Confirm the heat pump has reached the desired temperature set on the thermostat. The heat pump will continue to run until the set temperature is reached.
- Page 54 The water may be normal condensation produced as a by-product of the heat pump's refrigeration process. The heat pump can produce 8 to 10 gallons of condensation per day depending on the humidity of the ambient air. Determine if the water is condensation or a possible leak. Ice Forming on the Heat Pump Why ice and frost appear: 1.
Need help?
Do you have a question about the AquaCal AutoPilot and is the answer not in the manual?
Questions and answers