Table of Contents
Advertisement
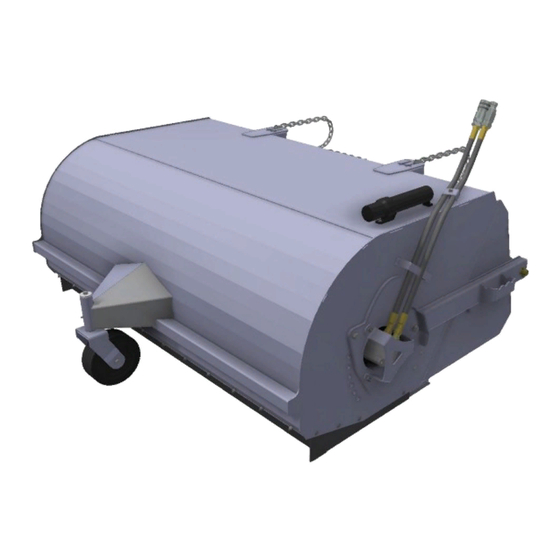
BR Series Hydraulic Rotary Bucket Broom
Keep this manual with the machine at all times
!
Do not attempt to operate the equipment without thoroughly
reviewing this manual for safe and proper operation.
Rev 210819
BRB72, BRB84, BRB96
CAUTION
!
Operational Hazard
Personal Protection Equipment
(PPE) is required when operating
or maintaining this machine.
PRINTED IN CANADA
HORST WELDING
8082 Rd 129
Listowel, ON N4W 3G8
Canada
519-291-4162
1-866-567-4162
Fax 1-519-291-5388
www .hlaattachments.com
sales@horstwelding.com
www.horstwelding.com
BRB84
SNL00001
HA00107
Advertisement
Table of Contents

Related Manuals for HLA BR Series

Summary of Contents for HLA BR Series
- Page 1 519-291-4162 1-866-567-4162 Fax 1-519-291-5388 www .hlaattachments.com sales@horstwelding.com www.horstwelding.com BRB84 BR Series Hydraulic Rotary Bucket Broom BRB72, BRB84, BRB96 Keep this manual with the machine at all times CAUTION Operational Hazard Personal Protection Equipment (PPE) is required when operating or maintaining this machine.
-
Page 2: Table Of Contents
TABLE OF CONTENTS Introduction, General Information, Serial Number………….…………...……………2 Owner and Operator and Safety Information………………..…………...…………3-6 Definitions of Safety Terms and Symbols, Accident Prevention…..3 Safety Sign Location……………… ……………….………………..….4 Safety Section ……… ………………………………….…..……..5 - 6 Power Unit Specifications………………………………………..………………..…….7 Attachment Specifications…………………………………….………………….……..7 Broom Installation and Removal .……………………………………………..……….8 Broom Adjustments……………………………………………………………..……….8 Hydraulic Connection.………………………………….…………..….……………..9 Operation………………………………………………………..…………….……..10... -
Page 3: Introduction, General Information, Serial Number
HLA at the telephone number or address listed on the previous page of this manual. Keep this manual available for reference whenever this product is being handled or used. Provide this manual to any new owners and/or operators. -
Page 4: Owner And Operator And Safety Information
The safety information given in this manual does not replace any safety codes, insurance needs, federal, state and local laws. ACCIDENTS CAN BE PREVENTED WITH YOUR HELP! The best safety device is a careful operator. HLA and YOU ARE THE KEY TO SAFETY BECAUSE: your dealer ask that YOU be that careful, responsible equipment operator. -
Page 5: Safety Sign Location
Safety signs are available free of charge from your Item 3 dealer or from HLA. PLACEMENT OR REPLACEMENT OF SAFETY SIGNS Clean the area of application with non-flammable solvent, then, wash the same area with soap and water. -
Page 6: Safety Section
SAFETY SECTION WORK SAFELY – A CAREFUL OPERATOR IS THE BEST INSURANCE AGAINST ACCIDENTS!! WARNING Obey all safety instructions listed in this section and throughout this manual. Failure to obey instructions in this section could result in death or serious injury. WHEN YOUR POWER UNIT IS USED DURING ANY TYPE BEFORE ATTEMPTING ANY TYPE OF ASSEMBLY, OPER- OF ASSEMBLY, OPERATION, MAINTENANCE OR OTHER... - Page 7 / quick-attach manufacturer. • If this product does not fit properly, contact HLA before operating. • Never place your finger into the mounting plate or 3-point hitch or loader holes.
-
Page 8: Power Unit Specifications
POWER UNIT SPECIFICATIONS IMPORTANT Exceeding any of the recommended power unit specifications CAN result in damage to your power unit and/or this product and WILL void all HLA warranties. LOADER SPECIFICATIONS Minimum 12-20gpm @ 3000PSI ATTACHMENT SPECIFICATIONS - 7 -... -
Page 9: Broom Installation And Removal
BROOM INSTALLATION & REMOVAL INSTRUCTIONS SAFETY FIRST!! READ AND UNDERSTAND THE SAFETY INSTRUCTIONS (pages 3-6 of BEFORE BEGINNING ANY BROOM MOUNTING. this manual) INSTALLATION: Place this product on a firm, level surface that is large enough to safely accommodate this product, your power unit and all workers involved in the mounting process. -
Page 10: Hydraulic Connection
Brush Pattern To check pattern: Move Broom to a dusty flat surface. Set power unit’s parking brake and leave the engine running. Start the Broom at a slow speed; then lower it so bristle tips and castor wheel touch the ground. The heal of the bucket should be approximately 1 inch off the ground. -
Page 11: Operation
BROOM OPERATION SAFETY FIRST!! READ AND UNDERSTAND THE SAFETY INSTRUCTIONS ( pages 3-6 of BEFORE BEGINNING ANY BROOM OPERATION. this manual) WARNING EXPOSURE TO RESPIRABLE CRYSTALLINE SILICA ALONG WITH OTHER HAZARDOUS DUSTS MAY CAUSE SERIOUS OR FATAL RESPIRATORY DISEASE. Failure to obey the following procedure will result in death or serious injury. •... -
Page 12: Storage
BROOM STORAGE The following storage procedure will assist you to keep your Broom in top condition. NOTICE DO NOT STORE BROOM WITH WEIGHT ON THE BRUSH. Weight will deform the bristles, destroying the sweeping effectiveness. To avoid this problem, place the Broom on blocks or optional stands. -
Page 13: Maintenance
BROOM MAINTENANCE Regular maintenance is the key to long equipment life and safe operation. It is very important that these maintenance functions be performed as described below. SAFETY FIRST!! READ AND UNDERSTAND THE SAFETY INSTRUCTIONS ( pages 3-6 BEFORE BEGINNING ANY BROOM MAINTENANCE OPERATION. of this manual) BEFORE FIRST USE •... -
Page 14: Service
BROOM SERVICE SAFETY FIRST!! READ AND UNDERSTAND THE SAFETY INSTRUCTIONS ( pages 3-6 BEFORE BEGINNING ANY BROOM SERVICE. of this manual) WARNING Hydraulic fluid under pressure can penetrate skin, resulting in serious injury or death. Always relieve hydraulic pressure before disconnecting lines. •... -
Page 15: Bolt Torque Chart
These tables are offered as the suggested maximum torque values for dry (not lubricated) threaded products and are only a general guide. Check tightness of bolts periodically, replace hardware with the same strength bolt. Torque specification for bolts are identified by their head markings as shown. See the “Wheel Torque Specification”... -
Page 16: Troubleshooting
Change or clean filter Hydraulic motor is failing Test hydraulic system Dirt or debris in spools Contact your dealer or HLA Find correct combination of ground Travel speed too fast and/or and brush speeds: do not travel at Brush head assembly “bounces”... - Page 17 TROUBLESHOOTING (cont.) PROBLEM POSSIBLE CAUSE SOLUTION Dirty oil Drain and refill oil, replace filter. Partially plugged inlet filter Clean filter element. Hydraulic oil heating Oil too light in hot weather Use recommended oil. Damaged oil lines Replace oil lines. Motor seals damaged Repair motor.
-
Page 18: Warranty Policy
1 year from the date of delivery, and a commercial period of 2 years for HLA Snow 3000, 4000, 5000 and 6000 series blades from the date of delivery. Warranty is limited to the repair of the product and / or replacement of parts. - Page 19 Notes...
- Page 20 HORST WELDING 8082 Rd 129 Listowel, ON N4W 3G8 Canada 519-291-4162 1-866-567-4162 Fax 1-519-291-5388 www.hlaattachments.com sales@horstwelding.com www.horstwelding.com...
Need help?
Do you have a question about the BR Series and is the answer not in the manual?
Questions and answers