Table of Contents
Advertisement
Quick Links
Models-
18500, 18500-220V "Turbo Towel"
Page 2
Page 3
Page 4
Page 5
Page 6-12
Page 13
Page 14
Page 15
Page 16
1
Product Information
Specifications
Important Safety Instructions
Product Dimensions
Installation
Installation and Operating Safety
Operating Instructions and Maintenance
Troubleshooting
Drawings
REV 12-28-2018
Advertisement
Table of Contents

Related Manuals for J.E. Adams Turbo Towel 18500


Summary of Contents for J.E. Adams Turbo Towel 18500
- Page 1 Models- 18500, 18500-220V "Turbo Towel" Page 2 Product Information Page 3 Specifications Page 4 Important Safety Instructions Page 5 Product Dimensions Page 6-12 Installation Page 13 Installation and Operating Safety Page 14 Operating Instructions and Maintenance Page 15 Troubleshooting Page 16 Drawings REV 12-28-2018...
-
Page 2: Product Information
There may be more than one key number depending on unit. Please keep this information with your records. MODEL#:____________________________ SERIAL#:____________________________ KEY NUMBER(S):_____________________ DATE PURCHASED:___________________ DISTRIBUTOR:_______________________ J.E. Adams Industries 1025 63rd Ave. S.W. Cedar Rapids, IA 52404 1-800-553-8861 www.jeadams.com REV 12-28-2018... -
Page 3: Specifications
Specifications 120 Volt model Unit specifications: 18500 Voltage: 120vac, 60hz Amperage: (1) 30 amp service is required for this unit, dedicated line. Blower specifications Blower – (1) High performance Regenerative blower, 120vac, 20 amps, 60hz --------------------------------------------------------------------------------------------------------------------------------------------------------------------- 220 Volt model Unit specifications: 18500-220V Voltage: 220vac, 60hz... -
Page 4: Important Safety Instructions
IMPORTANT SAFETY INSTRUCTIONS When using an electrical appliance, basic precautions should always be followed, including the following: READ ALL INSTRUCTIONS BEFORE USING (THIS APPLIANCE) WARNING – To reduce the risk of fire, electric shock, or injury: • Use only as described in manual. Use only manufactures recommended attachments. •... -
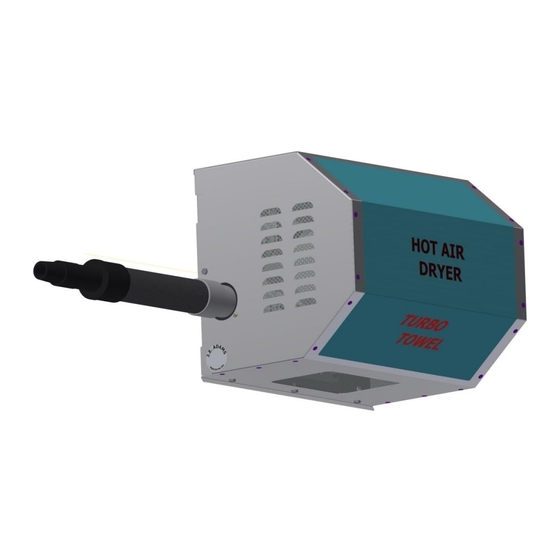
Page 5: Product Dimensions
PRODUCT DIMENSIONS REV 12-28-2018... -
Page 6: Typical Installation
TYPICAL INSTALLATION Typical in-bay installation with boom (cutting hose is mandatory when using boom). When no boom is used, simply locate hose hanger under Turbo Towel unit. Note blower must be mounted with motor axis horizontal never vertical. Boom is typically installed above Turbo Towel unit so it does not hit the cover of Turbo Towel when being used. - Page 7 OPTIONAL HORIZONTAL INSTALLATION Mounting unit flat vs. wall mount is optional but only when unit is in a clean dust free, moisture protected environment. Area within 2 feet of Turbo Towel must be free of any insulation so as not to impact air intake.
-
Page 8: Mounting Instructions
Mounting Instructions Very important that all (4) mounting holes on base plate engage structure capable of supporting 100 lbs minimum. Turbo Towel cover hooks over top of base plate so surface unit is mounted needs to be reasonably flat so this spacing is maintained. -
Page 9: Wiring Instructions
Wiring Instructions Liquidtite conduit can be routed to these two connectors, one for power to motor, the other to thermal protection which is wired to motor contactor. Wires from each conduit connector should be routed through adjacent cavity blower bottom and blower mounting bracket. REV 12-28-2018... - Page 10 120VAC Motor Wiring Instructions Ground screw is tucked underneath capacitor. 8mm nut, 5mm thread. #10 ring terminal REV 12-28-2018...
- Page 11 220VAC Motor Wiring Instructions Ground screw is tucked underneath capacitor. 8mm nut, 5mm thread. #10 ring terminal REV 12-28-2018...
- Page 12 EXTERNAL BLOWER CONTROL WIRING SCHEME When wiring direct to the rotary switch in a carwash bay, below is a typical 120V scenario showing a shut off box with motor contactor. NOTE: TURBO TOWEL SHOULD BE INSTALLED AND SET UP PER LOCAL ELECTRICAL CODES BY QUALIFIED ELECTRICIAN.
- Page 13 EXTERNAL BLOWER CONTROL WIRING SCHEME When wiring direct to the rotary switch in a carwash bay, below is a typical 220V scenario showing a shut off box with motor contactor. NOTE: TURBO TOWEL SHOULD BE INSTALLED AND SET UP PER LOCAL ELECTRICAL CODES BY QUALIFIED ELECTRICIAN.
- Page 14 INSTALLATION / SAFETY INSTRUCTIONS: Always use qualified electrical and mechanical personnel for installation and maintenance of equipment. Disconnect electrical power before working on the system. Make sure the motor is electrically grounded, the mounting bolts are properly secured, and all guards are in place during operation.
- Page 15 Machine Operating Instructions: 1) Read safety instructions on previous pages. 2) Hold nozzle in hand. 3) Insert coins or bills to start. 4) Machine will start and air will begin to blow. 5) For best results, start at the top of the car and blow water downward. 6) Hang hose up when finished.
- Page 16 Troubleshooting (120V example): REV 12-28-2018...
- Page 17 REV 12-28-2018...
- Page 18 REV 12-28-2018...
- Page 19 REV 12-28-2018...
- Page 20 REV 12-28-2018...
- Page 21 REV 12-28-2018...
- Page 22 REV 12-28-2018...
Need help?
Do you have a question about the Turbo Towel 18500 and is the answer not in the manual?
Questions and answers