Table of Contents
Advertisement
J10HD_JA4ULLD_ENG_2491
2.1CH Home Theater System
OWNER'S MANUAL
MODEL: J10HD
SPEAKERS: J10HD-SF/J10HD-SA
USB
Before connecting, operating or adjusting this product,
please read this instruction booklet carefully and
completely.
FOR THE GUARANTEE TERMS & CONDITIONS,
PLEASE REFER TO BACK COVER OF THIS
MANUAL.
Advertisement
Table of Contents

Related Manuals for LG J10HD


Summary of Contents for LG J10HD
- Page 1 J10HD_JA4ULLD_ENG_2491 2.1CH Home Theater System OWNER’S MANUAL MODEL: J10HD SPEAKERS: J10HD-SF/J10HD-SA Before connecting, operating or adjusting this product, please read this instruction booklet carefully and completely. FOR THE GUARANTEE TERMS & CONDITIONS, PLEASE REFER TO BACK COVER OF THIS MANUAL.
- Page 2 CAUTION RISK OF ELECTRIC SHOCK DO NOT OPEN CAUTION: THESE SERVICING INSTRUCTIONS ARE FOR USE BY QUALIFIED SERVICE PERSONNEL ONLY. TO REDUCE THE RISK OF ELECTRIC SHOCK DO NOT PERFORM ANY SERVICING OTHER THAN THAT CONTAINED IN THE OPERATING INSTRUCTIONS UNLESS YOU ARE QUALIFIED TO DO SO.
- Page 3 ® Gracenote End User License Agreement Version 20061005 This application or device contains software from Gracenote, Inc. of Emeryville, California (“Gracenote”). The software from Gracenote (the “Gracenote Software”) enables this application to perform disc and/or file identification and obtain music-related information, including name, artist, track, and title information (“Gracenote Data”) from online servers or embedded databases (collectively, “Gracenote Servers”) and to perform other functions.
-
Page 4: Table Of Contents
Contents Introduction ......5-10 Symbol Used in this Manual ....5 Notes on Discs . -
Page 5: Introduction
Introduction To ensure proper use of this product, please read this owner’s manual carefully and retain for future reference. This manual provides information on the operation and maintenance of your unit. Should the unit require service, contact an authorized service location. Symbol Used in this Manual The lightning flash symbol alerts you to the presence of dangerous voltage within the... -
Page 6: Playable Discs
Playable Discs DVD (8 cm / 12 cm disc) Discs such as movies that can be purchased or rented Video CD (VCD) (8 cm / 12 cm disc) VIDEO CDs or CD-Rs/CD-RWs in VIDEO CD/Super VIDEO CD format Audio CD (8 cm / 12 cm disc) Music CDs or CD-Rs/CD-RWs in music CD format that can be purchased CD-R/CD-RW (8 cm / 12 cm disc) CD-R/CD-RW discs that contain audio titles, DivX, MP3, WMA, or JPEG files. -
Page 7: About The Internal Hard Disk Drive
About the internal hard disk drive The internal hard disk drive (HDD) is a fragile piece of equipment. Please use the unit following the guidelines below to protect against possible HDD failure. We recommend that you back up your important recordings onto DVD discs in order to protect against accidental loss. -
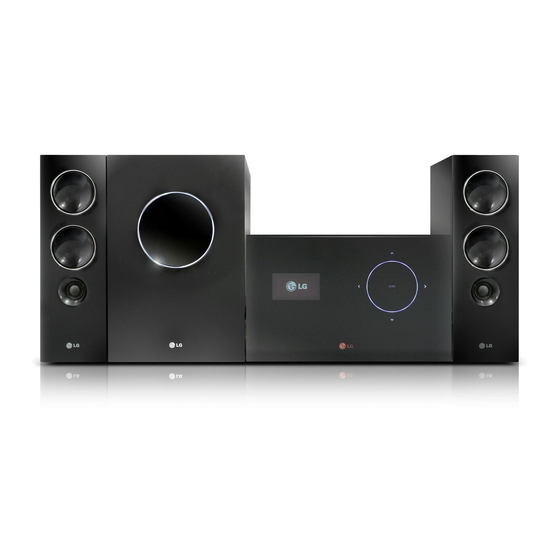
Page 8: Main Unit
Main Unit a HDMI Connector (Type A) HDMI output providing a high quality interface for digital audio and video. b SYSTEM Connector Connect the main unit to the active subwoofer. c Display window d * Touch pad You can point to, select, and scroll objects on the display window. -
Page 9: Touch Pad Functions
* Touch pad This unit has touch sensitive controls that respond to the touch of your fingers. Notes: Do not place objects on the top panel of the main unit. Do not touch the touch pad hard to make it work. Slowly and lightly touch the touch pad. -
Page 10: Remote Control
Remote Control TUNER: Selects an FM or AM broadcast. HDD: Selects an HDD mode. MOBILE: Selects a MOBILE mode. POWER: Switches the unit ON or OFF. DIMMER: Press to change brightness of the display window on the top panel during power-on status. -
Page 11: Hookup And Settings
Hookup and Settings Making system connections Turn off your unit before you set the VIDEO OUT SELECTOR. When using the COMPONENT VIDEO OUT jacks, set the VIDEO OUT SELECTOR to COMP. When using the SCART jack, set the VIDEO OUT SELECTOR to SCART. Caution Do not plug the active subwoofer into an AC power(mains) outlet until all the components are... -
Page 12: Connecting Tv To Active Subwoofer
Connecting Your TV to the active subwoofer Portable audio Digital Device devices OPTICAL Headphones or Line out jack Rear of active subwoofer SYSTEM(DVDP) MOBILE Rear of TV Video connection Connect the VIDEO OUT jack on the rear of the active subwoofer into the video input jack on your TV using the video cable (V). -
Page 13: Hdmi Connection
HDMI connection If you have a HDMI TV or monitor, you can connect it to this unit using a HDMI cable. 1. Connect the HDMI jack on the unit to the HDMI jack on a HDMI compatible TV or monitor (H). 2. -
Page 14: Using The Home Menu
Using the Home Menu From the Home Menu screen you can access all the Media for playback and recording of the unit. 1. Press HOME to display the Home Menu screen. 2. Use the b / B buttons to select a main option you want. -
Page 15: Pbc (Version 2.0)
PBC (Version 2.0) PBC stands for Playback Control and refers to special menus and navigation features that are available on some Video CDs. [ON] Video CDs are played according to the PBC, if available. [OFF] Video CDs are played the same way as Audio CDs. -
Page 16: Lock (Parental Control) Settings
Lock (Parental Control) Settings Set Password 1. Select [Set Password] option then press B. 2. To access the Rating, Password and Area Code features, you must input the 4-digit password you created. If you have not yet entered a password you are prompted to do so. -
Page 17: Displaying Disc Information On-Screen
Displaying Disc Information on-screen You can display various information about the disc loaded on-screen. 1. Press DISPLAY to show various playback information. The items displayed differ depending on the disc type or playing status. 2. You can select an item by pressing v / V and change or select the setting by pressing b / B. -
Page 18: Playback
Playback General Playback Features 1. Insert your chosen disc into CD loader, with the playback side down. 2. Starts playback using HOME menu (see page 14). 3. To stop the playback, press x (STOP). The unit records the stopped point, depending on the disc. “Xx” appears on the screen briefly. Press B (PLAY) to resume playback (from the scene point). - Page 19 General Playback Features (Continued) Buttons Operations REPEAT During playback, press REPEAT repeatedly to select a desired repeat mode. DVD (Title/Chapter/Off) Video CD, DivX (Title/ALL/Off) Audio CD, MP3/WMA (TRACK/ALL/(OFF)) Notes: On a Video CD with PBC, you must set PBC to [OFF] in the Setup menu to use the Repeat function.
- Page 20 If a menu screen is displayed The menu screen may be displayed first after loading a DVD or Video CD which contains a menu. Use the b / B / v / V buttons to select the title/chapter you want to view, then press ENTER to start playback.
-
Page 21: Playing A Divx Movie File
Playing a DivX Movie File The unit can play Divx files. Before playing DivX files, read “DivX file requirement” on right. 1. Press HOME then select [MOVIE] option. 2. Select a media that contains DivX file(s) then press ENTER. The [Movie List] menu appears on the TV screen. 3. -
Page 22: Playing An Audio Cd Or Mp3/Wma File
Playing an Audio CD or MP3/WMA file The unit can play audio CDs and MP3/WMA files. Before playing MP3/WMA files, read “MP3/WMA audio file requirement” on page 23. The Gracenote ® music recognition service enables your unit to look up from its built-in database the CD track information (including album, artist, track information). - Page 23 Music List Folder (HDD) [Folder View] The identified and unidentified audio files in the hard disk are displayed in the folder list view. [Song List] The identified audio files in the hard disk are displayed in the file list view. [Artist] The identified audio files in the hard disk is displayed by the artist’s name.
-
Page 24: Identifying The Audio Cd Tracks Or The Stored Music Files In The Hard Disk
Identifying the audio CD tracks or the stored music files in the hard disk You can identify the audio CD tracks or music files from built-in database the CD track information. Note: This unit enables you to identify the recorded files from radio, but the identifying will not work. -
Page 25: Program Playback With Audio Cd And Mp3/Wma File
Program Playback with Audio CD and MP3/WMA file Program Playback enables you to make custom playlists of Audio CD or MP3/WMA tracks. Programs can contain up to 99 Audio CD tracks or 256 MP3/WMA files. 1. Use v / V to select a track/file (or folder) on the Audio CD or Music menu. -
Page 26: Viewing A Jpeg File
Viewing a JPEG File This unit can play JPEG files. Before playing JPEG recordings, read “Photo file requirement” on page 27 1. Press HOME. The HOME menu appears. 2. Select [PHOTO] option. 3. Select a media that contains JPEG file then press ENTER. - Page 27 Tip: You can create new folder in the HDD. Select [Edit-Copy-New Album] option then press ENTER. “NONAME###” folder is created. Photo file requirement File extensions “.jpg” Photo size: Less than 4MB recommended CD-R Format: ISO 9660 and JOLIET. DVD±R/RW Format: ISO 9660 (UDF Bridge format) Maximum Files/Disc: Less than 999 (total number of files and folders)
-
Page 28: Editing A Mp3/Wma, Jpeg, Divx File
Editing a MP3/WMA, JPEG, DivX file These descriptions are MP3 file’s operation for example, other kind’s files are operated same way. Note: The MP3/WMA, JPEG, and DivX files on the disc or HDD cannot be copied or moved to USB device. Erasing a file(s)/folder(s) from the HDD You can erase MP3/WMA, JPEG or DivX file(s)/ folder(s) on the HDD. - Page 29 Copying a file(s) to another media or folder You can copy a file(s)/folder(s) to HDD or folder. 1. Select a file you wish to copy on the menu. Selecting multiple files (folders) 1. Press MARKER. A check mark appears on the file or folder. Press MARKER again to cancel the marked file or folder.
-
Page 30: Aux/Mobile/Scart/Optical (Listening To An External Source)
AUX/MOBILE/SCART/OPTICAL (Listening to an external source) You can listen to the sound of the connected external device through your unit. 1. Check the external device has been properly connected. (See Connecting an additional appliance on page 12.) 2. Press MOBILE on the remote control to select MOBILE mode. -
Page 31: Recording
Recording By ripping CDs and recording from radio you can build your music library on hard disk. Ripping CDs (for audio CDs) After you identify a audio CD, if you rip the audio CD, the ripped CD tracks are properly categorized (for example, under Artist, Album or Song List) and also stored with the existing files in the hard disk. -
Page 32: Timeshift
Timeshift Do not miss a part from a live broadcast. If the telephone rings while you are listening to your favorite live broadcast, just press TIMESHIFT and X before answering the phone. When the timeshift function is activated, the sound will be muted and the broadcast is then recorded for later listening to. -
Page 33: Reference
Reference Additional Information Presetting the Radio Stations You can preset 50 stations for FM and AM (MW). Before tuning, make sure that you have turned down the volume. 1. Press TUNER on the remote control. (If you are in any menu mode, remove it completely by pressing RETURN or HOME repeatedly.) On the home menu screen, select RADIO and then press ENTER. -
Page 34: Rds Operation
RDS Operation This unit is equipped with RDS (Radio Data System), which brings a wide range of information to FM radio. Now in use in many countries, RDS is a system for transmitting station call signs or network information, a description of station programme type text message about the station or specifics of musical selection and the correct time. -
Page 35: Sleep
Each time you press XTS pro the setting changes in the following order. NORMAL ↔ XTS-P ON XTS-P ON The unique sound quality of the LG Technology creates the optimum sound for you to play the perfect playback of the original sound and to feel the living sound source. -
Page 36: Language Codes
Language Codes Use this list to input your desired language for the following initial settings: Disc Audio, Disc Subtitle, Disc Menu. Language Code Language Abkhazian 6566 Fiji Afar 6565 Finnish Afrikaans 6570 French Albanian 8381 Frisian Ameharic 6577 Galician Arabic 6582 Georgian Armenian... -
Page 37: Troubleshooting
Troubleshooting Check the following guide for the possible cause of a problem before contacting service. Symptom The power cord is disconnected. No power. No picture. The TV is not set to receive unit signal output. The video cable is not connected securely. -
Page 38: Specifications
87.5 - 108 MHz 10.7 MHz 60 dB (Mono) 522 - 1,620 kHz 450 kHz Wire antenna (FM) Loop antenna (AM) Active Subwoofer (J10HD-SA) Power requirements: Power consumption: Impedance: Frequency Response: Sound Pressure Level: Max. Input Power: Net Dimensions (... - Page 39 2. The dealer (or his service agent) who sold the product will be reimbursed for any labour provided in the repair of this LG equipment, for a period of 12 months from the original date of purchase. These claims must be made in accordance with the published scale of service charges and relevant claims procedure.
Need help?
Do you have a question about the J10HD and is the answer not in the manual?
Questions and answers