Table of Contents
Advertisement
Available languages
Available languages
Advertisement
Table of Contents

Summary of Contents for Daspi PASSAGE
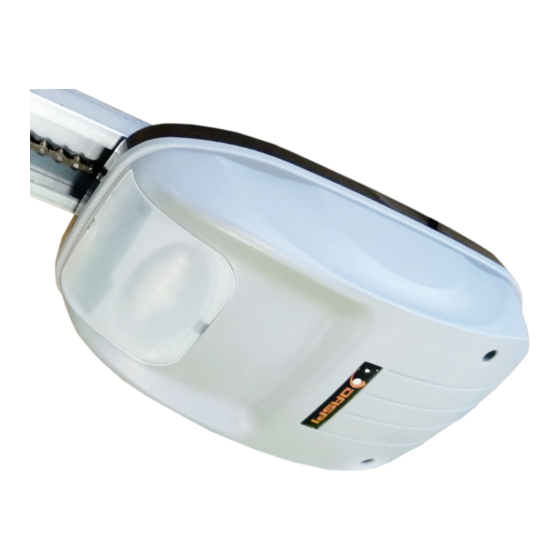
- Page 1 PASSAGE...
-
Page 2: Table Of Contents
PASSAGE ÍNDICE ASPECTOS DE SEGURIDAD…………………………………………….………………………………. 2 HERRAMIENTAS NECESARIAS…………………………………….…………………………………. 2 AJUSTE DE LA CADENA…………………………………………………………………………………. 3 INSTALACIÓN DEL SOPORTE DEL CABEZAL Y DEL SOPORTE DE LA PUERTA… CONEXIÓN DEL BRAZO DE LA PUERTA AL CARRIL…………………………….. 3 y 4 PROGRAMACIÓN Y AJUSTE………………………………………………………………... 5 y 6 PROGRAMACIÓN DEL MANDO…………………………………………………………….………... -
Page 3: Aspectos De Seguridad
PASSAGE ASPECTOS DE SEGURIDAD Para asegurar su seguridad y reducir los accidentes, antes de la instalación debe leer cuidadosamente el manual de instalación. Si tiene alguna cuestión, por favor pregunte a su especialista o distribuidor. 1) El instalador debe inspeccionar la puerta antes de la instalación. Sólo se permite la instalación del motor en estado de balanceo. -
Page 4: Ajuste De La Cadena
PASSAGE AJUSTE DE LA CADENA INSTALACIÓN DEL SOPORTE DEL CABEZAL Y DEL SOPORTE DE LA PUERTA UNIÓN DEL RAÍL AL SOPORTE DEL CABEZAL CONEXIÓN DEL BRAZO DE LA PUERTA AL CARRO 1. Cierre la puerta. Desconecte el carril tirando de la manilla de desbloqueo. - Page 5 PASSAGE 3. Fije el brazo al soporte de la puerta usando un pasador corto (H6). Asegurelo con el (H5). 4. Junte ambos brazos. Busque dos agujeros que alineados entre ambos brazos y una las secciones. Elija unos agujeros que disten lo máximo posible entre ambos para así...
-
Page 6: Programación Y Ajuste
PASSAGE PROGRAMACIÓN Y AJUSTE 1. Programación de los botones (S) BOTON WIFI - (BOTÓN BAJAR) +(BOTÓN SUBIR) (P)BOTÓN PROGRAMAR 2. Instrucciones eléctricas Al conectar el motor a la luz, el LED1 y LED2 parpadeará 3 veces. El motor estará en stand-by. - Page 7 PASSAGE ATENCIÓN: los botones ARRIBA y ABAJO pueden ser usados para mover la puerta en dichos sentidos tanto como sea necesario. 3.3 Una vez que la puerta alcance la posición de apertura deseada, presione el botón “P” y se encenderá el LED1.
-
Page 8: Programación Del Mando
PASSAGE PROGRAMACIÓN DEL MANDO BOTÓN ROJO SELECCIÓN DE LA MARCA 1. Presione el botón rojo hasta que el LED permanezca fijo. 2. Presione una vez el botón que quiera grabar de su mando, después vuelva a presionar el mismo botón de nuevo. El LED parpadeará para después apagarse. - Page 9 PASSAGE PROGRAMACION DEL MOVIL CON EL RECEPTOR WIFI 1- Descargue la APP “DASPI” desde: 2- Crear nueva cuenta 3- Añadir dispositivo...
- Page 10 PASSAGE 4- Seleccionar tipo de dispositivo a añadir, en este caso “puerta seccional” 5- Primero comprobar que el dispositivo esta conectado a la corriente eléctrica, a continuación, pulsar “la luz de confirmación en el flash”...
- Page 11 PASSAGE 6- Conectar el móvil al wifi con el que vaya a trabajar el motor. 7- Introducir en la APP la red wifi y la contraseña para confirmarle al motor donde queremos que se conecte. Pulsar confirmar. 8- Mantener pulsado en el motor el botón “S” hasta que el led verde...
- Page 12 PASSAGE 9- El motor se agregó correctamente. Pulse “FINALIZADO”...
- Page 13 PASSAGE 10- Una vez agregado podremos controlar las maniobras desde el dispositivo móvil. ABRIR CERRAR PARAR ENCENDER Y APAGAR ESTADO LÁMPARA LAMPARA ESTADO DE LA PUERTA GARANTIA...
-
Page 14: Circuito Del Cuadro
PASSAGE CIRCUITO DEL CUADRO AJUSTE DE LA MARCHA ATRÁS 1. La marcha atrás ya ha sido programada. Si la fuerza de la marcha atrás es mayor que el valor de programación, la puerta se parará automáticamente. 2. Presione el mando, la puerta se cierra. Pruebe la fuerza de la marcha atrás, si está... -
Page 15: Fotocélula
PASSAGE 3. Cuando termine, haga funcionar el motor varias veces para asegurarse de que la puerta se mueve con normalidad en ambos sentidos y el ajuste realizado es correcto. Si no, necesitará ajustar la fuerza de la marcha atrás de nuevo hasta alcanzar el ajuste deseado. -
Page 16: Cierre Automático De La Puerta
PASSAGE CIERRE AUTOMÁTICO Para activar cierre automático “- “ 1-pulsar el botón hasta que el led empieza a parpadear, por cada parpadeo es un segundo de cierre automático. 2-pulsar de nuevo cuando queramos finalizar el tiempo de cierre automático. Para desactivar cierre automático Pulsar el botón “-”... - Page 17 PASSAGE plena maniobra y más alta que la del cambia su sentido. El sistema 2. Mire el ajuste de la LED parpadea fuerza de marcha rápidamente atrás 1. El contacto de la fotocélula está abierto por la presencia de un 1.
- Page 18 PASSAGE...
- Page 19 PASSAGE INDEX SECURITY ASPECTS………………………………...…………………….……..…………………………. TOOLS NEEDED…………………………………….………………………………………………………….2 CHAIN ADJUSTMENT………………………………………………………………………………………..3 INSTALLATION OF THE HEAD AND THE BRACKET OF THE DOOR ……………………3 CONNECTION OF THE ARM OF THE DOOR TO THE RAIL……………………………..3 y 4 PROGRAMMING AND ADJUSTMENT……………………………………………………………5 y 6 LEARNING A REMOTE…………………………………………………………….………………………..7 MEMORY RESET………………………………………………………………………………………………7 ADDING A SMARTPHONE……………………………………………………………………………8-11...
- Page 20 PASSAGE SECURITY ASPECTS To ensure your safety and reduce accidents before installation you should carefully read the installation manual. If you have any questions, please ask your specialist or distributor. 1) The installer must inspect the door before installation. Only the installation of the motor in swinging state is allowed.
- Page 21 PASSAGE CHAIN ADJUSTMENT INSTALLATION OF THE HEAD AND THE BRACKET OF THE DOOR CONNECTION OF THE ARM OF THE DOOR TO THE RAIL 1. Close the door. Disconnect the rail by pulling the unlocking handle. 2. Fix the straight arm to the outside of the rail using the short pin (H6). Secure it with (H5) 3.
- Page 22 PASSAGE each other to increase the strength and fix them with the screws (H4) and the nuts (H8). 5. Pull from the unlocking cord towards the motor until the releasing arm of the trolley is in horizontal. The trolley will hitch up again automatically when...
- Page 23 PASSAGE PROGRAMMING AND ADJUSTMENT 1. Programming the buttons -(DOWNWARDS) + (UPWARDS) (P) PROGRAMMING (S) WIFI 2. Electrical instructions When connecting the motor to the power supply, LED1 and LED2 will flash 3 times. The motor will remain in stand-by. 3. Programming the maneuver 3.1 Press and hold button “P”...
- Page 24 PASSAGE ATTENTION: the UPWARDS and DOWNWARDS buttons can be used to move the door in these directions as much as necessary. 3.3 Once the door reaches the desired opening position, press the “P” and LED1 will light up. 3.4 Press and hold the button until the door reaches the desired closing position.
- Page 25 PASSAGE LEARNING A REMOTE RED BUTTON SELECT BRAND 1. Press the red button until the LED remains steady. 2. Press the button you want to record on your remote control once, then press the same button again. The LED will flash and then turn off.
- Page 26 PASSAGE ADDING A SMARTPHONE 1. Download the App “DASPI” from the “App Store” or “Google Play” 2. Register a new account 3. Add a new device 4. Choose the kind of device you will add. In this case we will add “sectional...
- Page 27 PASSAGE 5. In the App press “Confirm indicator rapidly blink”.
- Page 28 PASSAGE 7. Connect the smartphone to the WiFi network you will use to operate the motor. 8. Select in the App the WiFi network to use and type the passaword. Then press “Confirm”. 9. Make sure the device is connected to the power supply and then press...
- Page 29 PASSAGE The App will start synchronizing.
- Page 30 PASSAGE 10. Now the device has been added, press “Done” to finish and start using it with the App. Setting menu Open, stop & close Turn On/Off the lamp Percentage of Status of the device opening or closing Automatic closing...
- Page 31 PASSAGE CONTROL BOARDS’ CIRCUIT REVERSE MANEUVER ADJUSTMENT 1. The reverse gear has already been programmed. If the reverse force is greater than the programming value, the door will automatically stop. 2. Press the knob, the door closes. Test the reverse gear, if it is too strong, turn the potentiometer counterclockwise.
- Page 32 PASSAGE NOTE: Setting the reverse gear can not be done when the door is moving. In doing so, the setting will not be memorized. PHOTOCELL When you enable the photocell option, if an object cuts the beam of light emitted by this device when the door is closing, it will stop and immediately open completely.
- Page 33 PASSAGE - Lubricate the bearings, supports and hinges. The engine does not need any other lubrication. TECHNICAL PARAMETERS Voltage: 230v 50Hz Motor: DC 24V Frequency: 433-868 MHz Maximum speed: 100 mm/s Rolling Code Max. use intensity: 4 minutes Use only in dry environments Force in stand-by: <5W...
-
Page 34: Selección De La Marca
PASSAGE light has become darker The control works but The push button cable Check the connection the wall push button is not loose or of the wall button does not work disconnected SELECCIÓN DE LA MARCA / BRAND SELECTION. COMBINACIÓN DIP MARCA FRECUEN. - Page 35 PASSAGE...
- Page 36 PASSAGE Fixed Code...
- Page 37 PASSAGE Código Fijo...
- Page 38 PASSAGE S0mmer ROLLING CODE ROLLING CODE S0mmer...
- Page 39 PASSAGE...
- Page 40 PASSAGE...
Need help?
Do you have a question about the PASSAGE and is the answer not in the manual?
Questions and answers