Advertisement
Advertisement
Table of Contents

Related Manuals for EarthPulse Command V.5


Summary of Contents for EarthPulse Command V.5
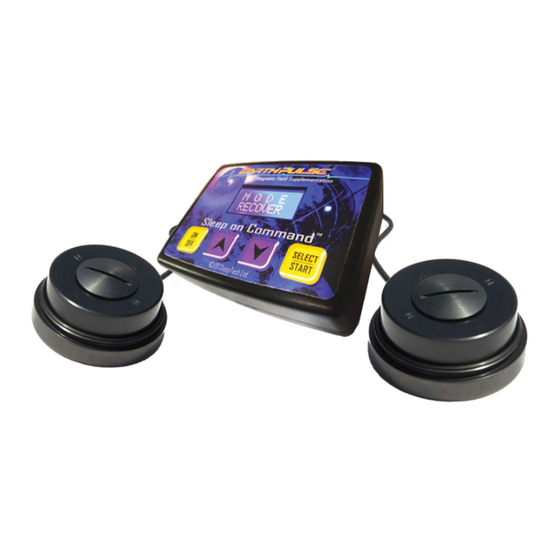
- Page 2 QuickStart Guide: A) Getting Started Sleep on Command v.5 / v.5Pro; Contents: • Sleep on Command™ v.5 or v.5Pro controller • power supply 100 - 240 volt AC to 12 volt DC • one modular electromagnet (v.5) or two electromagnets (v.5Pro) •...
- Page 3 You’ll notice LCD screen lights momentarily as power is connected. If not, check wall outlet. 4) Firmly plug electromagnet(s) into remaining jack(s). Please familiarize yourself with electromagnet schematic diagram so there is no confusion removing cross-polarity-ring, core & base- plate for the initial session to be done with Air-Core magnet only. 5) Remove Electromagnet CROSS-POLARIZING ring so your mag- net(s) look like the on next page with...
- Page 4 SLEEP AIR-CORE CROSS-POLARITY 80 Gauss local application 600 Gauss 750 Gauss NORTH POLE SOUTH POLE BACK TO TABLE OF CONTENTS:...
- Page 5 C) Testing Magnetic Output: 1) With blue-diode blinking; Lay the fatter rounded side of the ring across the center of the solid electromagnet core (as shown in photo below); Testing magnet output 2) Raise ring 1/4-1/2 inch (1-2 cm) above core to feel pulsing signal; 3) Move to 3/4 inch or 2-3 cm above core and it is very weak if not relatively unnoticeable;...
- Page 6 D) Initial 1-3 Hour Session: (please do baseline test) Please do this session as far from nighttime sleep as possible. 1) Remove Cross-Polarizing ring from magnet(s); refer to magnet schematic; ing up on top of mattress under a soft yet thin pillow. Position your head to have the magnet directly below base of skull;...
- Page 7 ) Session Checklist; 1) BLUE BLINKING DIODE (ACTIVE OUTPUT); 3) BLINKING TIMER SHOWS 1HR or up to 3 HRS; TOWARD BODY (NO METAL PARTS); 5) THIN PILLOW / PADDING FOR HEAD WITH MAGNET UNDER; 6) SET CONVENTIONAL ALARM-CLOCK COINCIDING W/ CONTROLLER TIMER LAPSE;...
Need help?
Do you have a question about the Command V.5 and is the answer not in the manual?
Questions and answers