Table of Contents
Advertisement
Quick Links
Advertisement
Table of Contents

Subscribe to Our Youtube Channel
Summary of Contents for Sonnet RackMac Pro
- Page 1 Installation Instructions for RackMac Pro Computer Mounting Module ™...
-
Page 3: Table Of Contents
Mac Pro Bottom Cover Label 5/64-Inch Hex Wrench 2 Mac Pro and Computer Mounting Module Installation Steps A – Prepare RackMac Pro for Computer Mounting Module Installation B – Install Mac Pro Into Computer Mounting Module C – Install Computer Mounting Modules Into Enclosure... - Page 4 This page left intentionally blank...
-
Page 5: Product Description
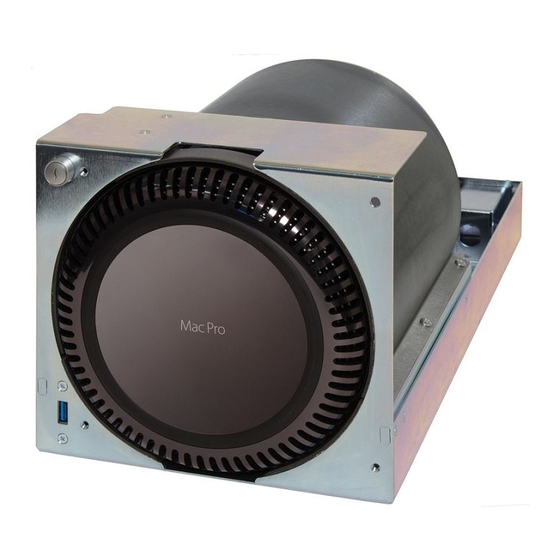
2 – USB 3.0 Port AC power cable here. words “Mac Pro” parallel to the RackMac Pro enclosure. This port connects to the Mac Pro through a cable attached behind the front panel. -
Page 6: Mac Pro And Computer Mounting Module Installation Steps
Support Note: This manual assumes you have already installed a RackMac Pro with one Mac Pro into your equipment rack. If you are adding this Computer Mounting Module as part of a new RackMac Pro installation, please refer to the RackMac Pro’s user’s guide instead. -
Page 7: B - Install Mac Pro Into Computer Mounting Module
Chapter 1 – Mac Pro and Computer Mounting Module Installation Steps B – Install Mac Pro Into Computer Mounting Module 1. Remove the RackMac Pro Computer Mounting Module from its packaging, and then set it on a flat, level surface. - Page 8 Chapter 2 – Mac Pro and Computer Mounting Module Installation Steps 6. Holding the computer with its ports facing up, very carefully insert the computer top-first into the Computer Mounting Module as shown, lining up the Mac Pro’s ports with the openings in the module’s top bracket.
- Page 9 Support Note: If you connect any Thunderbolt cables to the Mac Pro, Sonnet recommends that you secure them with cable ties to the Computer Mounting Module’s cables. 10. Tighten the six screws securing the Computer Mounting Module’s top bracket to its bottom bracket.
-
Page 10: C - Install Computer Mounting Modules Into Enclosure
C – Install Computer Mounting Modules Into Enclosure 1. Carefully slide the Computer Mounting Modules one at a time into the RackMac Pro’s rackmount enclosure until they stop (Figure 9). Figure 9 2. Turn the six thumbscrews clockwise to secure the Computer Mounting Modules to the rackmount enclosure (Figure 10). -
Page 11: Specifications, Precautions, And Support Information
For support on this product, contact your reseller or local distributor. Visit Our Web Site For the most current product information and online support files, visit the Sonnet Web site at www.sonnettech. com/support/. Register your product online at http:// registration.sonnettech.com to be informed of future upgrades and product releases. - Page 12 ©2016 Sonnet Technologies, Inc. All rights reserved. Sonnet, the Sonnet logotype, Simply Fast, the Simply Fast logotype, and RackMac are trademarks of Sonnet Technologies, Inc. Mac, the Mac logo, and Mac Pro are trademarks of Apple Inc., registered in the...
Need help?
Do you have a question about the RackMac Pro and is the answer not in the manual?
Questions and answers