
Summary of Contents for AGRI EASE BE-FTL
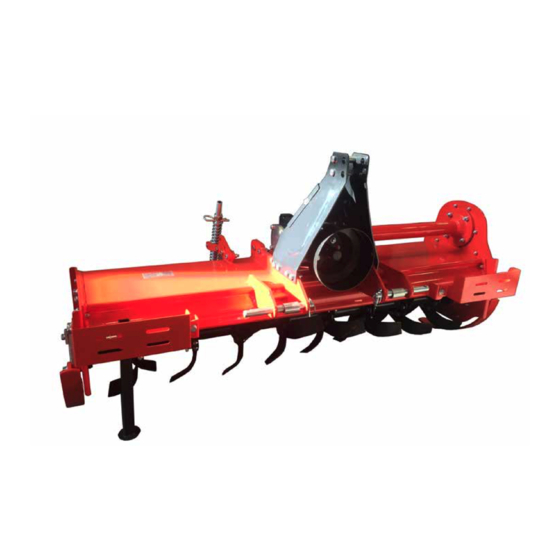
- Page 1 BE - FT L ROTARY TILLERS Owner’s Manual ASSEMBLY & OPERATING INSTRUCTIONS Purchase Date_________Model NO. __________ Serial NO._____________ Dealer__________________________________________________________...
-
Page 2: Before You Start
WARNINGS All implements with moving parts are potentially hazardous. There is no substitute for a cautious, safe-minded operator who recognizes the potential hazards and follows reasonable safety practices. The manufacturer has designed this implement to be used with all its safety equipment properly attached to minimize the chance of accidents. BEFORE YOU START Read the safety messages on the implement and shown in your manual. -
Page 3: Safety Precautions
SAFETY PRECAUTIONS MOST ACCIDENTS OCCUR BECAUSE OF NEGLECT OR CARELESSNESS. AVOID NEEDLESS ACCIDENTS BY FOLLOWING ALL OF THE SAFETY PRECAUTIONS LISTED BELOW. • Machinery should be operated only by those who are responsible and are authorized to do so. Stop the engine, lower all equipment, lock the brakes, and remove the ignition key before dis-mounting from the tractor. -
Page 4: Safety Information
WHEN ORDERING REPAIR PARTS, ALWAYS GIVE THE FOLLOWING INFORMATION: 1. PART NUMBER 2. PART DESCRIPTION 3. MODEL NUMBER & SERIAL NUMBER 4. NAME OF ITEM SAFETY INFORMATION • All equipment is potentially hazardous. There is no substitute for a cautious, safe-minded operator who recognizes potential hazards and follows reasonable safety practices. - Page 5 •When assembling the top of the 3 point hitch, keep all of the hardware loose until it’s mounted. Tighten the bottom 8 12 mm bolts first, then the top 2 12mm bolts, and the 2 8mm bolts that hold the cover plate last.
- Page 7 •When assembling the top of the 3 point hitch, keep all of the hardware loose until it’s mounted. Tighten the bottom 8 12 mm bolts first, then the top 2 12mm bolts, and the 2 8mm bolts that hold the cover plate last.
- Page 8 •When assembling the top of the 3 point hitch, keep all of the hardware loose until it’s mounted. Tighten the bottom 8 12 mm bolts first, then the top 2 12mm bolts, and the 2 8mm bolts that hold the cover plate last.
- Page 9 •When assembling the top of the 3 point hitch, keep all of the hardware loose until it’s mounted. Tighten the bottom 8 12 mm bolts first, then the top 2 12mm bolts, and the 2 8mm bolts that hold the cover plate last.
- Page 11 •When assembling the top of the 3 point hitch, keep all of the hardware loose until it’s mounted. Tighten the bottom 8 12 mm bolts first, then the top 2 12mm bolts, and the 2 8mm bolts that hold the cover plate last.
- Page 12 •When assembling the top of the 3 point hitch, keep all of the hardware loose until it’s mounted. Tighten the bottom 8 12 mm bolts first, then the top 2 12mm bolts, and the 2 8mm bolts that hold the cover plate last.
- Page 13 •When assembling the top of the 3 point hitch, keep all of the hardware loose until it’s mounted. Tighten the bottom 8 12 mm bolts first, then the top 2 12mm bolts, and the 2 8mm bolts that hold the cover plate last.
- Page 22 Remove and reinstall with tailgate pins. •When installing the tailgate, the bolts for the pins are already on the machine. They simply need to be loosened and pulled out.
- Page 23 •When installing the tailgate, the bolts for the pins are already on the machine. They simply need to be loosened and pulled out.
- Page 24 •When installing the tailgate, the bolts for the pins are already on the machine. They simply need to be loosened and pulled out.
- Page 27 This bolt comes preinstalled on tiller. Remove it and reinstall for tail- gate assembly. •When installing the tailgate, the bolts for the pins are already on the machine. They simply need to be loosened and pulled out.
- Page 29 •When installing the side guards beside the tailgate, the bolt head must be inside the tiller case and nuts must be on the outside or the blades will hit the bolt.
- Page 30 •When installing the side guards beside the tailgate, the bolt head must be inside the tiller case and nuts must be on the outside or the blades will hit the bolt.
- Page 31 •When installing the side guards beside the tailgate, the bolt head must be inside the tiller case and nuts must be on the outside or the blades will hit the bolt.
- Page 32 Nuts must be to the outside. •When installing the side guards beside the tailgate, the bolt head must be inside the tiller case and nuts must be on the outside or the blades will hit the bolt.
- Page 39 Breather Fill level •In the picture of the oil bath chain cover, there’s a 10 mm plug near the bottom, above the drain plug. This is the oil level mark. Fill from the breather hole at the top.
- Page 40 Breather •In the picture of the oil bath chain cover, there’s a 10 mm plug near the bottom, above the drain plug. This is the oil level mark. Fill from the breather hole at the top.
Need help?
Do you have a question about the BE-FTL and is the answer not in the manual?
Questions and answers