
Related Manuals for Mugnaini PICCOLO 60


Summary of Contents for Mugnaini PICCOLO 60
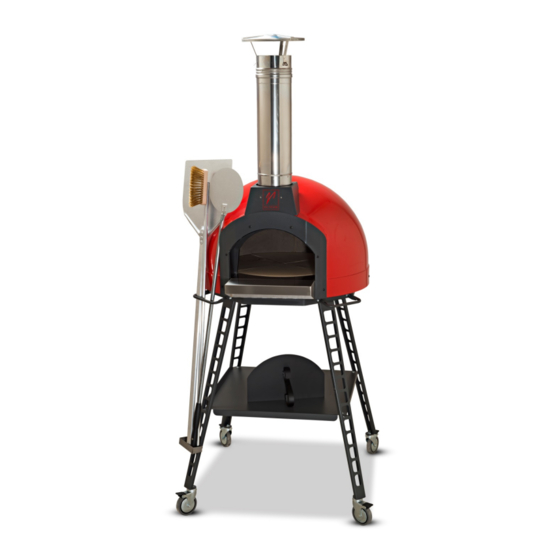
- Page 1 Outdoor Wood Fired Pizza Oven PICCOLO 60 Mugnaini Imports, Inc. 1530 Grove St. Healdsburg CA 95448 888.887.7206 Mugnaini.com...
- Page 2 INSTALLATION, USE AND MAINTENANCE MANUAL IMPORTANT SAFETY INSTRUCTIONS READ ALL INSTRUCTIONS BEFORE USE WARNING WHEN THIS OVEN IS NOT PROPERLY INSTALLED OR USED PROPERLY, A FIRE MAY RESULT. TO REDUCE THE RISK OF FIRE, FOLLOW THE INSTALLATION INSTRUCTIONS. PLEASE READ THIS ENTIRE MANUAL BEFORE YOU USE THE OVEN. FAILURE TO FOLLOW INSTRUCTIONS MAY RESULT IN PROPERTY DAMAGE, BODILY INJURY AND EVEN DEATH.
-
Page 3: Table Of Contents
INSTALLATION, USE AND MAINTENANCE MANUAL TABLE OF CONTENTS Safety Instructions Introduction Installation Instructions Oven Overview Curing Your Oven How To Use Your Oven Maintenance Warranty INTRODUCTION Congratulations on the purchase of your new Piccolo 60 Outdoor Wood Fired Pizza Oven! Your new oven has been specially designed to bake pizza and other menu items just like a large masonry built oven. The Piccolo 60 is appropriate to use on patios, balconies and most any outdoor settings. Use common sense when locating it and be aware of your surroundings and the impact of the exhaust smoke and fumes. -
Page 4: Installation Instructions
INSTALLATION, USE AND MAINTENANCE MANUAL INSTALLATION INSTRUCTIONS The Piccolo 60 Outdoor Wood Fired Pizza Oven comes from the factory fully assembled except for installing the chimney and chimney cap. In some cases, a longer chimney pipe may be necessary. Please contact our office if you have any concerns about meeting the minimum clearance requirements. Basic Requirements for a Safe Installation • The Piccolo 60 oven must be installed outdoors and operated on a hard, flat and level surface. • Not for use under an over hang, pergola, balcony or other overhead obstruction. • When using the steel stand, installation on a non-combustible surface is allowed. • Maintain 2” of clearance from combustible materials on the sides and back of the oven. • Install only in a well-ventilated draft free location. • Ensure adequate clearance around oven and chimney cap. • The chimney cap should be 2’ taller than any combustible construction within a 10’ radius. • The oven must be cured first before use! ____________________________________________________________ OVEN OVERVIEW The Piccolo 60 is an authentic wood burning oven built with the same materials and construction as a traditional pizza oven. Each time you use your oven you will start by making a fire in the oven with the goal of saturating the oven dome and floor with heat. Once the fire has burned down to red-hot coals, push the coals to one side, add more wood to maintain a cooking flame and place food next to the fire. Pizzas are cooked directly on the oven floor with other menu items cooked in oven safe cookware. NOTE: Pizza, oven use and cooking techniques can be found on our website: Mugnaini.com... -
Page 5: Curing Your Oven
INSTALLATION, USE AND MAINTENANCE MANUAL WARNING FOLLOW THE COMPLETE CURING SCHEDULE BEFORE COOKING IN THIS OVEN. FAILURE TO DO SO MAY CAUSE PERMANENT DAMAGE TO YOUR OVEN AND WILL VOID THE WARRANTY. DO NOT START A FIRE OR INITIATE THE CURING PROCESS UNTIL THE EXHAUST VENT HAS BEEN INSTALLED AND APPROVED BY THE LOCAL BUILDING OR FIRE OFFICIALS. NEVER USE GASOLINE, GASOLINE TYPE LANTERN FUEL, KEROSENE, CHARCOAL LIGHTER FLUID OR SIMILAR LIQUIDS TO START OR “FRESHEN UP” A FIRE IN THIS OVEN. KEEP ALL SUCH LIQUIDS WELL AWAY FROM THE OVEN WHEN IN USE. NEVER USE WATER TO LOWER TEMPERATURE INSIDE THE OVEN OR TO EXTINGUISH THE FIRE. CURING YOUR OVEN Your Mugnaini oven is made from Refrattari Cotto or refractory clay. The water used to form the clay must be cooked out prior to using your oven at full power. Curing is the process of slowly heating an oven to dry the moisture out of the clay components and then slowly raising the temperature to temper the oven dome. Once cured, your oven may be used at full power on any subsequent usage. It is crucial that this curing schedule be followed in order to not “thermally shock” the oven components which will result in a crack. A crack does not ruin the oven but it can and should be avoided. NOTE: Fine shallow cracks will become noticeable on the inside of the oven dome. This is a natural occurrence with refractory components and does not indicate a failure of the material. Before you start curing, familiarize yourself with the proper method to fire the oven. Day 1: 4 hour firing procedure • Build fires hourly with a small fire in the center of the oven. (Typically 4 fires over 4 hours) • Use a handheld thermometer to measure the temperature on the side of the dome and make a note of the temperature and the time. Average the temperature, as it will vary across the dome. • The goal is to increase the temperature of the dome at a rate of 50 - 70° per hour up to a maximum temperature of 200°F. TIP: Pick a spot in the middle of the walls to monitor. • Use small pieces of wood and allow the fire to die out and the heat to saturate the dome. • Increase flame as necessary to reach 200°F even if it takes longer than 4 hours. • Once the maximum temperature has been reached let the fire die out. -
Page 6: How To Use Your Oven
INSTALLATION, USE AND MAINTENANCE MANUAL Day 2: 4 hour firing procedure • Repeat the process from Day 1 proceeding quickly to 200°F and then slowing the pace. • Continue in this manner for approximately 4 hours to slowly reach 400-450°F in the dome walls. • Use small pieces of wood and allow the fire to die each time. • Spread the coals across the floor when the last fire has expired. • Insert door to close off bake chamber. Day 3: 4 hour firing • Repeat the process from Day 1 proceeding quickly to 400°F and then slowing the pace. • Continue hourly fires until the top of the dome has burned off all soot. • Be sure to use a larger flame if you are not reaching the higher temperatures. • Continue in this manner for 4 - 6 hours to achieve a full oven cure. • TIP: Your oven will be ready to use once the soot is burned off so plan on cooking for the last two hours of this process. HOW TO USE YOUR OVEN Selecting The Proper Wood For Your Oven You should use only seasoned hardwood (moisture content of 20% or less). The type of wood available to you will depend on where you are located and what your local firewood vendors stock. Oak, ash or maple are common hardwoods but fruit and nut woods such as apple, almond, cherry, walnut and pecan are all good choices. Avoid using soft resinous woods with a lot of sap and oil such as spruce, pine, eucalyptus or birch. The size of the wood is crucial to controlling the oven environment. We recommend double split wood in lengths of 12” or less. Double split logs are typically triangular in shape approximately 2–5” in diameter. Wood that is too large will over fire the oven resulting in flames that escape the oven mouth. Fired Starting Tools In addition to double split hardwood, you will want to stock some kindling (small pieces of wood approximately 1” in diameter, preferably hardwood), and fire starters. We recommend Weber® brand... - Page 7 INSTALLATION, USE AND MAINTENANCE MANUAL USING DOOR The door has two positions and functions. In its’ fully closed position the door is inserted at an angle through the arch and then straightened up and pushed back to close the bake chamber. This position is only used when there is no live flame in the oven. The door may also be placed outside of the arch on the shelf in a partially closed position to “damp down” the oven, which will also holds the heat. Allow enough room for combustion air to enter the bake chamber if you intend on keeping a fire going. Use this partially closed position during the curing process to control any smoke roll out when the oven is cold. MEASURE OVEN TEMPERATURE Mugnaini wood-fired ovens will self regulate based on the size of the flame and the floor temperature. We measure temperature inside a wood-fired oven with an infrared thermometer for accuracy. By checking the floor temperature, using visual cues and flame size we can create distinct repeatable oven environments for different styles of cooking. ...
- Page 8 INSTALLATION, USE AND MAINTENANCE MANUAL STARTING FIRE To start a fire, first place two small pieces of wood on the oven floor aligned front to back. Lay 2–3 pieces of kindling across the first two pieces with 2 pieces of hardwood on top. Place 2 Weber® brand fire starters in between the kindling and light. • Make sure the woodpile is in the center of the oven. • Use the long handled peel to push the wood and fire starters as necessary. • The flames should reach the top of the dome and flow out to the sides. • If the flames are getting pulled up the chimney flue or out the mouth of the oven you are over firing the oven. Push the fire deeper into the oven with the metal peel or knock down the fire. • Once the black soot is burned off the dome, push the fire to one side with the metal peel. • Use the floor brush to sweep ash into the fire to clean the floor of the oven. • Use the thermometer to monitor the floor temperature per Mugnaini oven cooking instructions. • Add wood as needed to maintain a constant flame. • Pizzas are cooked with a flame that rolls across the top of the dome. • Roasting meats and vegetables requires only a small flame that runs up the side of the dome. ISIT WWW MUGNAINI COM FOR COOKING INSTRUCTIONS...
-
Page 9: Maintenance
INSTALLATION, USE AND MAINTENANCE MANUAL MAINTENANCE Cleaning the oven Use the brass bristle floor brush to sweep debris out of the oven mouth. Scrape any buildup off the oven floor with the peel first before brushing. Stubborn buildups can be ‘cooked’ off by bringing the hot coals over the affected area for several minutes. Ashes Keep a metal can with a tight fitting lid to collect the ashes with. It is OK to let them build up for a couple of firings. Use the metal peel to shovel the ashes out of the oven. Technical Assistance We want your experience to be rewarding. Please call our office at 888.887.7206 if you have any questions or need help understanding these steps. ____________________________________________________________... -
Page 10: Warranty
Oven, related equipment, and accessories; To any Oven, or related equipment or accessory, that is improperly installed or maintained; To products resold in other than Mugnaini original packaging or to Ovens modified or altered by the Original Purchaser;... - Page 11 INSTALLATION, USE AND MAINTENANCE MANUAL All claims under warranty (“Warranty Claim(s)”) must be made within fifteen (15) days after occurrence of circumstances giving rise therein and all Warranty Claims must be received within the applicable Warranty Period by Mugnaini or its authorized representative. Any and all rights under this warranty or at law of Original Purchaser against Mugnaini shall terminate and be void in the event Warranty Claims are not submitted within the time set forth in the immediately preceding sentence. Such Warranty Claims must be in writing and include the Oven type, the model and serial number of the Oven, the purchase date and a full description of the circumstances giving rise to the Warranty Claim. Warranty Claims under this warranty are to be mailed to: MUGNAINI IMPORTS, INC. 1530 Grove Street Healdsburg, California 95448 Before any Oven is returned for repair, written authorization must be obtained from Mugnaini or its authorized representative for the return and instructions, as to how and where the Oven should be shipped. Any Oven returned to Mugnaini for examination shall be shipped with all shipping charges prepaid, at Original Purchaser’s expense, via the means of transportation indicated as acceptable by Mugnaini. Mugnaini reserves the right to reject any Warranty Claim not promptly reported and any Warranty Claim on any Oven that has been altered or has been shipped by non-acceptable means of transportation. When an Oven is returned for examination and inspection or for any other reason, Original Purchaser shall be responsible for all damages resulting from improper packing or handling and the risk of loss in transit, notwithstanding any defect or nonconformity in the Oven. In all cases, Mugnaini has sole responsibility in its reasonable judgment for determining the cause and nature of failure, and Mugnaini’s determination with regard thereto shall be final and binding upon the Original Purchaser. If it is found that Mugnaini’s Oven has been returned without cause and is still serviceable, Original Purchaser will be notified and the Oven returned at Original Purchaser’s expense. In addition, a charge for testing and examination may, in Mugnaini’s sole and reasonable discretion, be made on any Oven so returned.
Need help?
Do you have a question about the PICCOLO 60 and is the answer not in the manual?
Questions and answers