Table of Contents
Advertisement
Available languages
Available languages
Quick Links
Advertisement
Table of Contents

Subscribe to Our Youtube Channel
Summary of Contents for Ducati DGR 1300
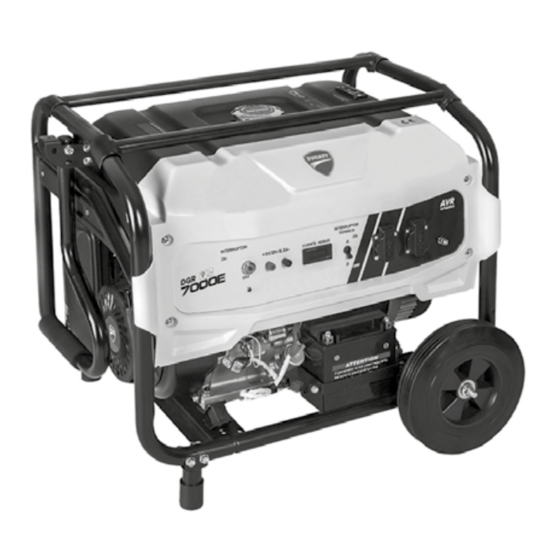
- Page 1 DGR 1300 DGR 1300S DGR 2500 DGR 2500S DGR 3200 DGR 3200S DGR 4500 DGR 4500S DGR 5500 DGR 5500S DGR 5500E DGR 5500ES DGRT 5500 DGRT 5500S DGR 7000E DGR 7000ES DGR 8000E DGR 8000ES genera tors Owner´s manual...
- Page 3 Español Atención • Antes de usar nuestro generador, por favor lea este manual cuidadosamente para saber cómo usar correctamente esta unidad. • Tenga este manual a mano.
- Page 4 Índice 1. Información de seguridad 2. Datos técnicos 3. Comprobaciones iniciales antes de usar 4. Encendido del motor 5. Uso del generador 6. Parar el motor 7. Mantenimiento 8. Arranque 9. Almacenaje y transporte 10. Problemas y soluciones 11. Especificaciones técnicas (pág. 33)
- Page 5 Español Manual de usuario Prevención de daños Gracias por adquirir nuestro generador. Este manual contiene información sobre el Verá otra importante información marcada con uso y el mantenimiento del generador, que “ATENCIÓN” . está basado en la información más reciente ATENCIÓN: Si usted no sigue las indicaciones sobre el producto disponible en el momento contenidas en este manual, puede dañar la...
- Page 6 Español Manual de usuario electrocutarse si lo usa en condiciones ADVERTENCIA PELIGRO: Peligro de húmedas. quemaduras. El tubo de escape alcanza altas 1.3 No conecte la unidad a la instalación temperaturas durante e inmediatamente eléctrica de un edificio. después de arrancar el motor. Cualquier contacto accidental con cualquier superficie ADVERTENCIA: Peligro de incendio y de caliente como el escape, puede causarle...
- Page 7 Español Manual de usuario 3.1.4. Ponga la varilla de nuevo y enrósquela 3. COMPROBACIONES INICIALES ANTES bien. DE USAR 3.2. Nivel de carburante Por favor realice los siguientes pasos antes 3.2.1. Ponga la unidad sobre una superficie de usar la unidad para asegurar el buen nivelada.
- Page 8 Español Manual de usuario Fig. 1 Fig. 3 3.3.2 Compruebe que el elemento del filtro 3.4 Batería (Sólo para los modelos con de aire está intacto y limpio. Si estuviese arranque eléctrico). roto, remplácelo por uno nuevo. 3.4.1 Compruebe la batería y sus conexiones.
- Page 9 Español Manual de usuario 4 ENCENDIDO DEL MOTOR NOTA Asegúrese de realizar todas las inspecciones necesarias antes de arrancar el motor. 4.1 Desenchufe todas las clavijas Ac para quitarle carga. 4.2 Compruebe que la unidad esta correctamente conectada a tierra. Fig.
- Page 10 Español Manual de usuario 5. USO DEL GENERADOR Para que su equipo esté en buenas condiciones, haga lo siguiente. ADVERTENCIA PELIGRO: Peligro de electrocución. No conectar el generador a una toma de tierra puede causar una descarga y electrocutarle. 5.1 Toma a tierra Tenga siempre la unidad conectada a tierra para evitar una posible electrocución.
- Page 11 Español Manual de usuario 5.4 Modos de conexión adecuado a la carga eléctrica que vaya a NOTA Familiarícese con los parámetros necesitar del panel de control para saber cómo usar correctamente la corriente de salida generada por el generador. PRECAUCIÓN El generador puede funcionar al rango establecido de salida solo si la temperatura, presión y humedad son constantes.
- Page 12 Español Manual de usuario ADVERTENCIA No toque ninguno de los componentes que se calienta hasta que la unidad este apagada y se haya enfriado por completo para evitar quemaduras. PRECAUCIÓN No tenga (Fig.11) (Fig.12) el carburante dentro de la unidad durante mucho tiempo ya que le resultará...
- Page 13 Español Manual de usuario 7.2.1 Quite el tornillo y saque la varilla del aceite. 7.2.2 Desenrosque el tapón de drenaje y quite el aceite del cárter. Fig. 15 7.2.3 Ponga de vuelta el tapón de drenaje. 7.3.4 Compruebe la distancia entre los 7.2.4 Llene con aceite para motor hasta la electrodos de la bujía, está...
- Page 14 Español Manual de usuario 7.4 Mantenimiento del filtro de carburante 8. ARRANQUE 7.4.1 Ponga la llave de paso en la posición OFF. Desmonte la carcasa del filtro y su 8.1 Arranque de la unidad malla. (Fig. 18) (Por favor, consulte el capítulo 5 para información relevante.) 7.4.2 Limpie la carcasa y la malla del filtro de Gire el conmutador de encendido a la posición...
- Page 15 Español Manual de usuario 8.4.1 Desconecte los cables positivo y Añada carburante nuevo y negativo de la batería. estabilizante para gasolina Quite la bujía y vierta en 8.4.2 Quite la placa que sujeta la batería. el cilindro una cucharada de aceite de motor, tire el De 1 año en adelante arranque manual suave- 8.4.3 Instale una nueva batería y la placa de...
- Page 16 Español Manual de usuario el aceite uniformemente. genere energía compruebe: 9.2.4 Tire del asa de arranque a mano con 10.2.1 Que el interruptor de corriente suavidad hasta que sienta que resistencia, continua AC este en la posición ON. (Fig. siga tirando hasta superarla. Una vez pasado este punto, tanto las válvulas de admisión como de escape del motor estarán cerradas y prevenimos que se genere oxido en el...
- Page 17 Español Manual de usuario Modelo / Model Par de funcionamiento Par de arranque Operation Torque Starting Torque 1300S 4.5N.m ≥1.5N.m 2500S 11N.m ≥1.5N.m 3200S 12N.m ≥1.5N.m 5500ES 25N.m ≥2.1N.m 7000ES 26N.m ≥2.1N.m Instrucciones para la barras de transporte del generador. Las barras solo se usan para empaquetarlo y transportarlo.
- Page 19 English Atention • Before using this generator, please read carefully this manual to have clear knowledge on how to use the unit. • Have this manual at reach.
-
Page 20: Table Of Contents
English Manual user Contents 1. Safety Instructions 2. Introduction to parts and components 3. Pre-operation check 4. Starting the engine 5. Use of the generator set 6. Stopping the engine 7. Maintenance 8. Electrical start 9. Storage and transportation 10. Troubleshooting 11. - Page 21 English Owner´s manual Damage prevention Thank you for purchasing our gasoline generator and hope that you will enjoy You can see other important information operating your unit. marked with “ATTENTION” . ATTENTION: If you don’t operate as those indicated in the manual, device damage will This manual contains information on operation be caused.
-
Page 22: Introduction To Parts And Components
English Owner´s manual can cause the flammables over-heat and 8. Control Panel cause a fire. 9. Fuel Stick 10. Engine Switch 1.6 Avoid fuel spillage when refuelling. 11. Voltage Meter 12. Circute Breaker 13. Groud Pole WARNING DANGER: Fire and/or 14. - Page 23 English Owner´s manual NOTE: Check only when the unit is on a level ground. 3.2.5 Re-mount the fuel filler cap and tighten it well. Take out the oil filler cover and 3.1.1 3.3 Air Cleaner have the dipstick cleaned 3.3.1 Remove the air cleaner housing 3.1.2 Insert the dipstick into the oil filler hole (Fig.
-
Page 24: Starting The Engine
English Owner´s manual (Fig. 3) WARNING DANGER: Electrical Shock. Failure to properly ground the generator can result in electrocution. 4 STARTING THE ENGINE NOTE Before starting the engine be sure that all the pre-operation check has been done. 4.1 Unplug all AC sockets to disconnect loads 4.2 Check if the unit has been properly grounded. - Page 25 English Owner´s manual Fig. 7 4.6 Pull up the Starting Handle gently until resistance is felt, then pull it up rapidly. Put back the handle slowly to avoid damage to the starting system. Turn the key-switch to START position for E-start Models, (Figure 8) 4.7 If the engine fails to start, please turn on the choke lever and repeat what explained in Section 4.6.
-
Page 26: Use Of The Generator Set
English Owner´s manual 5. USE OF THE GENERATOR SET Constantly do the following to keep the unit in sound, workable condition. WARNING DANGER Electrical Shock. Failure to properly ground the generator can result in electrocution. 5.1 Grounding Keep the generator properly grounded to avoid electrocution. 5.2 Wattage of Electrical Devices Reference data of the rating wattage and (the way to calculate) the starting wattage of the electric appliances connecting to the generator. -
Page 27: Stopping The Engine
English Owner´s manual 5.4 Instructions on AC Usage NOTE Acquaint yourself with the parameters on the Control Panel to ensure correct usage within the rated output of the generator set. CAUTION The generator set can work at its rated output only under constant temperature, pressure and humidity. -
Page 28: Maintenance
English Owner´s manual Fig. 11 Fig. 12 WARNING Don’t touch the heating components before the unit cools down after stopping the engine to avoid burns. CAUTION Fuel storage in unit which is not to be used for long time will cause it difficult to start the engine. - Page 29 English Owner´s manual 7.3.5 Re-mount the spark plug and its cap. 7.2.3 Put the drain plug back. Spark Plug recommended: F7TC (Fig. 17) 7.2.4 Fill engine oil to the upper level of the dipstick. Engine Oil recommended: 4-stroke gasoline engine oil engine oil class SE, SF from API Service Classification or SAE 15W- 40 engine oil equivalent to Class.
-
Page 30: Electrical Start
English Owner´s manual 8.3.2.2 Run the unit for several minutes without load to cool down the generator set. 8.3.2.3 Set the ignition switch to OFF position. 8.3.2.4 Set the fuel switch to OFF position 8.4 Replacement of the Battery If your unit can be started by recoil start, but cannot be started by electrical start, please run the unit with recoil start and have your battery charged for 20 minutes. -
Page 31: Troubleshooting
English Owner´s manual 9.2.3 Remove the spark plug and pour into 9.1.1 The storing places should be dry and the cylinder a spoon of engine oil, pull the clean. recoil start slowly to distribute the oil evenly. 9.1.2 Carry out maintenance according to the 9.2.4 Pull up the recoil start handle slowly table below: until an anti-action is felt, keep pulling until... - Page 32 English Owner´s manual Modelo / Model Par de funcionamiento Par de arranque Operation Torque Starting Torque 1300S 4.5N.m ≥1.5N.m 2500S 11N.m ≥1.5N.m 3200S 12N.m ≥1.5N.m 5500ES 25N.m ≥2.1N.m 7000ES 26N.m ≥2.1N.m Instructions for transportations bars. The bars are only for the use of packing and transportation. They can be removed when operating the generator.
-
Page 33: Specifications
ESPECIFICACIONES / ESPECIFICATIONS Referencia / Reference DGR361300S Referencia / Reference DGR361300 Dimensiones / Size (L x An x Al) 470x350x490 mm Dimensiones / Size (L x An x Al) 470x350x490 mm Depósito Combustible / Fuel Tank Depósito Combustible / Fuel Tank Capacidad Aceite Motor / Oil Capacidad Aceite Motor / 0,6L... - Page 34 Referencia / Reference DGR362500 Referencia / Reference DGR362500S Dimensiones / Size (L x An x Al) 605x455x470 mm Dimensiones / Size (L x An x Al) 605x455x470 mm Depósito Combustible / Fuel Tank Depósito Combustible / Fuel Tank Capacidad Aceite Motor / Oil Capacidad Aceite Motor / Oil 0,6L 0,6L...
- Page 35 Referencia / Reference DGR363200 Referencia / Reference DGR363200S Dimensiones / Size (L x An x Al) 605x455x470 mm Dimensiones / Size (L x An x Al) 605x455x470 mm Depósito Combustible / Fuel Tank Depósito Combustible / Fuel Tank Capacidad Aceite Motor / Capacidad Aceite Motor / 0,6L 0,6L...
- Page 36 Referencia / Reference DGR364500 Referencia / Reference DGR364500S Dimensiones / Size (L x An x Al) 680x505x590 mm Dimensiones / Size (L x An x Al) 680x505x590 mm Depósito Combustible / Fuel Tank Depósito Combustible / Fuel Tank Capacidad Aceite Motor / Oil Capacidad Aceite Motor / 1,1L 1,1L...
- Page 37 DGR365500, DGR365500S, Referencia / Reference Referencia / Reference DGR365500E DGR365500ES Dimensiones / Size (L x An x Al) 695x535x575 mm Dimensiones / Size (L x An x Al) 695x535x575 mm Depósito Combustible / Fuel Tank Depósito Combustible / Fuel Tank Capacidad Aceite Motor / Capacidad Aceite Motor / Oil 1,1L...
- Page 38 Referencia / Reference DGRT365500 Referencia / Reference DGRT365500S Dimensiones / Size (L x An x Al) 695x535x575 mm Dimensiones / Size (L x An x Al) 695x535x575 mm Depósito Combustible / Fuel Tank Depósito Combustible / Fuel Tank Capacidad Aceite Motor / Oil Capacidad Aceite Motor / Oil 1,1L 1,1L...
- Page 39 Referencia / Reference DGR367000E Referencia / Reference DGR367000ES Dimensiones / Size (L x An x Al) 680x505x590 mm Dimensiones / Size (L x An x Al) 680x505x590 mm Depósito Combustible / Fuel Tank Depósito Combustible / Fuel Tank Capacidad Aceite Motor / Oil Capacidad Aceite Motor / 1,1L 1,1L...
- Page 40 Referencia / Reference DGR368000E DGR368000ES Potencia máx. / Max. Power 18hp Cilindrada / Displacemente 459cc Tipo Motor / Type of engine Single cylinder, 4-Stroke, Forced Air Cooling Petrol Engine Rated Speed 3000 3600 Volt Adjustment AVR (Automatic Voltage Regulation) Ignition Non-contact transistor Start Type Recoil start...
- Page 57 English Owner´s manual...
- Page 59 Plataforma Logística de Zaragoza (PLAZA) C/ Isla de Ischia, 2-4 50197 ZARAGOZA (Spain) Tfno.: +34 976 786 686 Fax.: +34 976 771 0 53 http://www.ducatigarden.com...
- Page 60 English Owner´s manual Manual 2017 - V3...
Need help?
Do you have a question about the DGR 1300 and is the answer not in the manual?
Questions and answers