Table of Contents
Advertisement
Quick Links
Advertisement
Table of Contents

Summary of Contents for AOMAGO V82
-
Page 1: Forward
Aomago Voice Recorder Pen User Manual... - Page 2 Product Manual Forward Thank you for purchasing Aomago voice recorder pen. For the purpose to familiarize yourself with the operating of this device as soon as possible, we have included a detail user manual with the unit. Prior to using the product, be sure to carefully read all the information provided.
-
Page 3: Table Of Contents
Product Manual CONTENT Forward..................1 Part 1:Prior to Use..............5 1.Product Features............5 2.Annex................7 3.Product Safety Information.......... 8 4.Product Illustration and function........9 Part 2: Recording Function...........11 1.Switch On..............11 2.Switch Off..............11 3.charging indicator............12 4.Built-in microphone recording........12 5.Stop recording............ - Page 4 Product Manual 3.Sound Level Adjustment..........16 4.Previous/Next............. 16 5.Fast Forward...............17 6.Music file/ Switch recording file........17 Part 4 : Connecting to computer.......... 18 1.Connect with computer..........18 2.Upload and download files.........19 3.Disconnect from computer......... 19 4.Battery and Charging..........20 5. Troubleshooting............21 6.Technical Specification..........27 •4•...
-
Page 5: Part 1:Prior To Use
Part 1:Prior to Use 1.Product Features All-directional microphone recording using professional recording DSP chip, built-in digital noise reduction technology. Exquisite deigned pen. Design with dual functions (Recording/Writing) . Single key to start recording and save. Quick and convenient. - Page 6 Product Manual Independent VOR voice-activated recording, toggle switch to saves power and memory space effectively. VOR voice recording files and ordinary recording files classification storage function to facilitate later search. USB charging / headset combo interface design, automatic recognition of the headphone jack.
-
Page 7: Annex
Product Manual 2.Annex This product includes the following device and accessories. If they are missing at the time of purchase, please contact your local dealer. 1.V82 Voice recorder pen 2.User manual 3.Headset 4.Special USB cable 5.Pen refills •7•... -
Page 8: Product Safety Information
Product Manual 3.Product Safety Information WARNING: Failure to follow these safety instructions may result in injury and danger! Do not drop or violently collide the device as this may result in serious damage or malfunction. Do not open or disassemble this device, there is no need to ... -
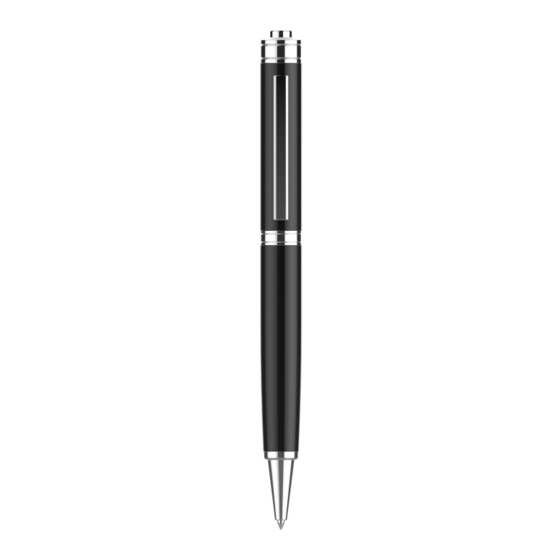
Page 9: Product Illustration And Function
Product Manual 4.Product Illustration and function •9•... - Page 10 Product Manual Indicator lamp description: 1.Switch On: Light red and blue light; 2.Switch Off: Red light and blue light flash at the same time and then off; 3.Record process: Flashing red light; 4.Play: Long blue light and flashing red light; •10•...
-
Page 11: Part 2: Recording Function
Product Manual 5.Low Battery: Shut down when the blue light and red light flash at the same time; 6.Charging: Flashing red light when charging, red light is off when full; Part 2: Recording Function 1.Switch On Press the top After several seconds, recording automatically begins with... -
Page 12: Charging Indicator
Product Manual 3.charging indicator Charging: When charging, the charge indicator light will flash. The 4 indicators Press “+” to show mean the 4 different stage battery indicator of remaining power(25%, during recording. 50%, 75%, 100%, Please charge respectively).When the when light is on. -
Page 13: Stop Recording
Product Manual 5.Stop/Save recording In the process of recording, press the top button to rebound back to high level. Save the current recording and switch off the voice recorder. 6.Voice activated recording Turn the toggle switch to the VOR position for voice mode, the red orange light flashes alternately and the voice control begins to work. -
Page 14: Time Setting
Product Manual 7.Time setting Insert the dedicated USB cable into the PC's USB port and enter the USB disk mode. In the local disk, there is a "Time.exe" that comes with the program. Double-click the "Time.exe" Synchronize with the computer clock. Note: You can refer to the description of the README file. -
Page 15: Part 3: File Management And Playback
Product Manual Part 3: File Management and Playback 1.Delete Document When the earphone is playing, press the top spring switch to rebound to high level to enter the pause state, press "+" key twice to enter the delete state; press the "+" key twice to delete the current file, press the "+"... -
Page 16: Play/Pause
Product Manual 2.Play/Pause For playing the recording files, insert the headset into recorder pen, then press the top button in low position. For pausing the playback, press the top button in high position. Press the top button in low position again to resume the playback. -
Page 17: Fast Forward
Product Manual 5.Fast forward When play the files via headset, press and hold the “+” button to release the volume, first adjust the volume to the maximum, then continue to press and hold “+” for fast forward operation; 6.Music file/ Switch recording file Under the play state of the plug in headphone, press the spring at the top first to rebound back to the high level, and hen press “-”... -
Page 18: Part 4 : Connecting To Computer
Product Manual Part 4 : Connecting to computer 1.Connect with computer In order to be able to download and upload files from the computer, connect the PC's USB port and the unit using the supplied USB cable, and the unit will be automatically power on when connected. -
Page 19: Upload And Download Files
Product Manual 2.Upload and download files When the driver letter appears under Windows System, you can copy the recording file to your computer. 3.Disconnect from computer After the file transfer is completed, please close my computer or Explorer, and then unplug the cable as follows.For users using WINDOW 2000 and OS above WINDOW 2000, please follow the steps as shown below. -
Page 20: Battery And Charging
Product Manual !Reference: The tip image of different operating system are slightly different, the above is for reference only. 4.Battery and Charging The device has built-in lithium battery. You can connect the computer through a random USB cable to charge the device. Long bright red light happens when charging. -
Page 21: Troubleshooting
Product Manual Troubleshooting The recording pen indicator does not blink after pressing the power button. Causes of failure and troubleshooting: Lithium battery has no electricity, please charge the lithium battery in time. No Sound when playing the document. Cause of the failure and troubleshooting: volume is too small, adjust the volume;... - Page 22 Product Manual Cannot transfer files after connection Causes of failure and troubleshooting: Your motherboard may not support the USB interface, you need to upgrade your motherboard driver. Why it causes abnormal behavior to the computer sometimes when plug into the computer? Cause of the failure and troubleshooting: It is mainly due to USB plugged during file transfer, it is recommended that users do not disconnect during file transfer, so as to avoid causing abnormal...
- Page 23 Product Manual The reason: mainly due to the need for some of the memory space to store the program, and to display the font. Therefore, total memory is smaller than the actual nominal. Why some MP3 songs cannot be played normally in the recorder? Causes of failure and troubleshooting: Strictly speaking, MP3 refers to the MPEG I Layer3 standard compressed music files,...
- Page 24 Product Manual 2) When using software self-compression, please select MPEG I Layer 3 encoding. Can I delete recording from computer? Yes, when the recorder is successfully connected to your computer, you will find a removable drive names as “L80A”, and all your recordings was saved in a folder named “RECORD”...
- Page 25 Product Manual 1. The recorded file was not saved properly. Please start the recording and saving the recording by pressing the Top button 2. Connect the pen to your computer, you will find a removable disk, and click whole disk select ‘Format’. ...
- Page 26 Product Manual When the memory is full, you may backup all your recording files to your computer, and format the recorder. The voice recorder has a storage space of 16GB. You may back up your recording files onto your computer when the space is full. •26•...
-
Page 27: Technical Specification
Product Manual Technical Specification Pen-type recording pen Product name Built in 16G Storage 16GB memory can be recorded Recording storage period continuously for 10800 minutes Built-in Lithium Battery: 3.7V Power supply 110mAh Built-in Microphone: Microphone Omnidirectional Microphone Signal to noise ratio ≥80dB WAV:32Kbps~192Kbps Support Audio Play... - Page 28 Product Manual Recording Sampling Rate 48KHz File System FAT32 Operating Temperature -5℃~40℃ Connection Method 3.5MMUSB Interface Transmission Interface USB 2.0 WINDOWS Supported System XP/VISTA/WINDOWS 10 Dimension(L×H) 145mm*12mm Continuous Recording About 8 hours time Play Time About 5 hours 40grams(Please refer to the Net Net weight weight actual product as standard)...
- Page 29 -or- Email: support@aomago.com We will regularly update our E-book based on our customer feedback. If there is any issue, please feel free to contact us. We will be there to assist you. Thanks for your support. Sincerely, Aomago Team •29•...
Need help?
Do you have a question about the V82 and is the answer not in the manual?
Questions and answers