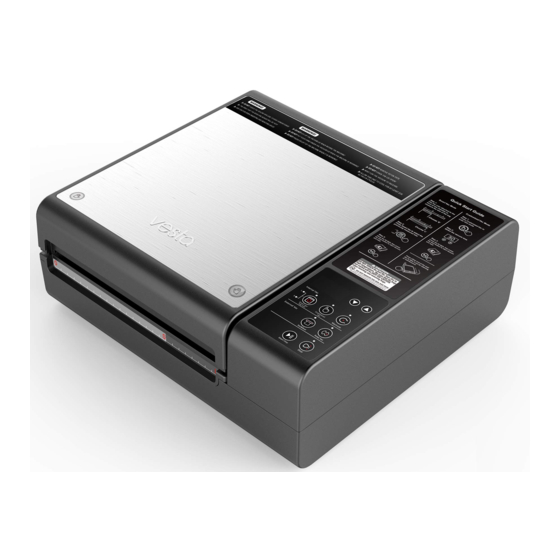

Summary of Contents for Vesta Precision Chamber Vac Elite
- Page 1 Chamber Vac Elite User Manual Precision Appliance Technology, Inc. Website: www.vestaprecision.com...
-
Page 2: Table Of Contents
TABLE OF CONTENTS IMPORTANT SAFETY INFORMATION ............ 2 VACUUM PACKAGING GUIDELINES ........... 3 PRODUCT COMPONENTS ..............5 FEATURES AND OPTIONS ..............6 POUCH GUIDELINES ................10 OPERATING INSTRUCTIONS ............... 11 To Close and Open the Vacuum Lid ........... 11 Before you begin… ................ 12 How to Chamber Vacuum and Seal a Pouch ...... -
Page 3: Important Safety Information
IMPORTANT SAFETY INFORMATION When using this electrical appliance, basic safety precautions should always be followed including: 1. Read and understand all instructions. 2. Operate the appliance indoors only on a dry, stable, hard surface. 3. Do not use the appliance near a heat source, on a hot surface, or in wet conditions. -
Page 4: Vacuum Packaging Guidelines
VACUUM PACKAGING GUIDELINES • Follow all food safety regulations as outlined by the FDA at www.FDA.gov. • Vacuum packaging is NOT a substitute for canning. • Vacuum packaging is NOT a substitute for refrigeration or freezing. • Vacuum packaging cannot reverse the deterioration of foods. - Page 5 Food Storage and Safety Information Typical Vacuum Storage Foods Storage Packaging Meat 6 months 15-20 months Fish, Seafood 6 months 10-12 months Frozen Dried fruit, Coffee 6-9 months 18-24 months beans Meat 2-3 days 12-13 days Fish, Seafood 2-3 days 6-8 days Cooked 2-3 days...
-
Page 6: Product Components
PRODUCT COMPONENTS ① ⑦ ② ⑧ ③ ④ ⑤ ⑥ ⑨ ⑩ 1.Seal foam 2. Upper chamber 3. Suction inlet 4. Lower Chamber 5. Seal wire 6. Lock 7. Vacuum lid 8. Chamber seal gasket 9. Control panel 10. Vacuum bag clamp... -
Page 7: Features And Options
FEATURES AND OPTIONS 1. Start/Stop Button • Plug in and press any button to enter Standby mode. • When in Standby mode, press the “Start/Stop” button to begin the currently selected mode. • To cancel an ongoing operation, press the “Start/Stop” button to stop the function and return to Standby mode. - Page 8 2. Seal Button - From Standby mode, press the “Seal” button to set the desired seal time. Press the "▲" or "▼" button to increase or decrease the sealing time from 0 to 6 seconds. All vacuum sealing modes use this sealing time setting. Press the “Start/Stop” button to begin sealing - While vacuuming in either the Smart Vac, Customized Vac, Vac&Seal, Pulse Vac, or Marinate modes, press the “Seal”...
- Page 9 6. Customized Vac Button - From Standby mode, press the “Customized Vac” button. The display will show “C” + vacuum time in seconds. Press the "▲" or "▼" buttons to increase or decrease the vacuum time from 0 to 99 seconds. Close the lid and press the “Start/Stop” button to begin the Customized Vac process.
- Page 10 ▼ Buttons ▲ By pressing the " ▲" or " ▼" buttons, you can increase or decrease the heat-sealing time, the vacuuming time of the Customized Vac mode, or the number of cycles for Marinate mode. It can also be pressed down and held for a rapid change.
-
Page 11: Pouch Guidelines
CLO Status • The unit is in protection mode and will not respond to any keypress until the lid is opened. To restore factory settings While in Standby mode, press and hold the “Marinate” and “Seal” buttons at the same time until the display shows "rs" and the unit beeps. -
Page 12: Operating Instructions
OPERATING INSTRUCTIONS To Close and Open the Vacuum Lid To close: Press both sides of the vacuum lid gently but firmly, so that the lock engages the lid. To open: Grasp the middle of the lid by hand and lift it up gently but firmly to open the lid. -
Page 13: Before You Begin
Before you begin… • Plug in the electrical cable. • When connected to an outlet, the display shows ‘OFF’ and is in power-saving mode. • Press any button to enter Standby mode. The digital display will light up. • The machine is now ready for all functions. How to Chamber Vacuum and Seal a Pouch In order to extend the life of your vacuum sealer, we strongly recommend pausing at least 20 seconds between... - Page 14 4. Place the vacuum bag with the item into the vacuum chamber with the open end of the pouch over the seal bar. If the clip is not extended, press the clip to pop it up. Be sure to clip the lower/bottom side of the bag into the bag clip making sure the bag does not lay past the limit line.
-
Page 15: To Make Bags From Rolls
5. Close the vacuum lid and press the “Start/Stop” button to start the vacuum and seal process. If you need to seal the bag before the vacuum process finishes, press the “Seal” button to start sealing immediately. 6. At the end of the process, the machine will beep 3 times to signal the operation is complete. -
Page 16: How To External Vacuum And Seal A Pouch
How to External Vacuum and Seal a Pouch In order to extend the life of your vacuum sealer, we strongly recommend pausing at least 20 seconds between each seal. 1. Choose a suitable sized vacuum pouch and place item in pouch, allowing a minimum of 2 inches (5 cm) between the item and top of pouch. -
Page 17: How To Marinate Foods
6. To start the process: - If using Vac&Seal mode, close the vacuum lid and press the “Start/Stop” button to start the vacuum and seal process. If you need to seal the bag before the vacuum process finishes, press the “Seal” button to start sealing immediately. - If using Pulse Vac mode, press the “Pulse Vac”... - Page 18 9-minute cycles. 2. Choose a suitable sized vacuum pouch and place item in pouch, allowing a minimum of 2 inches (5 cm) between the item and top of pouch. 3. Place the vacuum bag with the item into the vacuum chamber with the open end of the bag over the seal bar, but not past the limit line.
-
Page 19: Maintenance
MAINTENANCE 1. Always unplug the machine before cleaning. 2. Do not immerse the machine or electrical cord in water or any other liquid. 3. Do not use abrasive cleansers or scouring pads to clean the machine to avoid scratching the surface. 4. -
Page 20: Troubleshooting
TROUBLESHOOTING Fails to operate • Make sure the machine is plugged into an electrical outlet. • Check the power cord for tears and frays. If the cord is damaged or frayed, do not operate the machine and contact Vesta Customer Care. Does not completely vacuum or seal automatically •... - Page 21 Error Reason Troubleshooting Code Condition 1: The E01 error code occurs 1. Press the STOP button to under two conditions: exit the Error status AND 2. Check if the gasket on the 1. when a certain vacuum door is clean and in good pressure cannot repair without a large gap at...
-
Page 22: Technical Parameters
TECHNICAL PARAMETERS Rated voltage: 110-120 V~ / 220-240 V~ Rated frequency: 60HZ / 50HZ Rated power: 270 W Pump: Dual dry pump Pressure: -28.3inHg / -958mbar Seal wire width: 0.14” / 3.5 mm Seal bar length: 10” / 254mm Size: 15x13.4x5.4in / 380x340x136mm Weight: 13.45 lb. -
Page 23: Limited Warranty And After Sales Service
• Full refunds can only be provided within 30 days of purchase directly from Vesta Precision. Devices purchased through resellers, retail partners, or other websites are not eligible for a return and full refund. Please consult their return policies for more information. -
Page 24: Warranty Replacements
Retail exchanges can only be provided within 30 days of purchase directly from Vesta Precision. Products purchased through resellers, retail partners, or other websites are not eligible for a retail exchange. Please consult their exchange policies for more information. We cannot provide a retail exchange for any damaged devices not covered under our limited warranty. -
Page 25: Damaged And Defective Items
Damaged and Defective Items If you received a damaged or defective product, notify us immediately for assistance via phone, email, or web support. Please note that if we do not have an exact replacement for your unit, we will replace it with a similar unit of equal or greater value. - Page 26 Precision Appliance Technology, Inc. Questions or Problems? Contact support via Website: www.vestaprecision.com Email: support@vestaprecision.com...
Need help?
Do you have a question about the Chamber Vac Elite and is the answer not in the manual?
Questions and answers