Table of Contents
Advertisement
Advertisement
Table of Contents

Related Manuals for AOMAGO A31

Summary of Contents for AOMAGO A31
- Page 1 A31 User Manual...
-
Page 2: Product Information
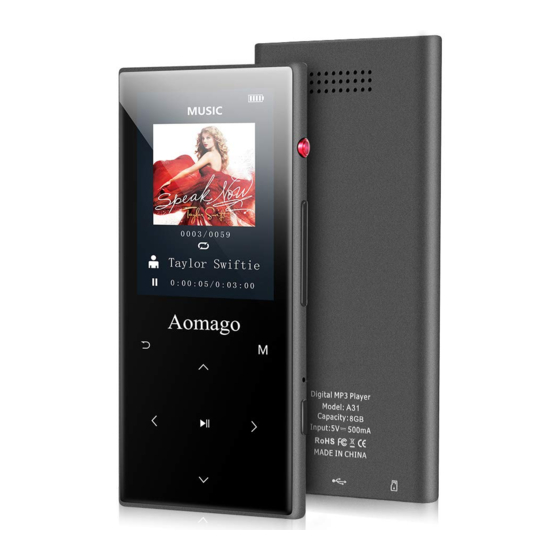
Product Information 1.Capacitive touch button 2.Bluetooth 4.2 transmitter 3.2.4inch TFT display 4.Play in background 5.Support TF card (micro SD card), max 128GB (high speed TF card) 6.Clock Display 7.Support FM radio 8.Support pedometer 9.Support Video, TXT textbook, picture viewer 10.One button recording... - Page 3 Warnings: This was high precision electronics product, be careful when using it: 1.Keep it far away from EME interference 2.Do not disassemble or reform this device 3.Do not put heavy thing above it, or extrude it. 4.Keep away from water, damp, dust place 5.Do not put the device into water or liquid container, if unfortunately, get the device wet, dry it carefully by drying cloth.
- Page 4 device will be hot, it is normal.So after charging and data transfer, remember to remove the connection 12.Do not use the device while driving or walking, in case of dangerous 13.After firmware upgrade, the device maybe a little difference than the booklet mentioned. Battery: 1.This player built-in with Polymer Lion battery, it could be rechargeable, in the first time using,...
-
Page 5: Packing List
(input 0.5-1A 5V). Adapter not included. When charging, it will be a slightly thermal dissipation, this was normal situation for charging battery. Packing List 1 x A31 Music Player 1 x USB Charging & Data Transfer Cable 1 x User Manual... - Page 6 Operation Key Functions: Operation Key Functions: 15 16 17 1、Speaker 2、Display 3、Return (to Homepage) 4、Scroll Up 1、Speaker 2、Display 3 、 Return (to Homepage) 4、Scroll Up 5 、Previous / Rewind 5、Previous / Rewind 6、Play / Pause / Confirm 7、Scroll Down 6、Play / Pause / Confirm 7 、Scroll Down 8、Menu 9、Next / FF 10、Recording...
-
Page 7: Insert Tf Card
Turn ON / OFF: Press the Power Button 2 seconds, the device will turn on. Press the power button 2 seconds again, it will turn off. Insert TF Card: While insert the TF card into TF card slot, it will lock the TF card, and the device scanning the TF card. - Page 8 Charging: Once get the device, check its battery bar. If battery low, please kindly recharge it immedi- ately. When battery is low, the device will remind low battery, and automatically power off. 1.Charging via Adapter: (adapter not included) connect the USB A side to adapter, and USB C to the device USB C socket, so it will charge, usually it needs 4 hours to be full charged.
- Page 9 device when charging through the computer. While charging, the device will go slightly hot, it is normal. Music At the homepage, select Music Option, find all songs, so we could scroll to the correct song, and start to play by press PLAY button. During playback, press PLAY to pause;...
- Page 10 device when charging through the computer. While charging, the device will go slightly hot, it is normal. Play all songs in currently folder in random 1.5Repeat Settings The A-B Repeat function Repeat Mode: select this, press PLAY, enter the A-B repeat function. The display A-B, it is flashing, press FF move the B, now the B is flashing, and then we press FF again, it will show A-B, and playback from A to B...
- Page 11 Rock, Punk, Hip Hop, Jazz, Classical, Techno. Press PLAY to confirm the setting. 2.2Variable Speed Playback The playback speed could change from - 8 to +8, higher digit, play faster; Remember to press PLAY button to confirm the setting. 3.Add to Playlist Add the currently song to playlist 4.Remove From Playlist Remove currently song from playlist...
- Page 12 700Kbps ~ 1536Kbps FLAC 700Kbps ~ 1536Kbps Video At the homepage, select Video Option, so we could scroll to the correct video, and start to play by press PLAY button; Press PLAY button again, it will pause the playing Supported Video Format: Video Format Resolution Ratio 240*320...
- Page 13 Now we could press REW/FF to manual adjust the FM radio frequency. Or press M(menu), we could go to more FM Radio Settings. 1.Start FM Radio Recording It will start to record the currently radio station, help you record favorite program on the radio. 2.Save Save currently radio station frequency.
- Page 14 At the homepage, select Pictures Option, press PLAY button enter it, so we could scroll down / up to select the picture, and then press PLAY button to view it. And press FF/REW to move to next or previous picture. Supported Picture Format Picture Format Size...
- Page 15 When reading an EBOOK, press M(menu) go to EBOOK settings, we it has these functions: Add bookmark, Bookmark Select, Delete bookmark, Ebook Background Setting, Page Select, Font Size, Play Setting, Delete Ebook. Folder Viewer At the homepage, select Folder Viewer Option, press PLAY button enter it, it will show all the supported files and folders on the device.
- Page 16 Scroll up / down to select Pedometer, press PLAY button enter it, it will start to timing and step count. 1.Press return, we could select the pedometer to run at background. Or select NO to discard this pedometer count. 2.When it is counting, press PLAY button to stop counting.
-
Page 17: System Setting
press PLAY button, go to pairing page. Start to pair the device. 3.After pairing successfully, we could Select Bluetooth Play start to play via Bluetooth device Notice: this device was built-in with Bluetooth Transmitter only (it could only connect to bluetooth speaker, bluetooth earphone / earbud, cannot connect to cellphone, car bluetooth system) - Page 18 will automatically shut down for power saving reason. 2.Display Settings Backlight timer: select how long the display be lightened up. Brightness: select the brightness of the display. 3.Date and Time Time settings: Press PLAY enter set time, we could scroll up / down the adjust the hour.
- Page 19 Press FF/REW it could move to select between day, month or year. After setting the correctly day, month, year, we could press PLAY button to confirm the settings. 4.Alarm Alarm on / off: turn on / off the alarm clock Alarm Music: select the alarm ring Alarm Cycle: It could set the alarm to ring up at “Once”, “Daily”, “Work Day”...
- Page 20 Disk Space: It will show the total space, and free space on the device. 7.Screensaver It could set the screensaver at digital clock. 8.Format Device It will erase all data on the device. 9.Factory Settings If, unfortunately, we make the device settings in chaos, we could restore to factory setting, let be the same like brand new setting.
- Page 21 C.Press RETURN, it will show show exit information, we could select YES, and press PLAY button to save recording. D.We could also press REC button to save recording. 2.Recording Library It will show all recordings, and could select Delete All to delete All recordings. Be careful, do not mistakenly delete the files.
- Page 22 Recording Format Bit Rate 32kpbs, 64kpbs, 128kpbs, 192kpbs 512kpbs, 768kpbs, 1024kpbs, 1536kpbs 512kpbs, 768kpbs, 1024kpbs, 1536kpbs Recording Time for 8GB Capacity Recording Time for 8GB Capacity Recordi n g Mp3 Mp3 Mp3 Mp3 WAV WAV WAV WAV Format 32kpbs 64kpbs 128kpbs 192kpbs 512kbps 768kpbs 1024kpbs 1536kpbs Bit Rate 5 8 0 2 9 0...
-
Page 23: Troubleshooting Guide
Trouble Shooting Guide 1)Cannot turn on the device? First, press down the power button 2seconds, and then release, if cannot turn on. Connect to computer charging it for at least 10minutes, and then try to turn it on. 2)When playing, there is no sound? First, check the volume;...
Need help?
Do you have a question about the A31 and is the answer not in the manual?
Questions and answers