Table of Contents
Advertisement
VISIT US ONLINE AT:
ninjakitchen.co.uk
Or follow us on any of our social media pages:
NOTE: Save these instructions. Keep for future reference.
This marking indicates this product should not be disposed of with other household
waste. To prevent possible harm to the environment or human health from uncontrolled
waste disposal, recycle it responsibly to promote the sustainable reuse of material
sources. To return your used device, please use the return and collection systems
or contact the retailer where this product was purchased. They can take this product for
environmentally safe recycling.
SharkNinja Europe Limited
3150 Century Way,
Thorpe Park, Leeds, LS15 8ZB, UK
0800 862 0453
ninjakitchen.co.uk
SharkNinja Germany GmbH, c/o Regus Management GmbH
Excellent Business Center 10. + 11/ Stock
Westhafenplatz 1, 60327 Frankfurt am Main, Germany
Illustrations may differ from actual product. We are constantly striving to improve our products,
therefore the specifications contained herein are subject to change without notice.
FOODI & NINJA are registered trademarks of SharkNinja Operating LLC.
COOK & CRISP, SMARTLID & SMARTLID SLIDER are trademarks of SharkNinja Operating LLC.
© 2021 SharkNinja Operating LLC
PRINTED IN CHINA
OL750UK_IB_MP_211119_MV1
TM
OL750UK
INSTRUCTIONS
ninjakitchen.co.uk
Advertisement
Table of Contents

Related Manuals for Ninja Foodi MAX OL750UK


Summary of Contents for Ninja Foodi MAX OL750UK
- Page 1 Illustrations may differ from actual product. We are constantly striving to improve our products, therefore the specifications contained herein are subject to change without notice. FOODI & NINJA are registered trademarks of SharkNinja Operating LLC. COOK & CRISP, SMARTLID & SMARTLID SLIDER are trademarks of SharkNinja Operating LLC.
-
Page 2: Table Of Contents
Removing & Reinstalling the Anti-Clog Cap ....10 Scan QR code using mobile device Using the Ninja® Foodi® Digital Cooking Probe ... .11 Using the Ninja® Foodi® Max SmartLid™ Multi-Cooker ..13 Using the Pressure Cooking Functions . -
Page 3: Important Safeguards
DO NOT fill appliance. 16 DO NOT sauté or fry with oil while pot more than halfway, or as otherwise pressure cooking. instructed in a Ninja® Foodi® recipe. 32 DO NOT use this unit to cook instant rice. SAVE THESE INSTRUCTIONS ninjakitchen.co.uk... - Page 4 IMPORTANT SAFEGUARDS HOUSEHOLD USE ONLY • READ ALL INSTRUCTIONS BEFORE USE 33 Electrical socket voltages can vary, 41 The cooking pot, Cook & Crisp™ affecting the performance of your Basket, and reversible rack become product. To prevent possible illness, use a extremely hot during the cooking probe to check that your food is cooked process.
-
Page 5: Parts & Accessories
NOTE: Only a silicone ring PARTS & ACCESSORIES specific to SmartLid Multi- cookers can be used in this product. Other multi-cooker Unit Lid silicone rings or competitor Accessories Included rings cannot be used. Anti–Clog 2-Tier Reversible Rack Heating Element Cook & Crisp™ Basket Metal Pins Probe Cap Detachable Diffuser... -
Page 6: Accessory Assembly Instructions
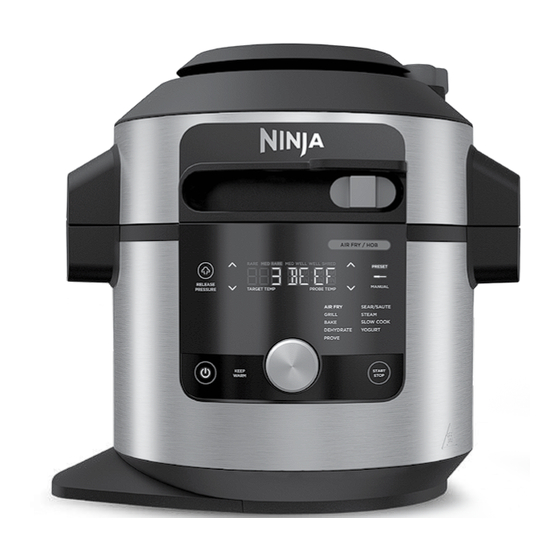
ACCESSORY ASSEMBLY INSTRUCTIONS USING THE CONTROL PANEL COOK & CRISP™ BASKET USING THE SMARTLID SLIDER™ COOKING FUNCTIONS OPERATING BUTTONS The slider allows you to switch between PRESSURE: Cook food quickly while SMARTLID SLIDER™: As you move the cook modes and notifies the lid which maintaining tenderness. -
Page 7: Before First Use
USING THE NINJA® FOODI® BEFORE FIRST USE DIGITAL COOKING PROBE REMOVING & REINSTALLING Remove and discard any packaging NOTE: There is no need to set a cook IMPORTANT: Digital Cooking Probe and material, stickers and tape from THE ANTI-CLOG CAP time, as the unit will automatically turn cord will be hot during and after cooking. - Page 8 USING THE NINJA® FOODI® USING YOUR NINJA® FOODI® DIGITAL COOKING PROBE - CONT. MAX SMARTLID™ MULTI-COOKER 5 Place the accessory required for your USING THE PROBE IN DIFFERENT HOW TO CORRECTLY INSERT THE PROBE selected cook function in the unit.
-
Page 9: Using The Pressure Cooking Functions
USING THE PRESSURE COOKING FUNCTIONS WATER TEST: GETTING STARTED 4 Use the dial to select QUICK RELEASE. RELEASING PRESSURE USING THE PRESSURE FUNCTION The unit will default to high (Hi) pressure. PRESSURE COOKING AUTOMATICALLY To turn on the unit, plug the power cord Use the right down arrow to adjust the into a wall socket, then press the button. -
Page 10: Using The Combi-Steam Mode Functions
USING THE USING THE PRESSURE COOKING FUNCTIONS - CONT COMBI-STEAM MODE FUNCTIONS 6 When the unit reaches the appropriate To turn on the unit, plug the power cord NOTE: If running for 1 hour or less, the into a wall socket, then press the button. -
Page 11: Steam Roast
USING THE COMBI-STEAM MODE FUNCTIONS - CONT 6 When the unit reaches the appropriate 6 When the unit reaches the appropriate 4 Press START/STOP to begin cooking. STEAM BREAD steam level, the display will show the steam level, the display will show set 5 The display will show "PrE"... -
Page 12: Using The Air Fry/Hob Functions
USING THE AIR FRY/HOB FUNCTIONS 3 Move slider to AIR FRY/HOB, Grill 4 Use the up and down arrows to the right To turn on the unit, plug the power cord into a wall socket, then press the button. then use the dial to select AIR FRY. The of the display to adjust the cook time in Place the reversible rack in the pot in default temperature setting will display. -
Page 13: Bake
USING THE AIR FRY/HOB FUNCTIONS -CONT Bake Dehydrate 4 Use the up and down arrows to the right Sear/Sauté of the display to adjust the cook time in Add ingredients to the pot. Place any accessories and ingredients in Place the reversible rack in the pot in 15-minute increments from 1 hour to 12 the pot. -
Page 14: Steam
USING THE AIR FRY/HOB FUNCTIONS -CONT Steam 6 When the cook time reaches zero, the Yogurt 8 Open the lid and skim the top off unit will beep and "End" will flash 3 times the milk. Add 250ml of liquid (or recipe-specified Add desired amount of milk to the pot. -
Page 15: Cleaning & Maintenance
CLEANING & MAINTENANCE CLEANING THE LID Cleaning: Dishwasher & Hand-Washing Removing & Reinstalling 5 Repeat steps 3 and 4 as needed and We recommend inspecting the interior the Silicone Ring of the lid and heating elements prior to spot clean as necessary. cooking with “wet cooking functions,”... -
Page 16: Troubleshooting Guide
TROUBLESHOOTING GUIDE TROUBLESHOOTING GUIDE - CONT. Why is my unit taking so long to come to pressure? How long does it take to “ADD POT” error message appears on display screen. come to pressure? • Cooking pot is not inside the cooker base. Cooking pot is required for all functions. •...
Need help?
Do you have a question about the Foodi MAX OL750UK and is the answer not in the manual?
Questions and answers