Advertisement
Quick Links
Copyright ©2006 Slope Indicator Company. All Rights Reserved.
This equipment should be installed, maintained, and operated by technically qualified personnel. Any errors
or omissions in data, or the interpretation of data, are not the responsibility of Slope Indicator Company. The
information herein is subject to change without notification.
This document contains information that is proprietary to Slope Indicator company and is subject to return
upon request. It is transmitted for the sole purpose of aiding the transaction of business between Slope Indi-
cator Company and the recipient. All information, data, designs, and drawings contained herein are propri-
etary to and the property of Slope Indicator Company, and may not be reproduced or copied in any form, by
photocopy or any other means, including disclosure to outside parties, directly or indirectly, without permis-
sion in writing from Slope Indicator Company.
Digitilt
DataMate
50310999
SLOPE INDICATOR
12123 Harbour Reach Drive
Mukilteo, Washington, USA, 98275
Tel: 425-493-6200 Fax: 425-493-6250
E-mail: solutions@slope.com
Website: www.slopeindicator.com
Advertisement

Subscribe to Our Youtube Channel
Related Manuals for SLOPE INDICATOR Digitilt DataMate

Summary of Contents for SLOPE INDICATOR Digitilt DataMate
- Page 1 Company and the recipient. All information, data, designs, and drawings contained herein are propri- etary to and the property of Slope Indicator Company, and may not be reproduced or copied in any form, by photocopy or any other means, including disclosure to outside parties, directly or indirectly, without permis- sion in writing from Slope Indicator Company.
-
Page 2: Table Of Contents
Contents Digitilt DataMate ....1 Setting Up Installations ... . 4 Recording Surveys ....6 Retrieving Surveys . -
Page 3: Digitilt Datamate
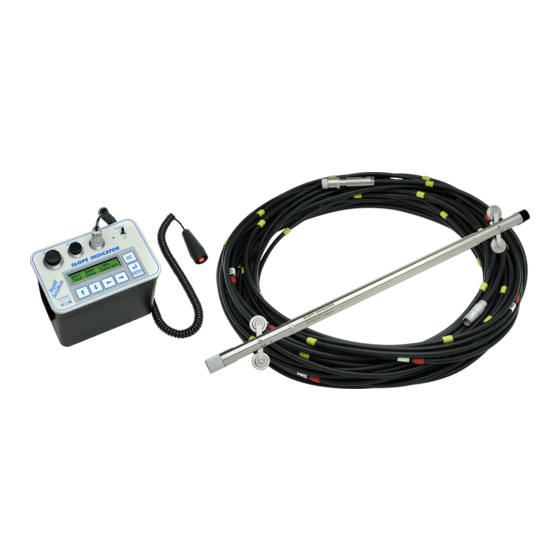
Digitilt DataMate What is The Digitilt DataMate is a recording readout that is used with Digitilt inclinometer the DataMate? probes (vertical or horizontal), Digitilt tiltmeters, and the spiral sensor. It works with both metric and English unit versions of these sensors. - Page 4 USB connectors, you must use a USB-to-serial adapter or a PCM serial adaptor. Waiting for PC . . . Utilities Menu The Utilities menu lets you set defaults, and check battery voltage and memory. Batt Beep Light Temp Date Contrast Digitilt DataMate, 2006/10/23...
- Page 5 To check the moisture level in the DataMate, choose Temp from the Utilities menu. The DataMate displays humidity and temperature. Humidity levels from 20 to 60% are normal. If humidity exceeds 75%, replace the desiccant. See instructions in the chapter on inspection and maintenance. Digitilt DataMate, 2006/10/23...
-
Page 6: Setting Up Installations
40 installation records in the DataMate, the Create command does not appear, and you cannot enter an installation. You cannot delete installations using the DataMate keypad, but you can still record a survey, if necessary. At recording time, select any installation and change its parameters as necessary. Digitilt DataMate, 2006/10/23... - Page 7 Enter 0.5 for metric-unit systems and 2 for English unit systems. Interval: Check Verify that the DataMate now holds your installation list: the Installations Choose Read from the main menu. Choose Installation. Scroll through the list of installations. Digitilt DataMate, 2006/10/23...
-
Page 8: Recording Surveys
This helps prevent bias-shift errors. Check your readings on site using the DataMate’s Validate command. If neces- sary, reposition the probe at the required depth and using the Correct command to obtain a new reading for that depth. Digitilt DataMate, 2006/10/23... - Page 9 Begin the survey. Raise the probe to the start depth, then watch for a stable reading. Normally, you will see three diamonds, as shown below. Press Enter to record the reading. ♦♦♦ ♦ ♦ ♦ Three diamonds indicate stable reading. Depth Press Enter to record. Digitilt DataMate, 2006/10/23...
- Page 10 Repeat these steps until the probe is at the top of the casing and you have recorded the last reading. Choose Done from the menu, and remove the probe from the casing. Continue Done You may want to validate the survey using the DataMate’s validate command. See Appendix 1 for instructions. Digitilt DataMate, 2006/10/23...
- Page 11 When you return to the office, upload the survey as usual. Then use DMM to create a new installation and move the survey to that installation. The How-To notes in the DMM manual show how to do this. Digitilt DataMate, 2006/10/23...
-
Page 12: Retrieving Surveys
Choose Print from the DataMate’s. Set the baud rate for 9600 and press Enter. Then select the survey and press Enter to “print” it. Your terminal program will usually display the readings as they are sent from the DataMate. Close the file with your terminal program. Digitilt DataMate, 2006/10/23... -
Page 13: Validating Surveys
7 or 9. Narrower limits may be appropriate for deeper installations and critical measure- ments. Wider limits may be appropriate for shallower installations or for poorly- installed casing. Digitilt DataMate, 2006/10/23... - Page 14 Press Up or Down to display other zones. Again, the Left and Right keys toggle between mean and standard deviation. If you decide the survey is acceptable, press Esc to quit. Otherwise, note the zones (depths) that you want to inspect and continue. Digitilt DataMate, 2006/10/23...
- Page 15 Lower the probe to the required depth. Wait for the probe to adjust to the tem- perature in the borehole (5 to 10 minutes if the probe has been in open air) Press Enter to activate the reading. Press Enter again to record the reading. Digitilt DataMate, 2006/10/23...
-
Page 16: Comparing Surveys
The DataMate prompts for a conversion value. Enter 1000 for a displacement in millimeters (with metric data). Enter 12 for a displacement in inches (with English unit data). The DataMate then calculates the cumulative displacement for the survey and displays it. Press Esc when done. Digitilt DataMate, 2006/10/23... -
Page 17: Inspection And Maintenance
If it is necessary to clean the connector, use a small brush or a slim cotton swab. Do not use spray lubricants or electric con- tact cleaners. Solvents contained in such products will attack the neoprene inserts in the connectors. Digitilt DataMate, 2006/10/23... - Page 18 Do not over-tighten the screws Wiring Diagram Below is the wiring diagram for the connectors on the control cable. for Interface Cable Wiring Diagram Below is the wiring diagram for the hand switch. for Hand Switch Digitilt DataMate, 2006/10/23...
-
Page 19: Trouble-Shooting
Go to Support - TechNotes. The scroll down the page to find the inclinometer tech notes. Take a look at the Digitilt DataMate Q & A page. Readings Not Stable The DataMate's "ready" signal is displayed when readings in both axes are stable within 2 digits.
Need help?
Do you have a question about the Digitilt DataMate and is the answer not in the manual?
Questions and answers
I have a Digitilt Datamate ll. When I connect the USB cable to download to the computer, it no longer seems to connect. Just says waiting for PC
If a SLOPE INDICATOR DataMate Digitilt II shows "Waiting for PC" when connected via USB, follow these steps:
1. Check if the DataMate briefly displays “Linked to PC.” If it does and then returns to “Waiting for PC,” the cable may be faulty.
2. Open the comm menu in DigiPro 2 or DMM software to view available comm ports.
3. Select a different comm port, preferably the one with the highest number if using a serial-to-USB adapter.
4. The software may remember the wrong comm port if different DataMates use different cables. Manually select the correct comm port in the comm menu.
5. Verify that the USB driver is working:
- Turn off the DataMate (leave USB cable connected).
- Open and check the comm menu in the software for port numbers.
- Close the menu, then turn on the DataMate and connect the USB cable if disconnected.
These steps help ensure proper communication between the DataMate and PC.
This answer is automatically generated