Table of Contents
Advertisement
Quick Links
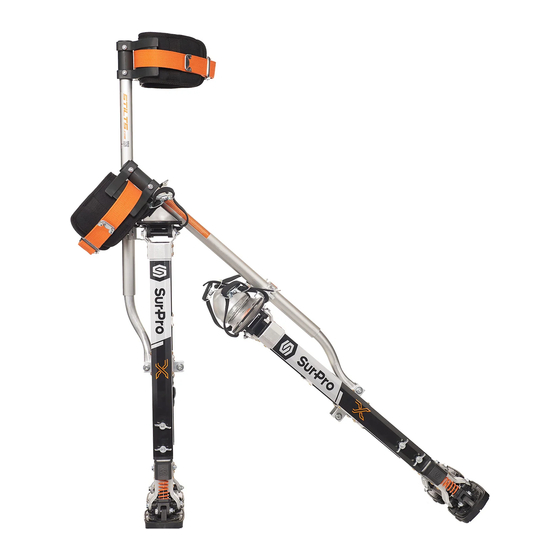
S I N G L E - S I D E D S T I L T S
INSTRUCTION MANUAL
VERSION 21.08
APPLIES TO:
SurPro S Aluminum Drywall Stilts
SurPro S1 Aluminum Drywall Stilts
SurPro S1 Magnesium Drywall Stilts
SurPro S1X Magnesium Drywall Stilts
(Illustrated to right)
Proper reading and understanding
this instruction manual is required
before operating SurPro S/S1/S1X
stilts. Following this guide is the first
step towards proper safety, assembly,
operation and maintenance.
PROPER ASSEMBLY REQUIRED.
Scan QR code
for the latest
Instruction Manual
Need Help?
1-888-443-8889
Advertisement
Table of Contents

Summary of Contents for Sur-Pro S ALUMINUM
- Page 1 S I N G L E - S I D E D S T I L T S INSTRUCTION MANUAL VERSION 21.08 APPLIES TO: SurPro S Aluminum Drywall Stilts SurPro S1 Aluminum Drywall Stilts SurPro S1 Magnesium Drywall Stilts SurPro S1X Magnesium Drywall Stilts...
- Page 2 WELCOME Thank you for choosing SurPro and Stilts.com. This instruction manual will help navigate the safety, assembly, and maintenance of the SurPro S, S1, and S1X Single-Sided Stilts. Please find an alternative instruction manual if your model is not listed on the cover. Keep this manual available for all users;...
- Page 3 TABLE OF CONTENTS NOTICE WARNING & SAFETY PRECAUTIONS PACKAGE CONTENTS ASSEMBLY INSTRUCTIONS 9-10 STILTS ADJUSTMENTS LEARNING TO WALK 11-13 GENUINE PARTS & PARTS DIAGRAM PART KITS 14-15 PARTS LIST 16-17 CONVERT SINGLE-SIDED TO DOUBLE-SIDED CARE & MAINTENANCE PRODUCT REGISTRATION & WARRANTY First things first, register your SurPro stilts for the best in customer care, service, and warranty.
-
Page 4: Warning & Safety Precautions
WARNING & SAFETY PRECAUTIONS Under no circumstances should the stilts be used while under the influence of alcohol, drugs, or other medications that can impair your balance, judgment, or cause drowsiness. Do not over-reach while on stilts. Do not exceed max load limit (225 LB). Do not operate without proper safety, operation and maintenance knowledge. -
Page 5: Package Contents
PACKAGE CONTENTS This manual covers SurPro Single-Sided Stilts (Models S, S1 & S1X). Package contents and assembly instructions will be the same unless otherwise noted. A L U M I N U M A L U M I N U M M A G N E S I U M M A G N E S I U M WHAT’S IN THE BOX... - Page 6 ASSEMBLY INSTRUCTIONS INSTALL HEEL CUP Position the heel cup in one of the three mounting points depending on the size of the user’s shoe. Secure heel bracket by inserting nuts onto the bottom of the foot plate. While holding the nuts down, insert screws through the top of the heel cup and secure to nuts.
- Page 7 ASSEMBLY INSTRUCTIONS Optional: Positioning and securing Arch Straps on top of the Foot Plate Arch straps may also be worn directly below the heel, Use alternate mounting instructions as depicted below: First remove the side pole clamp bracket to provide better access. Then, thread the straps through the top portion of the footplate, and secure in place with...
- Page 8 ASSEMBLY INSTRUCTIONS SIDE POLE INSTALLATION CONTINUED. Prepare Side Pole Clamps for use on Lower and SIDE POLE CLAMPS Upper Strut Tubes. Remove bolts from clamps. The clamps are a two-piece part that will separate once the bolts are removed. Note the three notches on the inside portion of the clamps.
- Page 9 STILTS ADJUSTMENTS SurPro Stilts are designed to maximize the user’s comfort and safety. There are three main areas of adjustment to achieve the desired settings for each user: Stilt Height, Side-Pole Rotation and Spring Tension. STILT HEIGHT ADJUSTMENT SurPro Stilts are designed to be used with 8 Wing Bolts (4 on each stilt). Using all Wing Bolts increases safety and also extends the lifespan of internals parts.
-
Page 10: Learning To Walk
STILT ADJUSTMENTS MAIN BODY SPRING TENSION Note: The upper portion of the spring controls forward motion, whereas the lower portion of the spring controls backward motion. To correct a tendency to lean forward, tighten the upper spring adjuster (A) to increase tension on the spring (clockwise rotation). - Page 11 ALWAYS GENUINE SURPRO PARTS Inspect included parts carefully before use or installation. Look for wear or damage. If any component has been worn out, dented, cracked or bent, or if screws/washers/bolts/parts are missing or damaged, replace with genuine SurPro parts immediately. Please note: The Forest Group, Inc.
-
Page 12: Parts Diagram
PARTS DIAGRAM PARTS DIAGRAM SS1005PF SS1002-B SS1005-F Wraparound Leg Band HS107W-B SS1002 H104-B SS1002 SS1009 HS104S-B SS1002 HS110W HS107W-F HS104S-O H104-O Optional 1½″ SS1009 H101PF HP107W Wide Arch HS108W-B H134W Strap HS101W-F H110W HS134W SS134 H108W SS1005P SS1012 H101P See PG. 13 for HS131S Flex Leg Band H134W... - Page 13 PARTS DIAGRAM PARTS DIAGRAM SS1005PF SS1002 Flex Leg Band Flexion Foot System H104-B SS1002 SS1002 SS1005-P HT190S H104-O SS1009 H101PF HP107W HT202W H134W HS116W-O H110W HS104S-B HT191S H108W SS1005P HS134W H101P SS134 H134W HT192W SS1012 HT201W HS101W-P H131S H109 SS2007 H127W PART KITS H132W...
-
Page 14: Parts List
PARTS LIST Part Kits fit all single-sided stilts (S, S1 & S1X) unless otherwise noted. Some are size specific. PART NO. PARTS DESCRIPTION HS101W-F Wraparound Leg Band HS101W-P Flex Leg Band HS104S-B Leg Band Strap (Black) 1.5" W x 10.5" L HS104S-O Leg Band Strap (Orange) 1.5"... - Page 15 PARTS LIST Part Kits fit all single-sided stilts (S, S1 & S1X) unless otherwise noted. Some are size specific. PART NO. PARTS DESCRIPTION HS148M Nylon Sleeve (Top) Sold in Kit HS149M Nylon Sleeve (Bottom) Sold in Kit HS150M-16BM Back Main Leg Strut - Magnesium / Black (Fits Size: 16”-24”) Not Sold Separately HS150M-16UA Back Main Leg Strut - Aluminum / Silver (Fits Size: 16"-24")
- Page 16 CONVERT SINGLE-SIDED TO DOUBLE-SIDED SurPro Single-Sided Stilts can be converted into Double-Sided Stilts by replacing the leg poles and leg bands. We have different conversion kits for different models/sizes, though the how-to instructions for replacing parts is generally the same. ORDER THE CORRECT CONVERSION KIT Kits include everything needed to convert SurPro single-sided stilts into double- sided stilts: side poles w/ end caps and pole holder, bolt assemblies, leg bands...
- Page 17 CONVERT SINGLE-SIDED TO DOUBLE-SIDED Remove nut and washer from bolt. Attach the second metal clamp bracket (HS131S) onto the main stilt body with the 3" bolt, washers and locknut (HS127W). INSTALL DOUBLE-SIDED POLES Once you have the proper parts in hand, remove your existing single-sided poles: First, insert the right and left side poles (HS123S) into the brackets on the main stilt body.
-
Page 18: Care And Maintenance
CARE & MAINTENANCE CLEANING Clean your stilts with water regularly. Rinse them off before debris hardens. Dry the stilts and floor plates after cleaning. Do not use scrapers or other methods to remove debris. Only use soft brushes or cleaning implements that cannot damage the stilts. -
Page 19: Product Registration & Warranty
PRODUCT REGISTRATION & WARRANTY REGISTER YOUR STILTS! We strongly encourage you to take a minute and register your new SurPro Stilts. Product registration is required for all warranty claims. Do it online, or hover your smart phone camera over the QR code below. Register online Scan QR Code... - Page 20 Need Help? +1-888-443-8889 help@stilts.com 5600 Bonhomme Rd Ste C Houston, TX 77036 A division of The Forest Group, Inc.
Need help?
Do you have a question about the S ALUMINUM and is the answer not in the manual?
Questions and answers