Table of Contents
Advertisement
Quick Links
1. Installation Of Controller
Please install the controller (PDL-TC-PF or PDL-TC-PFZ) to the
(15mm-30mm) catheter with the adaptor.
PDL-TC-PF single-channel handle
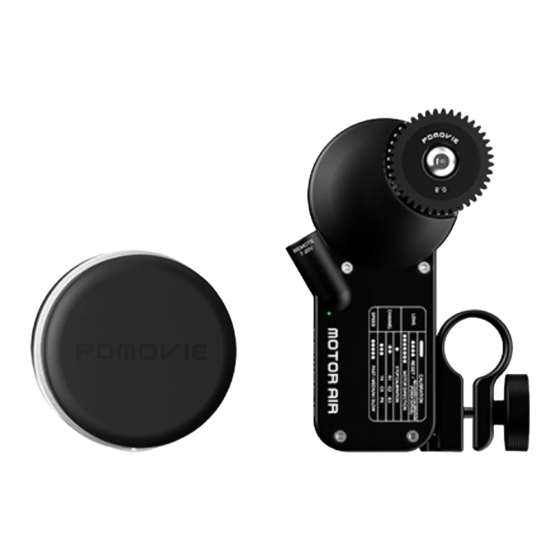
2. Installation Of Motor
Please install the motor to the catheter (15mm-30mm) then
match in the lens gear.
3. Connection Of Controller With Motor
①.For using the controller ( PDL-TC-PF) : Please let the motor
and handle control connect with Lemo cable .Then let the D-TAP
cable connect the motor with the D-tap output on the V-Mount
Battery .
②.For using the controller (PDL-TC-PFZ) ,please follow the steps
below : FIRST let Lemo cable connect the motor(PD-MX1&2) ,
SECOND let the other lemo cable connect the handle control and
the motor(PD-MX1). THEN let the D-tap cable to connect the motor
(PD-MX2)and the socket (REMOTE 7-20V). LAST let the D-Tap
cable connect the motor with the D-tap output on the V-Mount
Battery.
Lemo Cable
4.Motor start up
The motor do not need to turn on and off, cause it will turn on
automatically when it have power supply and it will turn it off when
power outage.( To know more detail please check with the instruction
No.7 & 8.)
5. Calibrate Lens Stroke
The controller PDL-TC-PF and PDL-TC-PFZ do not have ON/OFF
button and it will turn on automatically when power supply.
① For the controller PDL-TC-PF : Press the CHANNEL button for 3
seconds for calibrate.
②For the controller PDL-TC-PFZ : Press and hold the ZOOM
FOCUS
button or
IRIS
motors' will work at the same time when it calibrating.
6. Operation For Controller
Switch the controller hand wheel or Rocker to control the
FOCUS/ZOOM/IRIS
①When using the PDL-TC-PF please be sure the indicator light
on the controller and motor are in the same color. (Recommend both
on red.)
②When using the PDL-TC-PFZ please be sure that the indicator
light (Left side) on the controller and motor (PD-MX1) are in the
same color. (Recommend both on red.); please be sure that the
indicator light (Right side) on the controller and motor (PD-MX2) are
in the same color. (Recommend both on green.)
③When using the PDL-TC-PF and PDL-TC-PFZ please be sure
that the indicator lights on the PDL-TC-PF and motor (PD-MX1) are
in the same color. (Recommend both on red.); the indicator light
(Left side) on the PDL-TC-PFZ and motor (PD-MX2) are in the same
color. (Recommend both on blue.); And the indicator light (Right
side) on the PDL-TC-PFZ and motor (PD-MX3) are in the same
color. (Recommend both on green.)
7.Instruction of controller
Button &
Socket
Automatically
Calibrate
Stroke
Manual
Setting (AB
Point)
CHANNEL
Switch Channel
ZOOM
FOCUS
Switch Rotation
IRIS
Speed of Motor
REMOTE
7-20V
8.Instruction Of The Motors
①.Motor Button Instruction
The Button
Interface /
Motor Button
CHANNEL
SPEED
REMOTE
7-20V
②.Switching Motor Rotation Speed
Quickly press the
SPEED button on the
motor
9. Controller And Motor Switching
Channel Table
The SPEED Button
On The Controller
And Motor
LIVE PRO Product Manual
Setting button
for FOCUS channel
Indicator light
for FOCUS channel
Wheel(FOCUS)
PDL-TC-PFZ
button for 3 seconds for calibrate. Then two of the
Functions
Cancel
Switching
the rotation
direction of
the motor
The socket on the controller and motor support signal transmission,
power supply and 7-20 voltage.
Motor rotation speed and channel switching (refer to
channel switching and motor speed switching table)
Control signal transmission, universal 6-Pin socket for
power supply, support 7-20 voltage supply. The 7-20V
controller and the motor have the socket.
Normal (Normal torsion)
Controller/
Motor Channels
Indicator light for
FOCUS/IRIS channel
PDL-TC-PFZ dual-channel handle
Lemo Cable
PD-MX1
Instruction
Press and hold the button for 3 second
Setting: Please turn the lens to the A
point and press the button
(FOCUE/ZOOM/IRIS) on the controller
Set
for setting A point. Then turn the lens
to the B point and press the button
again for setting B point.
Cancel : After "setting", press the
button (FOCUE/ZOOM/IRIS) on the
controller for cancel the AB point.
Double click the button
(FOCUS/ZOOM/IRIS) for changing
channels which mean switch the indicator
light color.
Press the button(ZOOM) on the controller
(PDL-TC-PFZ) five times for adjust the
speed of motor. Press the button on the
motor for adjust the speed. (Instruction
8.2 to see more details)
Press 7 times, the direction that the
motor run will turn opposite. (Also
change the direction of the lens)
Functions
The rotation
speed of motors
Fast (Hard torsion)
Slow (Light torsion)
The Color of
Motors'
Indicator Lights
R1
G2
B3
Y4
C5
P6
Facebook: PDMOVIE
Indicator light for
ZOOM channel
Wheel(FOCUS/IRIS)
D-Tap
PD-MX2
The flashing
frequency of
the corresponding
indicator lights
Fast Flash
Normal Flash
Slow Flash
RED
GREEN
BLUE
YELLOW
CYAN
PRUPLE
Rocker(ZOOM)
Setting button for
ZOOM channel
Setting button for
FOCUS/IRIS channel
Corresponding
Channels
FOCUS
ZOOM
IRIS
Not enabled
Not enabled
Not enabled
Advertisement
Table of Contents

Related Manuals for PDMOVIE LIVE PRO


Summary of Contents for PDMOVIE LIVE PRO
- Page 1 LIVE PRO Product Manual 1. Installation Of Controller Please install the controller (PDL-TC-PF or PDL-TC-PFZ) to the (15mm-30mm) catheter with the adaptor. Indicator light for FOCUS/IRIS channel Setting button for FOCUS channel Indicator light for ZOOM channel Indicator light for FOCUS channel...
- Page 2 LIVE PRO Quick Start Guide Controller REMOTE 7-20V Setting button for FOCUS channel Indicator light for FOCUS channel Wheel(FOCUS) PDL-TC-PF Single-Channel Controller Rocker(ZOOM) Indicator light for ZOOM Setting button channel for ZOOM channel Indicator light Setting button for FOCUS for FOCUS/IRIS...
Need help?
Do you have a question about the LIVE PRO and is the answer not in the manual?
Questions and answers