Table of Contents
Advertisement
Quick Links
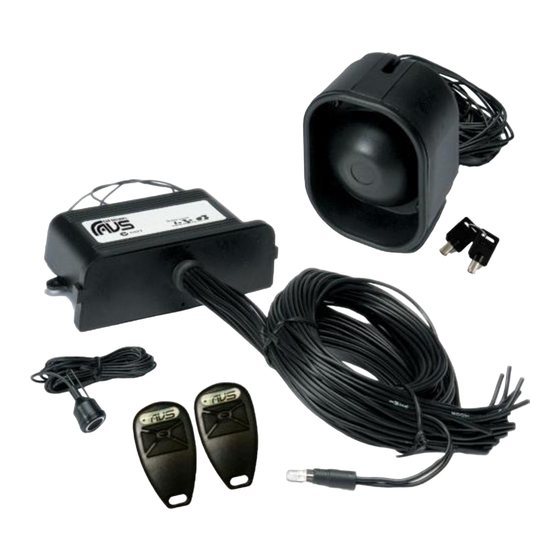
AVS 24v S-Series – AVS 24v S3/S4/S5
AVS 24v S3
Certification:
•
Test report XF2070/R1
•
The AVS S3 is certified to AS/NZS 4601:1999 Amendment A 2003
AVS 24v S4
Certification:
•
Test Report XF2106/R2
•
This product complies with AS/NZS 3749.1 2003 Class B. Volumetric Sensing (glass break/shock) must remain disabled
to comply with a Class B installation (refer Programmable Features).
•
Class B VSAS (Vehicle security alarm system) includes control equipment including setting and unsetting facilities, all
sensors, warning devices and provisions for immobilization of the vehicle
AVS 24v S5
Certification:
•
Test Report XF2106/R2
•
This product complies with AS/NZS 3749.1 2003 Class A. Volumetric Sensing (glass break/shock) must be enabled to
comply with a Class A installation (refer Programmable Features).
•
Class A VSAS (Vehicle security alarm system) includes control equipment including setting and unsetting facilities, all
sensors, warning devices and provisions for immobilization of the vehicle and the volumetric sensing device (glass
break/shock)
AVS is a registered trademark of the
Installation manual
Generation 2 Version 4
Serials: 2410317 – Current
Make sure you are using the correct manual
Manta help line 09 476 8052
group of companies
Advertisement
Table of Contents

Related Manuals for Manta AVS 24v S Series


Summary of Contents for Manta AVS 24v S Series
- Page 1 Class A VSAS (Vehicle security alarm system) includes control equipment including setting and unsetting facilities, all sensors, warning devices and provisions for immobilization of the vehicle and the volumetric sensing device (glass break/shock) Manta help line 09 476 8052 AVS is a registered trademark of the group of companies...
-
Page 2: Table Of Contents
Contents Introduction General system functions • Polyfuse protected inputs/outputs • Auto-immobilisation • Arm by remote • Door ajar warning • Disarm by remote • Low remote battery warning • Panic/car finder • Boot release output (150mA max) • Auto zone bypass •... - Page 3 Contents continued Programming features Register 1 continued • Shock sensor adjustment • Installer mode • Past alarm trigger memory • Factory remote interface (MAP function) on/off • Voltage drop sense override • Turbo timer run time • On-board turbo timer •...
-
Page 4: Introduction
Introduction Please read the entire instruction manual before attempting installation. As all cables are black please take care when making all connections. Insurance star ratings are only valid when installed by a registered AS/NZS installer and installed in accordance with methods and principles detailed in AS3749.2 PLEASE ENSURE ALL CONNECTIONS ARE SOLDERED AND TAPED. -
Page 5: Polyfuse Protected Inputs/Outputs
General system features Poly-fuse protected inputs/outputs: The AVS S-Series includes poly-fuses on all inputs and outputs except the immobiliser circuits. If the poly-fuse detects an overload, it will open to prevent damage to the alarm components. Once the overload has been removed the polyfuse will automatically reset. -
Page 6: Boot Release Output (150Ma Max)
Boot release output (150mA max): Press the button for three seconds. The system will disarm, the doors will unlock (if central locking connected) and the boot output wire will give a negative output for one second. For safety reasons the boot release will not work with the ignition on. -
Page 7: Additional Features
Additional features Data battery back-up siren (24VDBBS) - AVS 24v S5/S4: The data battery back-up siren has its own battery and charging system so it will sound if power is cut to it. It also communicates with the alarm module via an independent data line. This makes it more difficult for a would be thief to disable the siren. -
Page 8: Remote Controls
2. A new remote can be coded into the system 12 times. You can do this by coding the same remote in even if you only have one remote. 3. Or the unit can be sent back to Manta Electronics for resetting. Emergency disarm / PIN code override This feature enables the owner to disarm the system if the remote has been lost or broken (or the remote batteries are flat). -
Page 9: Wiring Instructions
Wiring instructions Supply voltage: 24v DC Current consumption: Un-triggered: 29mA Armed, 25mA disarmed (MAX) Location of main control unit: Mounting of the alarm brain is central to a good alarm installation. Mount either behind centre console, behind speedo cluster or left of dash. If this is not possible, mount under the driver’s side of the dash, but in an inconspicuous location. -
Page 10: Data Battery Backup Siren Wiring
Data battery back-up siren wiring V2 (DBBSMV2) The AVS 24v data siren has the following wires located on it: +24V – Connect to permanent 24 volt power source. To keep the install tidy run this wire with the other siren wires into the vehicle. GND –... -
Page 11: Plug Pin # To Connection
Plug Pin # Connection IGN - Connect to a +24 volts ignition switched lead, which does not fall to 0 volt when the engine is cranked. GND - Connect to two suitable earth points on the car body. Each wire must be earthed at a separate point to comply with AS/NZS installation standards. - Page 12 Continued… Plug Pin # Connection Starter motor immobiliser circuit - The starter wire is usually located under the steering IM1A 15 column; this wire must be +24v (8 AMP max) only when the vehicle is being started. Cut this wire. The vehicle should not turn over. Solder one side of the wire to both IM1A wires. Solder IM1B 17 the other end to both IM1B wires.
- Page 13 AVS 24v S-SERIES INSTALLATION MANUAL - GEN 2 VER 4...
-
Page 14: Changing Programmable Features
Changing programmable features The AVS S-Series programming mode is very quick and easy to use. Follow the steps below to change any of the programmable features: Find the Register (1 or 2) in which the feature is located. Set the vehicle up as described to access the required Register. e.g. to access Register 1 close all doors, bonnet and boot, arm and disarm alarm then turn ignition on, off and back on. -
Page 15: Instant Boot Release/On Board Turbo Timer Shut Down
Programming features Register 1 continued Vehicle set up: Close all doors, bonnet & boot, arm & disarm alarm then turn ignition on, off & on. Feature: Instant boot release/On board turbo timer shut down Press the button this many times: Factory setting: When this feature is ON, the boot release button will only require pressing once rather Description:... -
Page 16: Shock Sensor Adjustment
Programming features Register 1 continued Vehicle set up: Close all doors, bonnet & boot, arm & disarm alarm then turn ignition on, off & on. Feature: Shock sensor adjustment Press the button this many times: Factory setting: After pressing the button 11 times to enter this mode, turn the ignition to off. -
Page 17: Voltage Drop Sense Override
Programming features Register 1 continued Vehicle set up: Close all doors, bonnet & boot, arm & disarm alarm then turn ignition on, off & on. Factory remote interface mode ON/OFF Feature: Refer Factory Remote interface (MAP function) for full details Press the button this many times:... -
Page 18: Courier Mode
Programming features Register 1 continued Vehicle set up: Close all doors, bonnet & boot, arm & disarm alarm then turn ignition on, off & on. MAP feature 2-second entry delay / Factory remote interface mode (old OEM Feature: Enhancement module) / Split lock & unlock button mode Press the button this many times:... -
Page 19: Second Vehicle Control
Programming functions Register 2 Vehicle set up: Open a door, close bonnet & boot, arm & disarm alarm then turn ignition on, off & on. Feature: Second vehicle control - button used to arm/disarm this vehicle (vehicle B) Press the button this many times: Factory setting:... -
Page 20: Indicator Flash On Alarm Trigger
Programming functions Register 2 continued Vehicle set up: Open a door, close bonnet & boot, arm & disarm alarm then turn ignition on, off & on. Feature: Indicator flash on alarm trigger Press the button this many times: Factory setting: When turned OFF, this feature prevents the indicators from flashing when the system Description: is triggered. -
Page 21: Anti Hijack - Mode 2
Programming functions Register 2 continued Vehicle set up: Open a door, close bonnet & boot, arm & disarm alarm then turn ignition on, off & on. Feature: Anti Hijack – Mode 2 Press the button this many times: Factory setting: When this feature is turned ON, the unit will enter anti hijack mode 2 when the ignition is turned on. -
Page 22: Turbo Timer Instructions
Turbo timer instructions The system has two turbo timer features. Firstly it has its own on-board turbo timer system, and secondly it has an interface so is compatible with external turbo timers. On-board turbo timer On most vehicles the AVS S-Series can be set up to run the on-board turbo timer by simply connecting the ignition immobiliser wires that would normally be connected to the key side of the cut (IM2A) to +24V main power feed as shown in the diagram below. - Page 23 To allow the button to shut down the engine before the turbo timer times out: 1. Turn off the ignition. 2. Close all doors then turn ignition on, off and on. 3. Press the button 17 times. 4. Turn the ignition off. This will toggle the feature on or off. If the on-board turbo timer feature is turned on the siren will chirp once.
-
Page 24: Interface With External Turbo Timers
Interface with external turbo timers When this feature is turned ON, the system allows the vehicle to run on an external turbo timer for a time that does not exceed the time programmed into the system. The system allows for 1 minute, 2 minutes or 4 minutes. IT IS VERY IMPORTANT THAT THE EXTERNAL TURBO TIMER DOES NOT RUN FOR LONGER THAN THIS TIME AS IT WILL CAUSE THE SYSTEM TO FALSE ALARM. -
Page 25: Factory Remote Interface (Map Function)
Factory remote interface (MAP function) The AVS S-Series can be directly controlled using the vehicle’s existing factory remote control. By hooking up the POS1, POS2, NEG1, NEG2, M1 and M2 wires as per most data sheets (either supplied by AVS or not) or by testing to find the trigger wires, the alarm can be controlled without further programming. -
Page 26: Anti Hijack Modes
Anti Hijack The AVS S-Series has an anti hijack feature designed to prevent vehicle theft through programmed immobilisation procedures. This feature is aimed at reducing theft via car jacking or theft of the vehicles keys and alarm remote. When the anti hijack mode is set to on, the unit waits for a hidden momentary switch (connected between the AUX wire and ground) to be pressed following a specific event - such as the opening of a door after the ignition is turned on (anti hijack mode 1) or turning the ignition on (anti hijack mode 2). -
Page 27: Courier Mode
Courier mode Courier mode allows the driver to leave the engine running and arm the alarm with the keys in the ignition. The system will enter full arm mode only three seconds after arming (unlike the standard forty seconds). If the alarm is activated the system will shut the engine down and trigger as normal. -
Page 28: Central Door Lock Diagrams
Central door lock diagrams 1. Negative pulse CDL system: Unlock NC Unlock COM Connect to unlock wire of vehicle Unlock NO Earth Lock NC Lock COM Connect to lock wire of vehicle Lock NO Earth 2. Positive pulse CDL system: Unlock NC Unlock COM Connect to unlock wire of vehicle... -
Page 29: Single Wire Cdl System
Central Door Lock diagrams - continued 5. Single wire CDL system: Unlock NC Unlock COM Connect to relay side of control wire Unlock NO Earth Connect to door side of control wire Lock NC Lock COM Connect to Unlock COM Lock NO 6. -
Page 30: Timed Headlight Diagram
Timed Headlight diagram Optional Siren diagrams – see page 18 for Data Siren AVS 24v S-SERIES INSTALLATION MANUAL - GEN 2 VER 4... - Page 31 3 Extra Control Channels from AVS S-Series remote This will allow you to control 3 extra channels from the alarm remotes in addition to the boot pop channel on the alarm. These 3 channels on the RXPRO can be programmed to latch, momentary pulse or timed pulse and have N/O and N/C contacts on channel 1, 2 and 3 and N/O contacts only on channel 4.
-
Page 32: Trouble Shooting Guide
Trouble shooting guide Problem Possible fix No flash on arm/disarm or Turn OFF Factory Remote Interface feature Register 1, Arms on lock/unlock button, disarms on boot button Feature 19 Arms/disarms off boot button Turn OFF Register 2, Feature 2 Alarm chirps for 10 seconds on opening a door before Turn OFF Register 1, Feature 21 (Keypad disarm mode, triggering not in manual).
Need help?
Do you have a question about the AVS 24v S Series and is the answer not in the manual?
Questions and answers