Table of Contents
Advertisement
Quick Links
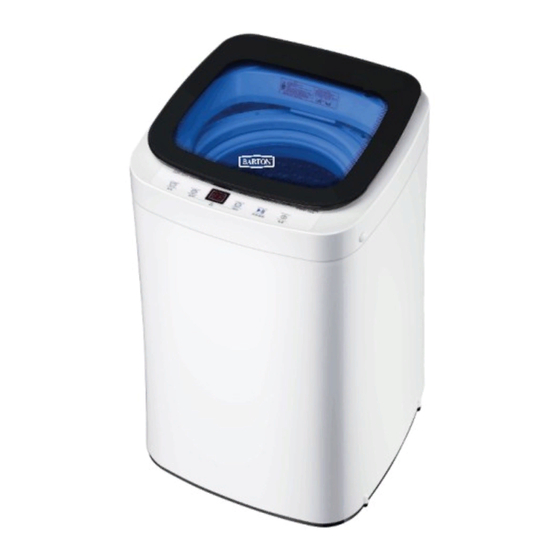
AUTOMATIC WASHER
ITEM: 99809
OWNER'S MANUAL AND SAFETY INSTRUCTIONS
SAVE THIS MANUAL: KEEP THIS MANUAL FOR SAFETY WARNINGS, PRECAUTIONS, ASSEMBLY,
OPERATING, INSPECTION, MAINTENANCE AND CLEANING PROCEDURES. WRITE THE PRODUCT'S
SERIAL NUMBER ON THE BACK OF THE MANUAL NEAR THE ASSEMBLY DIAGRAM (OR MONTH
AND YEAR OF PURCHASE IF PRODUCT HAS NO NUMBER).
FOR QUESTIONS PLEASE CALL OUR CUSTOMER SUPPORT: (909) 628-0880 MON-FRI 9AM TO 3PM PST
Advertisement
Table of Contents

Related Manuals for Barton 99809

Summary of Contents for Barton 99809
- Page 1 AUTOMATIC WASHER ITEM: 99809 OWNER’S MANUAL AND SAFETY INSTRUCTIONS SAVE THIS MANUAL: KEEP THIS MANUAL FOR SAFETY WARNINGS, PRECAUTIONS, ASSEMBLY, OPERATING, INSPECTION, MAINTENANCE AND CLEANING PROCEDURES. WRITE THE PRODUCT’S SERIAL NUMBER ON THE BACK OF THE MANUAL NEAR THE ASSEMBLY DIAGRAM (OR MONTH AND YEAR OF PURCHASE IF PRODUCT HAS NO NUMBER).
-
Page 2: Important Safety Information
IMPORTANT SAFETY INFORMATION GENERAL SAFETY WARNINGS Read all safety warnings and instructions. Failure to follow the warnings and instructions may result in electric fire and/or serious injury. Save all warnings and instructions for future reference. SAFETY The warnings, precautions, and instructions discussed in this instruction manual cannot cover all possible conditions and situations that may occur. - Page 3 IMPORTANT SAFETY INFORMATION WARNING: Risk of child entrapment. DO NOT allow children to play on or in the appliance. Close supervision of children is necessary when the appliance is used around them. The appliance must be plugged into a properly installed and grounded outlet that meets the voltage requirements listed on the ratings label.
-
Page 4: Parts Diagram And List
PARTS DIAGRAM AND LIST DO NOT hook the power cord over a metal object, place a heavy object on the power cord, insert the power cord between object or push the power cord into the space behind the appliance. This may result in electric shock or a fire. -
Page 5: Parts Diagram
INSTALLATION and PARTS UNPACKING AND REMOVING THE SHIPPING MATERIAL: Remove the packing box and lift the washer up and away from the Styrofoam base cushion. Open the lid of the washer to take out all accessories including the protective foam. Packaging materials can be dangerous to children;... -
Page 6: Installation
INSTALLATION ACCESSORIES TOOLS NEEDED FOR INSTALLATION KEY DIMENSIONS AND SPECIFICATIONS DIMENSIONS: 400X430X720mm PACKING SIZE: 505X515X780mm CHOOSING THE PROPER LOCATION FLOORING: For the best performance, you must install your washer on a solidly constructed floor. Wood floors may need to be reinforced to minimize vibration and/or unbalanced load situations. Carpeting and soft tile surfaces are contributing factors to vibration which can cause your washer to move slightly during the spin cycle. -
Page 7: Installing The Washer
INSTALLATION WATER To correctly fill your washer in the proper amount of time. Water pressure of 14 to 70PSI (100 to 500 kPa) is required. Water pressure less than 14psi may cause water valve failure, or may not allow the water valve to shot off completely or can extend the fill time beyond what your washer controls allow, causing your washer to turn off and alarm error. - Page 8 INSTALLATION STEP 1. The quick connection adaptor is primarily for quick connection to a single faucet, such as a kitchen sink. Skip this step if you are connecting the washer to a sink with separate hot and cold faucets the adaptor consists of two parts that quickly connect or disconnect.
-
Page 9: Connect The Drain Hose
INSTALLATION STEP 6. Tighten the fittings by hand until they are snug, then tighten them an additional 2/3 of a turn with a wrench. Confirm that the water supply hoses are not twisted or bent. If the hoses are twisted or bent, the hoses can leak and cause electric shock due to the water leakage. -
Page 10: Operation
OPERATION POWERING YOUR WASHER 1. Plug the power cord into a 3-prong, well grounded 120V/60Hz approved outlet protected by a 15 AMP fuse or comparable circuit breaker RUNNING A TEST CYCLE 1. Load about 6lbs of laundry into the tub. Then press the POWER button to turn on your washer. 2. - Page 11 OPERATION TIMER: The digital display will show and count down the estimated minutes for the cycle selected. You can choose how much time you need to wash or spin the cycle. WATER LEVEL: Press this button to select your desired water level, depending on the size of the load you want to wash.
- Page 12 OPERATION 2. Second, select the water level based on a High, Medium or Low load size. Press the Load Size button to change the water level setting. 3. Third, select your desired wash cycle steps. If you want the wash cycle to perform all three steps, just keep them lit.
-
Page 13: Cycle Guide
OPERATION CYCLE GUIDE CLEANING AND MAINTAINING THE MACHINE Cleaning the Exterior: Turn off the water faucets after finishing the day’s washing. This will shut off the water supply to your washer and prevent damage from escaping water. Leave the lid open to allow the inside of your washer to dry out. - Page 14 TROUBLESHOOTING...
- Page 15 TROUBLESHOOTING...
- Page 16 TROUBLESHOOTING...
- Page 17 TROUBLESHOOTING...
- Page 18 TROUBLESHOOTING...
- Page 19 TROUBLESHOOTING...
-
Page 20: Warranty
WARRANTY PLEASE READ THE FOLLOWING CAREFULLY THE MANUFACTURER AND/OR DISTRIBUTOR HAS PROVIDED THE PARTS LIST AND ASSEMBLY DIAGRAM IN THIS MANUAL AS A REFERENCE TOOL ONLY. NEITHER THE MANUFACTURER OR DISTRIBUTOR MAKES ANY REPRESENTATION OR WARRANTY OF ANY KIND TO THE BUYER THAT HE OR SHE IS QUALIFIED TO MAKE ANY REPAIRS TO THE PRODUCT, OR THAT HE OR SHE IS QUALIFIED TO REPLACE ANY PARTS OF THE PRODUCT.
Need help?
Do you have a question about the 99809 and is the answer not in the manual?
Questions and answers