Advertisement
Quick Links
Advertisement

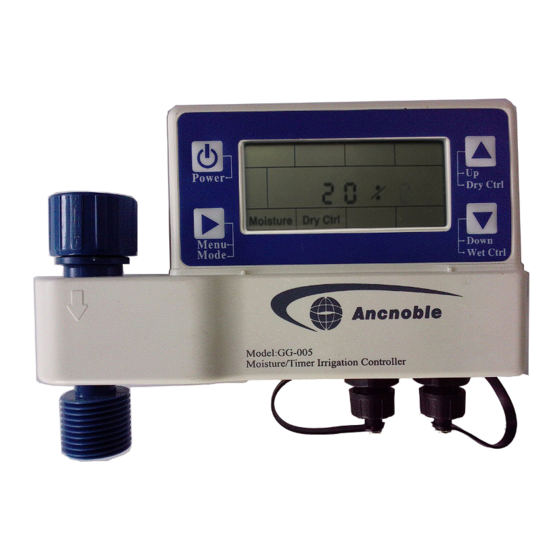
Summary of Contents for ancnoble GG-005
-
Page 3: Standard Package
Standard Package GG-005C-2 GG-005C-1... - Page 4 1. The valve of GG-005C is USA hose standard of NH-11.5, user can screw to faucet directly. 2. Before installation, prepare some water outlet connector, pipes, drippers, etc. if needed. Pressure Regulator (optional)
- Page 5 6. Connect the sensor and solar panel, as shown in the following figure: Connect solar panel Connect moisture sensor Note: The connector is waterproof,Please align the convex & concave before inserting and tightening.
- Page 6 7. Please refer to the following picture for connected solar panel and sensor Note: Recommend to connect the controller valve to water source in first and then water out. Finally connects sensor and solar panel.
- Page 7 8. Install the 4xAA rechargeable battery into the battery box on the back of controller...
- Page 8 After the controller is installed, bury the sensor in the position which would been irrigated properly, fix the solar panel to place with sun, set control parameters and put the purple waterproof cover over the controller.
- Page 9 How to use bury sensor 1. Bury the sensor according to crop root system. If root system is shallow and small, such as vegetables, insert into the ground as shown, if root system is large and deep such as tree, bury deep to the soil. 2.
- Page 10 How to fix solar panel User can fix the solar panel according to site. As shown in the following picture, tied the solar panel to the fence. It is recommended to choose a place with plenty of sun.
- Page 12 Power on Push and hold [Power] key until two beeps to turn on.
- Page 13 Timer and Moisture mode switching Push and hold [Menu/Mode] key to switch to operating mode one by one...
- Page 14 One key to setup Dry/Wet Control Level 1) When the soil is just dry to the point of needs irrigation, push and hold [Dry Ctrl] key until there is a beep, (Two beeps means successful learning. One beep means fail). Then the valve will open and start watering. This dry moisture level will be remembered as start irrigation threshold.
- Page 15 One key to setup Dry/Wet Control Level 2) When soil reached wet point to end irrigation, push and hold [Wet Crtl] key until there is a beep, (Two beeps means successful learning, one beep means fail.) The valve will close; this wet level will be remembered as turn off point.
- Page 16 Adjust Dry/Wet Control Levels Push [Menu] key to browse, when browse into “Dry Ctrl” or “Wet Ctrl”, the digits are flashing, push [▲▼] key to adjust the Dry/Wet control levels. Push and hold the Up/Down key will speed up adjusting.
- Page 17 Moisture mode, setup Max irrigation time Set maximum watering duration to prevent flooding by a fault, such as a broken hose to avoid wasting water. 1) Push [menu] key to browse into “Max” time limit set. 2) Digits for hour are flashing, push [▲▼] to adjust the hour.
- Page 18 Under Moisture mode, setup irrigation window Set irrigation window then irrigation will only happen in this time window. 1) Push [menu] key browse into "start" and the digits will flash. 2) Push [▲▼] to adjust start hour and then push [menu] key browse into start minute setting.
- Page 19 Under Timer mode, set start time for Timer For example, If you want to start watering 06:00 every morning for 1 hour, should set up Start time as 06:00, Interval is 23 hours and duration is 1 hour. please prefer the following: Start time 1) Push [menu] key browse into “start”, digits would flash which means up/down digits to setup.
- Page 20 Under Timer mode, setup timer Interval time Interval 1) Push [menu] key browse into "Interval" 2) Push [▲▼] adjust hour to 23 hours, then push [Menu] into minute and adjust minute to 00, push [Menu]key to save.
- Page 21 Under Timer mode, setup timer Duration time Duration 1) Push [menu] key browse into "Duration“, digits are flashing. 2) Push [▲▼] adjust hour to 01, push [Menu] into minute, and adjust minute to 00, push [Menu]key to save.
- Page 22 Under Timer mode, setup Max moisture limit MAX moisture 1) Push [menu] key, browse into "Max”, and digits are flashing. 2) Push [▲▼] adjust moisture to such as 85%, push [Menu] key to save.
-
Page 23: Setup System Time
Setup system time System Clock 1)No matter in timer mode or moisture mode, you can set clock for the system. 2)Push [Menu] key, browse into "Clock" and digits would flashing. Push [▲▼] adjust to right local time, push [Menu]key to save. -
Page 24: Installation Diagram
Installation diagram:... - Page 25 FQA: Q: What are the causes of controller's alarm beep? A: 1). If Dry Ctrl % is higher than wet Ctrl %, controller will beep to alarm. Check if the set is right. 2) Under moisture mode, if the irrigation duration exceeds the Max irrigation time limit, and the soil moisture still does not rise beyond the set Dry Ctrl, the controller will give an alarm of beep too.
Need help?
Do you have a question about the GG-005 and is the answer not in the manual?
Questions and answers