Table of Contents
Advertisement
Available languages
Available languages
Quick Links
ITA: INDICE
............................................................................................................................
..............................................................................................................
....................................................................................................................................
.......................................................................................................................
.................................................................................................................
......................................................................................................................
................................................................................................................................
Trattamento dei rifiuti delle apparecchiature elettriche
ed elettroniche
........................................................................................................................
ENG: INDEX
.................................................................................................................................
...............................................................................................................
....................................................................................................................................
.................................................................................................................................
...............................................................................................................
...............................................................................................................
..........................................................................................................................
................................................................................................................................
...............................................................................................................................
......................................................................................................................
......................................................................................................................
...................................................................................................
.................................................................................................
.........................................................................................................
......................................................................................................
.......................................................................................................
...................................................................................................
.............................................................................................................
......................................................................................................
.............................................................................................
................................................................................................
.....................................................................................................
p. 2
p. 3
p. 4
p. 5
p. 5
p. 6
p. 6
p. 8
p. 8
p. 9
p. 9
p. 9
p. 10
p. 54
p. 2
p. 15
p. 16
p. 17
p. 17
p. 18
p. 20
p. 20
p. 20
p. 21
p. 21
p. 22
p. 52
p. 26
p. 34
p. 41
1
Advertisement
Table of Contents

Related Manuals for TREVIDEA G3 Ferrari G10078


Summary of Contents for TREVIDEA G3 Ferrari G10078
-
Page 1: Table Of Contents
ITA: INDICE Simbologia p. 2 ………...……………………………………………………………………………..………………….. Avvertenze per l’utilizzo p. 3 ………...…………………………………………………………………………… Informazioni d’uso p. 4 ………...……………………………………...…………………………………………….. G10078 p. 5 ………...……………………………………...……………………………………...……………..…………. Nomenclatura p. 5 …..……………………………………...……………………..…………………………………. Al primo utilizzo p. 6 …..………………………...…………………………………………………………………… Introduzione alle funzioni p. 6 ……………………………...……………………………………………………. Consigli per la cottura p. -
Page 2: Simbologia
CLASSI DI PROTEZIONE / PROTECTION CLASSES ATTENZIONE RISCHIO DI SCOSSE ELETTRICHE NON ESPORRE A PIOGGIA E UMIDITA’ WARNING ELECTRIC SHOCK RISK DO NOT EXPOSE TO RAIN OR MOISTURE ATTENZIONE: NON APRITE L’APPARECCHIO. ALL’INTERNO NON VI SONO COMANDI MANIPOLABILI DALL’UTENTE NE’ PARTI DI RICAMBIO. PER TUTTE LE OPERAZIONI DI SERVIZIO RIVOLGERSI AD UN CENTRO DI ASSISTENZA AUTORIZZATO. -
Page 3: Avvertenze Per L'utilizzo
AVVERTENZE PER L’UTILIZZO i seguito sono riportate importanti indicazioni riguardanti l’installazione, l’uso e la manutenzione; conservare con cura questo libretto per ogni ulteriore consultazione; utilizzare il prodotto solo nel modo indicato dal presente libretto di istruzioni; ogni altro uso è da considerare improprio e pericoloso;... -
Page 4: Informazioni D'uso
INFORMAZIONI D’USO ATTENZIONE: il prodotto ha una funzione riscaldante. Le superfici possono sviluppare alte temperature. Dato che la percezione della temperatura è diversa per ogni persona, utilizzare l’apparecchio con cautela. Toccare solo le superfici progettate per essere toccare, e usare presine o guanti da cucina. -
Page 5: G10078
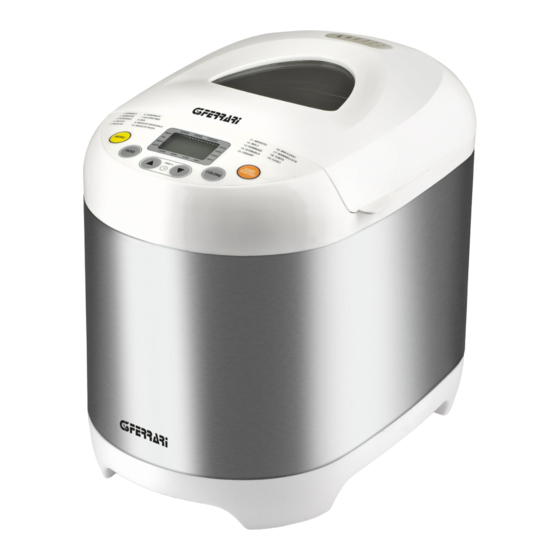
G10078 Oblò di controllo Corpo Coperchio Gancio Spatola impastatrice Coppetta dosatore Contenitore per impasto Cucchiaio dosatore Pannello di controllo PANNELLO DI CONTROLLO (5) -
Page 6: Al Primo Utilizzo
AL PRIMO UTILIZZO L'apparecchio potrebbe emettere un po’ di fumo e un odore caratteristico quando si accende per la prima volta. Questo è normale e smetterà presto. 1. Posizionare l’apparecchio su una superficie piana e stabile ed assicurarsi che sia dotato di sufficiente aerazione. - Page 7 12. MIX 2: impasta per un tempo impostabile da 8 a 45 minuti. 13. PORRIGDE: per fare il porridge (o zuppa d'avena). 14. SCONGELA: scalda a 50 gradi, temperatura adatta allo scongelamento. 15. YOGURT: per fare lo yogurt da latte e fermenti lattici. 16.
-
Page 8: Consigli Per La Cottura
3. AVVERTENZE D’USO Durante l’utilizzo, è possibile che le seguenti indicazioni compaiano sul display LCD: Se il display visualizza "H: HH" dopo aver premuto il tasto START/STOP (Figura 1), la temperatura interna della macchina è ancora troppo elevata. Spegnere l’apparecchio, aprire il coperchio e lasciare raffreddare per 10-20 minuti. -
Page 9: Manutenzione E Pulizia
10. Rovesciare la teglia (4) su una superficie pulita e agitare delicatamente fino a quando il pane non uscirà. 11. Lasciare raffreddare il pane per circa 20 minuti prima di affettare. 12. Al termine della cottura, qualora non si sia premuto il pulsante START/STOP, il pane viene mantenuto in caldo automaticamente per 1 ora. -
Page 10: Ricettario
Rumori durante l’uso e l’impasto La teglia non è installata Fissare la teglia in modo corretto, non è miscelato correttamente correttamente e l’impasto è troppo ricontrollare le dosi nella ricetta. grande per essere mescolato Pagnotta troppo grande Troppo lievito, troppa farina o Controllare la ricetta e i fattori troppa acqua. - Page 11 Se la spatola impastatrice rimane incastrata nel pane, estrarla senza usare oggetti metallici. Meglio toglierla con le dita quando il pane è freddo. Se la spatola impastatrice rimane incastrata nel perno, versare acqua calda e detersivo delicato per stoviglie ed attendere che l’incrostazione ammorbidisca. Pane Bianco 300 ml di acqua tiepida 1 cucchiaino di zucchero semolato...
- Page 12 Pane al FARRO 230 ml di acqua tiepida 1 pizzico di zucchero semolato 1 cucchiaio di olio extra vergine d’oliva 1 cucchiaino di sale 400g farina di farro 2 cucchiai di amido di mais 1/2 bustina di lievito di birra disidratato Programma NORMALE 1, Peso 750g, Colore crosta a piacere Pane con Speck 280 ml di acqua tiepida...
- Page 13 500g farina integrale 1/2 bustina di lievito di birra disidratato 2 pomodori e prezzemolo, da aggiungere dopo il “beep” Programma NORMALE 1, Peso 1000g, Colore crosta a piacere N.B.: i pomodori vanno lavati sotto acqua corrente e pelati. Togliere i semini e tagliare la polpa a dadini.
- Page 14 Tigella emiliana Mezzo bicchiere di latte 1 tazzina da caffè di acqua frizzante Un pizzico di zucchero semolato Un cucchiaio abbondante di olio extra vergine d’oliva 12g di sale 500g farina Mezzo cubetto di lievito di birra sciolto in latte tiepido Programma IMPASTO 11, Peso -, Colore - Sbriciolare il lievito in una ciotola e scioglierlo con poco latte tiepido.
- Page 15 N.B: Con uno sbattitore elettrico mescolare bene zucchero, uova e latte, ed inserire il composto nel contenitore. Sopra al composto aggiungere gli altri ingredienti. A 50 minuti dalla fine del programma cospargere di zucchero semolato per ottenere un'ottima crosta zuccherata. Il Panettone 190 ml di latte intero 130g di zucchero semolato...
-
Page 16: General Information
of the electricity grid; the installation must be performed according to the manufacturer's instructions considering the maximum power of the appliance as shown on the label; an incorrect installation may cause damage to people, animals or things, for which the manufacturer cannot be considered responsible thereof;... -
Page 17: G10078
- To prevent electrical shock, do not immerse power cord, plug or the body in water or other liquid. - Do not touch moving or rotating parts of the unit. Disconnect the plug from the outlet when the appliance is not in use, before putting on or taking off accessories and before cleaning. - The use of attachments not recommended by the manufacturer may cause damages or injuries which are not covered by the warranty. -
Page 18: Functions Introduction
MAIN FUNCTIONS INTRODUCTION As soon as the bread machine is connected to the electricity, it emits a beep and the words "1 3:10" appears on the display after a short period of time: "1" indicates the selected program while "3:10" is the processing time. - Page 19 Browning level (COLORE) This button is used to select the level of browning of the crust of the bread. Press the button repeatedly, and the arrow on the display will move between the following options: "CHIARO" (light golden brown), "MEDIO" (medium browned) "SCURO" (darker browning). Loaf - (PESO) Press this button repeatedly to select one of the following formats of bread: 500g, 750g, 1000g.
-
Page 20: Hints For Cooking
HINTS FOR A BETTER BAKING 1. QUICK PROGRAM (VELOCE) Selecting the program QUICK, the bread is made with yeast and sodium bicarbonate, which is activated by moisture and heat. To get a perfect result, it is suggested to place all liquids in the bottom of the pan and the dry ingredients on top. -
Page 21: Technical Features
Before storing the bread machine, ensure it has cooled down completely and that it has been cleaned and dried; put the spoon (9), the cup (8), the hook (7) and the kneading blade (3) into the pan (4), and close the cover (2). Store in a clean and dry place, out of reach of children. TECHNICAL FEATURES Power supply: AC 220-240V~ 50/60 Hz. -
Page 22: Recipy Book
RECIPEBOOK Bread is one of the most important daily food, and each city has its own specialties. The varieties of bread are therefore virtually endless. The goal of this cookbook is to provide the basics and ideas to be able to unleash the imagination and create your own personal recipes in the best way. - Page 23 French bread 200 ml of warm water 1 teaspoon granulated sugar 1,5 tablespoon extra-virgin olive oil 1 tablespoon of salt 420g flour 1/2 sachet of dried yeast Program FRENCH 2, Weight 750g, Color as you prefer Spelt Bread 230 ml of warm water 1 pinch of sugar 1 tablespoon extra-virgin olive oil 1 teaspoon of salt...
- Page 24 Bread with Tomatoes 250 ml of warm water 10g of caster sugar A tablespoon of extra-virgin olive oil 10g of salt 500g whole wheat flour 1/2 sachet of dried yeast 2 tomatoes and parsley, to be added after the "beep" Program BASIC 1, Weight 1000g, Color as you like it Note: tomatoes should be washed under running water and peeled.
- Page 25 At the end of the program, make a ball and let sit for another 15 minutes. Make small balls and roll out the dough thin. Cook with "Testo Romagnolo" or with a non-stick pan. Garnish to taste with cold meats, cheeses, vegetables, etc..Tigella emiliana Half of a glass of milk 1 coffee cup of sparkling water...
-
Page 26: Portuguese
1 packet of baking powder Program CAKE 18, Weight 750g, Color Dark N.B: With and electric mixer, mix well sugar, eggs and milk, then pour the mixture in the container. Put other ingredients over the mixture. At 50 minutes from the end of program pour some sugar on the dough, to get a delicious sugar crust. - Page 27 agrafos, etc.) ao alcance das crianças, uma vez que constituem potenciais fontes de perigo; além disso, recordamos que essas partes devem ser objecto de recolha diferenciada de resíduos; certifique- se de que os dados constantes da placa são compatíveis com os da rede eléctrica; a instalação deve ser efectuada de acordo com as instruções do fabricante, considerando a potência máxima do aparelho indicada na placa;...
- Page 28 - Este aparelho foi concebido para uso doméstico ou equivalente, em situações como as de refeitórios em pequenas empresas ou outros ambientes de natureza laboral; por clientes de hotéis, motéis ou outro tipo de acomodação turística, como turismo rural ou residencial. - Colocar sobre una superficie plana y estable.
- Page 29 3. Limpiar todas las partes como se indica en el apartado “Limpieza y mantenimiento”. 4. Ajustar la máquina para pan en la modalidad “cocción” (Función 19) y ponerla en funcionamiento en vacío durante unos 10 minutos. Tras su completo enfriamiento, limpiar nuevamente el aparato. 5.
- Page 30 8. MIX: amassar para 15 minutos. 9. MISTURA INTEGRAL (IMPASTO INTEGRALE): para amasar, fermentar com farinha integral. 10. MISTURA PIZZA (IMPASTO PIZZA): para amasar y fermentar la mistura para la pizza. Completar a subida para fora da máquina por um tempo a gosto. 11.
- Page 31 Efecto memoria Si la alimentación ha sufrido una interrupción durante el desarrollo de la panificación, el proceso continuará automáticamente en 10 minutos, sin pulsar el botón START/STOP. Si la interrupción de la corriente supera los 10 minutos, la memoria no se puede mantener y se deberá volver a poner en marcha la máquina.
- Page 32 Si es necesario, ajustar el arranque retardado pulsando TIME+ o TIME-. Pulsar el botón START/STOP para encender la máquina. Nota: con los programas NORMALE, FRANCESE, INTEGRALE/, RAPIDO/VELOCE, BRIOCHE, SANDWICH, SIN GLUTEN/GLUTEN FREE e TORTA, durante la fase de amasado la máquina emitirá...
- Page 33 RESOLUCIÓN DE PROBLEMAS Problema Causa Solución - Elemento calefactor sucio. - Desconectar la máquina y limpiar Sale humo de la unidad. - Primer uso: se ha quedado aceite el elemento calefactor. de elaboración en el elemento - Durante el primer uso, hacer calefactor.
-
Page 34: Español
ESPAÑOL ADVERTENCIAS DE USO A continuación se presentan importantes indicaciones sobre la instalación, el uso y el mantenimiento. Conservar con cuidado este manual para cualquier consulta posterior; utilizar el producto solo de la manera que indica este manual de instrucciones; cualquier otro uso se considera inadecuado y peligroso;... - Page 35 INFORMACIÓN GENERAL ATENCIÓN: el producto tiene una función de calentamiento. Las superficies pueden desarrollar altas temperaturas. Dado que la percepción de la temperatura es distinta para cada persona, utilizar el aparato con cautela. Tocar solo las superficies diseñadas para ser tocadas, y usar agarradores o guantes de cocina.
- Page 36 PRIMER USO El aparato podría emitir un poco de humo y un olor característico cuando se enciende por primera vez. Esto es normal y cesará pronto. 1. Colocar el aparato sobre una superficie plana y estable y asegurarse de que disponga de suficiente ventilación.
- Page 37 5. BRIOCHE: para amasar, fermentar y cocer el pan con leche o mantequilla. 6. SANDWICH: para amasar, fermentar y cocer el pan con medio-largo leudado. Para un pan adecuado para la creación de sándwiches y bocadillos 7. SIN GLUTEN/GLUTEN FREE: para amasar, fermentar y cocer pan sin gluten, gracias a los tiempos de agitación, de descanso y de levadura especialmente estudiado.
- Page 38 Nota: con el arranque retardado, se aconseja no utilizar ingredientes frescos y fácilmente perecederos (como huevos, leche fresca, fruta, cebollas, etc.). 2. CARACTERÍSTICAS FUNCIONALES BÁSICAS Función de mantenimiento del calor (programas 1,2,3,4,5,6,7,16,18) El pan se puede mantener automáticamente caliente durante 60 minutos después de la cocción. Si se desea tomar el pan antes, desactivar el programa pulsando el botón START/STOP en la pantalla de control.
- Page 39 integral, se aconseja invertir el orden de los ingredientes (esto es, verter primero levadura seca y harina, y por último el líquido para obtener una masa mejor). Hacer una pequeña abertura a un lado de la harina y añadir la levadura, asegurándose de que no entre en contacto con los ingredientes líquidos o la sal.
- Page 40 3 niveles de dorado • Arranque retardado (10min – 15h) • Accesorios: fuente antiadherente, copa y cuchara dosificadora, gancho • RESOLUCIÓN DE PROBLEMAS Problema Causa Solución - Elemento calefactor sucio. - Desconectar la máquina y limpiar Sale humo de la unidad. - Primer uso: se ha quedado aceite el elemento calefactor.
-
Page 41: Deutch
dejar enfriar la máquina durante unos 10-20 minutos. Si el problema persiste, contactar con un Centro de Reparación Autorizado. DEUTCH: HINWEISE: Verwenden Sie das Gerät nur nach den Anweisungen in dieser Bedienungsanleitung. Jede anderweitige Verwendung gilt als unsachgemäß und gefährlich, und der Hersteller kann für Schäden haftbar gemacht werden, die durch eine unsachgemäße, falsche oder unvernünftige Verwendung verursacht werden. - Page 42 werden. Halten Sie das Gerät ausschließlich auf Griffflächen die abhalten und verwenden Sie solche Hitzeschutzmaßen wie Hitzeschutzhandschuhe oder Topflappen. - Dieses Gerät ist nur für den Hausgebrauch oder gleichwertiges bestimmt, in Situationen wie bspw.: Kantinen in kleinen Firmen oder ähnliche Arbeitsumgebungen, von Kunden in Hotels, Motels oder andere Art von touristische Unterkunft, wie ländlicher oder Wohn –Tourismus.
- Page 43 VOR DER ERSTEN VERWENDUNG Das Gerät kann ein wenig Rauch und einen typischen Geruch freisetzen, wenn Sie das Gerät zum ersten Mal nutzen, Das ist normal und wird bald beendet. 1. Stellen Sie das Gerät auf einer flachen, stabilen Oberfläche, achten Sie bitte darauf, dass auf beiden Seiten ausreichend Platz für die Belüftung vorhanden ist.
- Page 44 und nutzen Sie ihn zur Herstellung von Sandwiches, Pizza, Brotlaibe. 12. MIX 2: ohne Kneten 8-45 Minuten lang. 13. PORRIGDE: zu machen porridge (Haferbrei). 14. AUFTAUEN (SCONGELA): erhitzt die Temperatur geeignet zum Abtauen bis 50 Grad,. 15. YOGURT: die Milch Joghurt und Milchsäurebakterien zu machen. 16.
- Page 45 Umgebung empfehlen eine Raumtemperatur zwischen 15 und 34C für eine bessere Ausleistung vom Brotbackautomat. 3. SPEZIELLE WARNHINWEISE Während der Nutzung, ist es möglich das folgende Anzeige im Display erscheinen: Zeigt das Display "H: HH" nach dem START/STOP – Taste drücken (Bild 1),bedeutet das, dass die Temperatur in der Backform noch zu hoch ist, Das Programm muss beendet werden.
- Page 46 Sie Ofenhandschuhen antragen, greifen Sie kräftig der Backbrotgriff (4). Drehen Sie die Backform entgegen der Uhrzeigerrichtung und heben Sie die anschließend aus dem Gerät. Wenn notwendig, nutzen Sie den Teigschaber, um das Brot an den Seiten vorsichtig zu lockern. ACHTUNG: Die Brotform (4) und das Brot können sehr heiß sein! Seien Sie vorsichtig und tragen Sie immer Ofenhandschuhe.
- Page 47 Backen geöffnet während dem Vorgang. - Überprüfen Sie, ob etwas den Knethaken - Der Knethaken kann sich kaum blockiert. Sollte das Problem andauern, drehen. kontaktieren Sie bitte den Kundendienst Service. Sie hören den Motor Dir Backform ist nicht gut befestigt Überprüfen Sie, ob die Backform gut befestigt arbeiten aber der oder die Teigmenge ist zu groß, um...
- Page 48 Wenn der Knethaken im Stift steckt, warmes Wasser und einen milden Reinigungsmittel für Geschirr gießen und warten bis die Verunreinigung aufweicht. Die Reihenfolge wie Sie die Zutaten einführen ist wichtig. Die Zutaten in der gleichen Reihenfolge, wie beschrieben einfügen. Während der ersten Phase des Programms, gibt das Gerät einen "Piepton" ab. Wenn Sie weitere Zutaten wie (Eier, Getreide, Oliven, etc.
- Page 49 Dinkelbrötchen 230 ml warmes Wasser 1 Prise Salz 1 Teelöffel Extra Olivenöl 1 Teelöffel Salz 400gr Dinkelmehl 2 Teelöffel Maisstärke 1/2 Beutel Backpulver Programm NORMAL 1, Gewischt 750gr, Farbe wie sie wünschen Brot mit Speck 280 ml warmes Wasser 1 Teelöffel granuliertes Zucker 1 Teelöffel Extra Olivenöl 1 Teelöffel Salz 500gr Mehl...
- Page 50 Note: Die Tomaten sollten unter fließendes Wasser gewacht und geschält werden. Entkernen und in kleinen Würfeln schneiden. Petersilien waschen und hacken. „Focaccia Genovese“ 310 ml warmes Wasser 10g Puderzucker Ein Teelöffel Extra Olivenöl 12g Salz 480g Mehl 1/2 Beutel Backpulver Programm TEIG 11, Gewicht - Farbe - Bei Programmende, ausstreichen und 30 Minuten aufgehen lassen.
- Page 51 12g Salz 500g Mehl Ein halbes Würfel Hefe in warmes Milch aufgelöst. Programm TEIG 11, Gewicht – Farbe - Die Hefe in eine kleine Schüssel Streuseln und mit ein bisschen warmes Milch auflösen. Mischen Die Zutaten in das Brotbackautomat hinzufügen und den Programm starten. Bei Programmende, machen Sie eine Kugel und warten Sie 30 Minuten.
-
Page 52: Waste Of Electric And Electronic Equipment (Weee Directive)
RIFIUTI APPARECCHIATURE ELETTRICHE ED ELETTRONICHE Al termine del suo periodo di vita, il prodotto va smaltito seguendo le direttive vigenti riguardo alla raccolta differenziata e non deve essere trattato come un normale rifiuto di nettezza urbana. Il prodotto va smaltito presso i centri di raccolta autorizzati allo scopo, o restituito al rivenditore, qualora si voglia sostituire il prodotto con uno equivalente nuovo. - Page 53 Appliance is conform to the pertinent European regulation and is therefore marked with the CE mark. www.g3ferrari.it TREVIDEA S.r.l. TREVIDEA S.R.L. – Strada Consolare Rimini – San Marino n. 62 – 47924 – RIMINI (RN) - ITALY MADE IN CHINA...
Need help?
Do you have a question about the G3 Ferrari G10078 and is the answer not in the manual?
Questions and answers