Table of Contents
Advertisement
Advertisement
Table of Contents

Subscribe to Our Youtube Channel
Summary of Contents for POWERHANDLING PowerPallet 2000
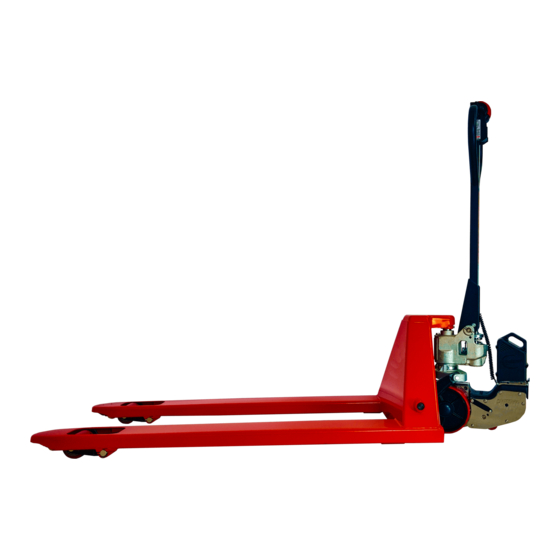
- Page 1 PowerHandling, Inc. PowerPallet User Manual Published: May 2021...
-
Page 2: Fcc Notice
DO NOT INSTALL, OPERATE OR SERVICE THIS PRODUCT UNLESS YOU HAVE READ AND FULLY UNDERSTAND THE ENTIRE CONTENTS OF THIS MANUAL. FAILURE TO DO SO MAY RESULT IN PROPERTY DAMAGE, BODILY INJURY OR DEATH. FCC Notice This device complies with part 15 of the FCC Rules. Operation is subject to the following 2 conditions: (1) This device may not cause harmful interference, and (2) this device must accept any interference received, including interference that may cause undesired operation. -
Page 3: Precautions
Precautions Improper operation of the equipment may result in operator injury, or load, and/or property damage. The following precautions must be adhered to at all times: Any person operating the machine must be trained and authorized to do so. All warnings and instructions must be carefully read and understood before operating the device. Do not operate in hazardous areas/environment. -
Page 4: Table Of Contents
Contents FCC Notice ..............................2 Training Information ............................. 2 Precautions ..............................3 Figures ................................6 Description ..............................7 Introduction .............................. 7 General Use and Application ........................7 PowerPallet Specifications ........................7 Battery Specifications ..........................7 Standard Safety Features .......................... 8 Braking by Handle Position ........................ - Page 5 Battery & Motor Temperature Indication ..................21 Belly-Stop ............................21 Parking Brake ............................21 Errors and Warnings ......................... 222 Maintenance ............................. 233 Machine Maintenance .......................... 233 Battery Maintenance ..........................233 Service ............................... 255 Manual Jack Operation ......................... 255 Drive-Spring Removal........................255 Drive-Spring Installation ........................
-
Page 6: Figures
Figures Figure 1: Parts (Out of the box) ........................Figure 2: Tools Required for Installation ......................Figure 3: Screw-Jack Height Adjustment ......................Figure 4: Curb-Wheel Height Adjustment ....................... Figure 5: Forward and Backward Travel ......................Figure 6: PowerPallet Base Unit ........................Figure 7: Parts of the User Controller ...................... -
Page 7: Description
Description Introduction This document describes the PowerPallet, a unique bolt-on machine that converts a manual pallet-jack into a powerful, fast, yet ultra-compact motorized pallet-jack. The standard safety features, assembly instructions, terms and definitions, operation, maintenance, service and troubleshooting pertaining to the machine are detailed in this manual. -
Page 8: Standard Safety Features
Standard Safety Features Braking by Handle Position In Warehouse mode, the PowerPallet applies full braking when the handle moves into the upright position. There is an optional setting to apply full braking when the PowerPallet handle moves into the horizontal position. In the Truck mode, there is an optional setting to apply full brakes when the PowerPallet handle moves into the horizontal position. -
Page 9: Installation
Installation List of Parts Figure 1: Parts (Out of the box) 1. PowerPallet Base unit with User Controller 2. User Controller mounting bracket 3. Pallet mount kit (pallet-jack specific) 4. Spacer rod 5. Fasteners 6. Allen-wrench tool for screw-jack adjustment 7. -
Page 10: Tools Required
Tools Required 1. M3 and M5 Allen-wrenches 2. Philips #1 screwdriver 3. Snap-ring pliers 4. Allen-wrench tool for screw- jack adjustment 5. Flat-head screwdriver Figure 2: Tools Required for Installation Assembly 1) Set the rear end of the pallet-jack such that the wheels are off the ground. Place some weights (>20kg) on the front forks, to prevent it from tipping over during installation. - Page 11 3) Remove the snap-rings using the snap-ring pliers, and slide the wheels out. (Note: Some pallet-jack models use nuts to hold the wheels on. Use appropriate tools if that is true for the pallet-jack that the PowerPallet is being installed on.) 4) If the pallet mount kit came with spacer rings for the pallet-jack, slide them onto both sides of the axle.
- Page 12 6) Gently lift and slide this assembly on to the corresponding shaft of the pallet-jack (The assembly can be held in place by mounting on one of the pallet-jack wheels behind it). Slide the other mounting plate on to the opposite side and secure it to the PowerPallet with the M8 flat-head screws.
- Page 13 10) Install the User Controller on the handle of the pallet-jack using the User Controller mounting plate with the aid of the Philips screwdriver and the 8 plastite screws. Make sure the backs of the mounting plate and the User Controller are laid completely flat against the handle of the pallet-jack and the cable is properly placed in the slot provided for it.
-
Page 14: Screw-Jack Adjustment
Screw-Jack Adjustment The machine comes with an adjustable screw-jack that allows the operator to set the height of the drive-wheel with respect to the wheels of the pallet-jack. The operator can alter this height by using the allen-wrench tool provided to adjust the compression in the drive-spring, thus being able to achieve sufficient traction and optimal stability for any operable load. -
Page 15: Operation
Operation Terms & Definitions Forward Travel If the truck is moving away from the operator when the operator is standing directly behind the handle of the pallet-jack and away from the forks, it is said to be traveling forward. Backward Travel If the truck is moving towards the operator when the operator is standing directly behind the handle of the pallet-jack and away from the forks, it is said to be traveling backward. -
Page 16: User Controller
User Controller The User Controller allows the user to control and operate the PowerPallet. Direction of Rotation -Throttle “FORWARD” No Rotation – Throttle “NEUTRAL” Direction of Rotation -Throttle “REVERSE” (Under Plastic) (Back View) Figure 7: Parts of the User Controller Part Use/Description Power up machine... -
Page 17: Device Operation
Li-Ion Battery Charging The Li-Ion battery charger includes an external charger block that plugs into the battery cradle. To charge the battery simply plug the power cord into the charger block, plug the charger block into the charger base, plug the power cord into a mains circuit and set the battery on the charger base. The LED indicator light that shows the battery charge status is located on this external battery charger block. -
Page 18: Battery Installation
Battery Installation Step 1: Align and insert Step 2: Make sure the tabs on centrally located steel tabs the back plate securely capture on the front of the battery the battery from the back. into the slots on the battery base-plate. -
Page 19: Battery Removal
Battery Removal Step 1: Pull battery latch plate Step 2: Tilt battery forward and backward. slide it out from the slots on the battery base-plate Figure 9: Removing the Battery Power Up & Power Down State Action Description Horn beeps once indicating the machine is awake Power Up Press Belly-Button with the battery installed... -
Page 20: Operating Modes
Operating Modes The 3 modes of operation for the PowerPallet are described in table below. The Left LED indicates the current mode of operation. Mode of Operation Left LED Driving Braking Full braking applied when handle is upright. Optional brake Tilt handle to speed control position, when handle is horizontal and then slowly rotate the throttle in... -
Page 21: Battery & Motor Temperature Indication
Battery & Motor Temperature Indication The Right LED indicates battery level and motor temperature information. Right LED Indication Description Solid GREEN Good battery > 70% battery remaining Solid YELLOW OK battery 40% - 70% battery remaining Solid RED Low battery 10% - 40% battery remaining <... -
Page 22: Errors And Warnings
Errors and Warnings The PowerPallet indicates any errors or warnings using the Left and Right LEDs, and the horn. The table below lists the various indications and their corresponding descriptions. Warning Indication Warning Description Recommended Action Throttle input Attempting to over- detected with steering Handle Positions for ride safety feature... -
Page 23: Maintenance
Rechargeable Battery Care Rechargeable batteries require routine care. Read and follow the guidelines in this document to safely use PowerHandling rechargeable batteries and achieve the maximum battery life span. Overview Do not leave batteries unused for extended periods of time, either in the product or in storage. When a battery has been unused for 6 months check the charge status and charge or dispose of the battery as appropriate. - Page 24 The battery charge time increases significantly. If a battery is stored or otherwise unused for an extended period, be sure to follow the storage instructions in this document. Storage (Li-Ion) Charge or discharge the battery to approximately 40%-50% of capacity before storage. ...
-
Page 25: Service
Service Manual Jack Operation The pallet-jack can be easily switched to manual jack operation by simply removing the drive-spring on the screw-jack assembly. Drive-Spring Removal STEP 1: Mount one side of the pallet-jack and the base unit of the PowerPallet over a pallet. Make sure the drive-arm is not resting on the pallet, and the drive-wheel is off the ground. -
Page 26: Drive-Spring Installation
Drive-Spring Installation To use the PowerPallet again, replace the drive-spring on the screw-jack assembly following the steps for removing the drive-spring in reverse order and reinstall a new plastic cable-tie. Make sure the battery is not installed when installing/removing the drive-spring. Replacement Parts Contact Sales &... -
Page 27: Firmware Update
Firmware Update The software on the device can be upgraded or reinstalled using a USB flash drive. The update file with the name “PHPPPRR.BIN” can be received by contacting Sales & Support. Copy the update file on a 8GB or smaller USB 2.0 flash drive (formatted to a FAT32 file system), and follow the Firmware &... -
Page 28: Troubleshooting
Troubleshooting If the PowerPallet does not perform as expected, see table below to troubleshoot the problem. Problem Diagnosis Possible Solution For any problem, first Follow corresponding Does problem match any of the warnings? check Errors and Warnings recommended action Is the drive-wheel off the ground? Adjust the screw-jack Is the drive-wheel slipping on the ground while the pallet- lower the drive-wheel... -
Page 29: Warranty & Guarantee (Machines & Parts / Materials & Labor)
PowerHandling location closer to the customer, the parts may be supplied from that location if available. In the event of a claim being made under the terms of this Warranty which requires the unit to be returned to PowerHandling, the customer must first obtain a Return Material Authorization (RMA) from their sales contact.
Need help?
Do you have a question about the PowerPallet 2000 and is the answer not in the manual?
Questions and answers