Table of Contents
Advertisement
Quick Links
Advertisement
Table of Contents

Summary of Contents for Digital Devices Octopus NET SL-MC
- Page 1 Instructions - Octopus Net MC Instructions for Octopus NET SL-MC 15 May 2020...
-
Page 2: Table Of Contents
2.5 Cleaning ............................. 4 3 General information ..................4 3.1 Receive modules ........................5 3.1.1 Octopus NET SL-MC-S (DVB-S/S2) ..................5 3.1.2 Octopus NET SL-MC (DVB-S/DVB-S2/ISDB-S or DVB-C/C2/ISDB-C/J.83 or DVB-T/T2/ISDB- T) ..............................5 3.2 Miscellaneous ..........................5 4 Description ....................6 4.1 Front View ............................. - Page 3 7.2.1 Structure of the M3U list for MAG250 STB ................. 28 7.2.2 Configuration on a MAG250 STB ..................29 7.3 Software Tool / Client ........................29 8 Digital Devices .................... 30 8.1 Product portfolio ......................... 30 8.2 Service information ........................30 8.3 Naming Rights..........................
-
Page 4: Scope Of Delivery
Please read and follow these safety instructions. This ensures reliable operation and a long service life for your Octopus NET SL-MC. Keep this manual within reach of the Octopus NET SL-MC for reference at any time. The Octopus NET SL-MC is constantly being developed further, a current version of this document can be downloaded from our website. -
Page 5: Receive Modules
Full DiSEqC 2. X support • Unicable support (SCR/single cable solution according to EN50494) for DVB-S/S2 equipment • 4x F-socket (75 Ohm) 3.1.2 Octopus NET SL-MC (DVB-S/DVB-S2/ISDB-S or DVB-C/C2/ISDB-C/J.83 or DVB- T/T2/ISDB-T) • Multi-Band tuner DVB-S/DVB-S2/ISDB-S (satellite tuner), DVB-C/DVB-C2/ISDB-C/J.83 (cable tuner), DVB-T/DVB-T2/ISDB-T (terrestrial tuner) •... -
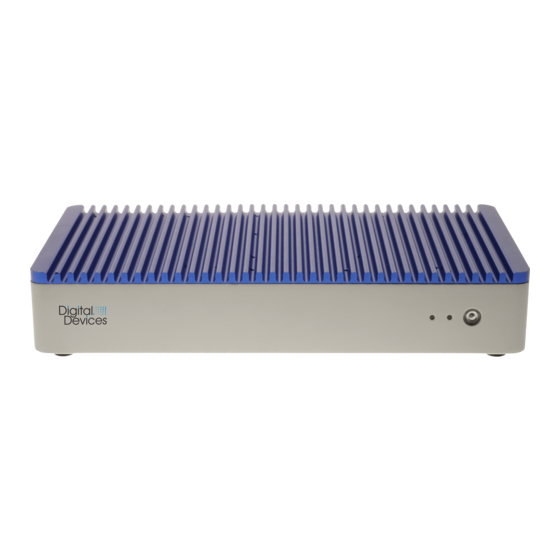
Page 6: Description
5.2 Connection First remove all protective films and packaging aids from the Octopus NET SL-MC. Place the unit on a level, dust-free surface. Installation with the supplied wall mounting adapter should only be carried out after completion of the installation. -
Page 7: Configuration
The Octopus NET SL-MC responds in the network with the name " ONet-MC1208-1". The actual configuration of the Octopus NET SL-MC is done via a web interface. This can be accessed via a web browser by entering the IP address and port 8080 (e. g. 192.168.0.0.120:8080). If you do not know the IP address of the device, look in the router / switch configuration for a list of devices connected to the network. - Page 8 The following describes the individual areas for configuring Octopus NET SL-MC. The setup of the Octopus NET SL-MC via the web browser of a PC is explained, and setup via mobile devices is just as easy to manage.
- Page 9 Instructions - Octopus Net MC When calling the web interface of Octopus NET SL-MC you will be the first to go to the login page. To register, please proceed as follows: (1) Enter the login name "admin" here. (2) Enter the password here (default: admin).
-
Page 10: Overview
Instructions - Octopus Net MC 6.1 Overview After successfully logging in to the web interface of Octopus NET SL-MC, you will be taken to the Overview page, which displays the navigation bar with links to the individual sections, available tuners, system information and the currently used network configuration. -
Page 11: Overview - System Information - Changing The Date / Time
Instructions - Octopus Net MC Under System Information, click on to perform a firmware update, which requires the Octopus FIRMWARE UPDATE NET SL-MC to be connected to the Internet In our case, the latest firmware is already on the box. Otherwise the current firmware is loaded automatically. 6.1.3 Overview - System Information - Changing the Date / Time The date and time can be set manually, or by activating "Synchronize via NTP", the time and date can be automatically synchronized via an NTP server (Network Time Protocol). -
Page 12: Overview - System Information - Change Password
6.1.5 Overview - System Information - Factory Reset With the Octopus NET SL-MC, it is not only possible to reset the box by pressing the reset button on the rear side of the box, but also to reset it to the factory settings by clicking on the following button via the web interface on the overview page. -
Page 13: Network
Instructions - Octopus Net MC 6.2 Network In the Network area you can customize the network configuration of Octopus NET SL-MC according to your needs. Once changes have been made to the settings, click on to accept them, otherwise they will be discarded. -
Page 14: Network - Set Static Ip
To use a static IP, proceed as follows: (1) Switching from dynamic IP to static IP. (2) Enter the desired IP under which Octopus NET SL-MC should be accessible in the network. (3) Enter the appropriate netmask for the IP address range here. -
Page 15: Channel Scanning
6.3 Channel scanning In the area of station scanning, a station scan must be carried out after the Octopus NET SL-MC has been put into operation for the first time. To do this, select a "Tuner" (1-8), the "Search Range" and the "DiSEqC" setting required for your system. -
Page 16: Station Search - Scan Your Own Transponder List
Instructions - Octopus Net MC 6.3.2 Station search - scan your own transponder list The process is the same as with the normal search, only that in the "Search area" is set to "Own transponder list" and is used for the search by clicking on a transponder list in ".ini" format. The process is the same as with the normal search, only that in the "Search area"... -
Page 17: Channel Search - Manual Transponder Scan
Instructions - Octopus Net MC 6.3.3 Channel search - manual transponder scan To scan individual transponders, select a "Tuner" and, if necessary, for SAT reception, select the "DiSEqC" setting required for your system. In the "Search area" select the setting that matches the reception, e.g. "DVB-S / S2: Manual transponder scan". -
Page 18: Multicast
Furthermore, it is possible to import the newly exported multicast list, which allows a faster setup of the multicast in Octopus NET SL-MC. Click here for on. In the pop-up window that opens, click on and select the XML file to be imported in the file browser. -
Page 19: Multicast - Basic Information
6.4.4 Multicast - basic information The Octopus NET SL-MC can manage up to 12 UDP or RTP multicast streams in hardware terms. It does not matter whether the maximum number of streams is distributed on one or all eight tuners. -
Page 20: Unicast
There is also the option of importing the unicast list that has just been exported, which means that the unicast can be set up in the Octopus NET SL-MC more quickly. To do this, click on. In the pop-up window that opens, click on and select the XML file to be imported in the file browser. -
Page 21: Tuner
The available tuners can be (de)activated in the Tuner area. By default, all tuners are enabled. MC-S only: With the satellite version of Octopus NET SL-MC the operating mode can be changed additionally. Once changes have been made to the settings, click on to accept them, otherwise they will be discarded. -
Page 22: Tuner - Unicable Settings (Mc-S Only)
Instructions - Octopus Net MC 6.6.2 Tuner - Unicable Settings (MC-S only) If Unicable is selected under Operating mode, the following settings must be made for the activated tuners: (1) Set EN50494 to enable unicable for this tuner. (2) Enter the Unicable frequency in KHz to be used here. If the frequency should only be specified in MHz e. -
Page 23: Common Interface (Ci)
Instructions - Octopus Net MC 6.7 Common Interface (CI) The Common Interface section lists the Common Interfaces (short CI) built into Octopus NET SL-MC. The CIs can be selected by clicking on the respective adapter/slot. 6.7.1 Common Interface - CAM Options... - Page 24 To illustrate the whole thing, here is an example based on a CAM module with ORF smart card in the CI slot 1 of the Octopus NET SL-MC-S: In the Multicast section, 4 channels have been assigned to Tuner 4.
-
Page 25: Streaming
Instructions - Octopus Net MC 6.8 Streaming In the Streaming area, all streamed channels including their stream address are displayed in a list. If your web browser supports it, click on the desired channel to play it in a suitable player. 15 May 2020... -
Page 26: Setup Examples Clients
The content of the M3U list has a simple or extended structure. The easy setup is sufficient for multicast streamers with SPTS like the Octopus NET SL-MC-S / MC. In case of problems during the search, the extended format can also be used. If you select the simple structure of the M3U list, the search can take longer, even with a few channels. -
Page 27: Structure Of The M3U List For Panasonic Tv (Enhanced)
Instructions - Octopus Net MC Make sure that there is a line break after the last line of text at the end of the playlist, otherwise the file will not be read correctly. The entire setup for two transmitters therefore looks like this: 7.1.2 Structure of the M3U List for Panasonic TV (Enhanced) The playlist starts normally with: #EXTM3U... -
Page 28: Configuration On The Panasonic Tv
USB stick. The name of the M3U list can be chosen freely, e. g. chanlist.m3u. The MAG250 STB can handle multiple protocols, so you can configure the streams on the Octopus NET SL-MC as RTP or UDP. -
Page 29: Configuration On A Mag250 Stb
7.3 Software Tool / Client To check the configuration of your Octopus NET SL-MC or to test a created M3U list, the VideoLan Client (VLC for short) is the best choice. This is a software player that works on Windows, Mac and Linux. -
Page 30: Digital Devices
8.1 Product portfolio The products of the Cine series are the basic product of numerous Digital Devices solutions. As a twin tuner with expandability by further twin tuners as well as CI extensions, numerous situations for PCI Express environments can be put together. -
Page 31: Index
Instructions - Octopus Net MC 9 Index Multicast IP-Adresse ............... 19 Multicast Konfig Aktualisieren ................... 11 MAC250 STB................28 Alle Streams entfernen ..............18 Panasonic TV ................26 Multicast Port ................. 19 Multicast Protokoll................19 Broadcast ..................14 Nameserver ..................13 Netmask .................. - Page 32 Anleitung – Octopus NET MC Notes _____________________________________________ _____________________________________________ _____________________________________________ _____________________________________________ _____________________________________________ _____________________________________________ _____________________________________________ _____________________________________________ _____________________________________________ _____________________________________________ _____________________________________________ _____________________________________________ _____________________________________________ _____________________________________________ _____________________________________________ _____________________________________________ _____________________________________________ _____________________________________________ _____________________________________________ _____________________________________________ _____________________________________________ _____________________________________________ _____________________________________________ _____________________________________________...
Need help?
Do you have a question about the Octopus NET SL-MC and is the answer not in the manual?
Questions and answers