Table of Contents
Advertisement
Quick Links
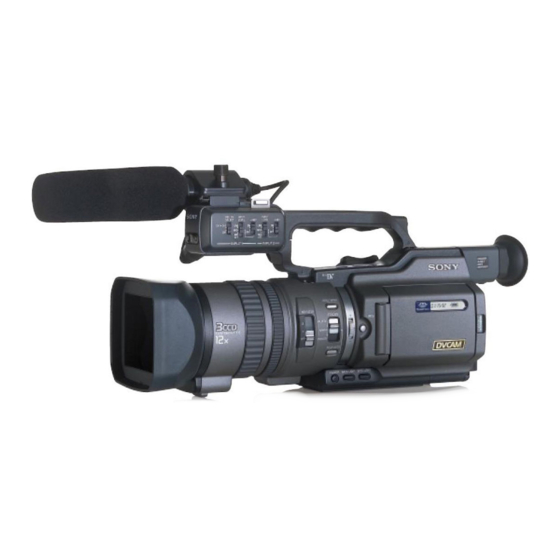
PD 150 shooting guide
1. INTRODUCTION
This guide is intended to be a useful reminder of the operation and functions of the Sony PD 150. Use it as a general
refresher if you haven't been out filming for a while, or refer directly to the relevant sections for guidance and help on
specific subjects. There are three main sections. This, the first section, will take you on a tour of the camera and guide you
through its basic operation. The second section deals with picture functions on the PD 150 and lighting, and the third
section is a guide to recording audio successfully. References to camera left and right are looking at the rear of the camera.
Text in BOLD is the additional information if you're used to the VX 2000.
2. SAFETY
Safety; both your own and other people's is a very important consideration when you are filming on DV. To go out filming on
DV you must have completed suitable relevant safety training. A risk assessment should be completed prior to every shoot.
Potential hazards must be identified and dealt with in advance of your shoot. Forward planning and thought about what you
are going to do on the shoot is crucial - think carefully about the environment and circumstances you will be filming in. If you
are filming in public places be aware of the dangers of people tripping over cables, your tripod and your kit bag. Children are
of course particularly unpredictable.
The small size and flexibility of a small DV camera can make it tempting to try things that you otherwise would think too
dangerous. Don't film from unguarded roofs, or other high places, be careful near water and moving traffic. It's yours and
other people's safety you are putting at risk.
If there are two or more of you on the shoot, divide responsibilities up sensibly between you. If you are operating alone, go
to the next section, as there are implications for the type of filming it is safe for you to do.
Think about the handling and transportation of your kit and don't overload yourself. Handheld filming is tiring so make sure
you take breaks, or put the camera on a tripod for periods.
There should be at least two of you on the shoot before you can contemplate using mains supply lights. You must be able to
prove you can use mains lighting safely. You should not use any mains socket without using a socket tester. Provided your
battery charger has been electrically tested and has a sticker to prove it, you can plug it directly into the mains. All other
mains equipment and untested chargers should be plugged into the mains via a residual current device or RCD, to avoid
shock. Refer to the lighting section of this guide for detailed information about using lights on a DV shoot.
Always make sure that someone at base knows where you are, and that you are contactable on location - ideally by mobile
'phone. Equally you need to know that there is someone at base that you can call if you need to. If circumstances change
while you are out filming, make sure you inform your producer before undertaking anything potentially hazardous that you
did not previously anticipate.
If you have any safety concerns about your shoot, raise them with your producer, so that you can make sure you are
equipped properly and can film safely.
3. SAFETY - LONE OPERATOR
Check for local guidance on lone working. Working alone means that your awareness; both physical and mental is severely
reduced, so you must be sensible about what you can achieve by yourself. Because of the potential hazards and problems
there are restrictions on what you should do when out filming solo.
Firstly keep your shoot to static general views, and simple pieces to camera or interviews only. You must not operate any
mains lighting kit, and you should restrict yourself to basic sound set-ups.
Never track backwards whilst filming on your own - don't do it unless someone can guide you.
While you are filming your eye is at a viewfinder, you are wearing headphones and you are concentrating on what you are
filming. So think carefully about your surroundings, and make sure you are in as controlled an environment as possible -
perhaps an office or a house. Don't contemplate filming in unpredictable surroundings like very busy public areas or near
moving vehicles, and avoid locations where your reduced awareness could cause you, or anyone else to have an accident.
Advertisement
Table of Contents

Related Manuals for Sony PD 150


Summary of Contents for Sony PD 150
- Page 1 1. INTRODUCTION This guide is intended to be a useful reminder of the operation and functions of the Sony PD 150. Use it as a general refresher if you haven’t been out filming for a while, or refer directly to the relevant sections for guidance and help on specific subjects.
-
Page 2: Getting Ready To Record
4. THE PD 150 TOUR - INTRODUCTION This guide starts with a tour of the PD 150, and a reminder of how to get the camera up and running. Refer to the index if you are interested in a specific subject. -
Page 3: Battery Indications
10. BATTERY INDICATIONS The PD 150 uses info-lithium batteries, which allow a readout of battery life in minutes. The bars on the battery symbol on the screen will reduce as the battery loses power, as well as the indicated time reducing?. Shortly before the battery fails completely a flashing battery symbol with a line through it appears in the centre of the screen. - Page 4 If you have reviewed your tape, you need to cue up at the end of your last recording. Switch back from VTR to camera mode. On the top of the camera, under the handle, there is an end search button. Press it and the PD 150 will search for the end of your recording, play back the last five seconds, and then sit at the end of your last recording, ready to record.
-
Page 5: Menu Settings
16. AUDIO Audio is dealt with in detail in the third section of this guide. The PD 150 comes with its own microphone which is normally fitted on the camera, however it’s not brilliant quality and is usually too far from the sound, so other solutions are described later. - Page 6 19. PICTURE AND LIGHTING - INTRODUCTION This section of the guide will look at the functions on the PD 150 that will help you to record pictures successfully. Refer to the index on the cover if you are interested in a specific subject.
- Page 7 26. MANUAL FOCUS Manual focussing using the focus wheel is of course perfectly possible, but it is not easy to get good results on the PD 150 because of the poor resolution of the viewfinder or screen, and the sensitivity of the focus ring. Only use this method if you have plenty of time to fiddle.
-
Page 8: Automatic Exposure
F-number. Using the wheel beside the iris button, you can adjust the iris. It can be difficult to be sure that you have set the exposure correctly by simply looking at the PD 150 screen. The... -
Page 9: Neutral Density Filters
PD 150 shooting guide 35. SEMI-AUTOMATIC EXPOSURE CONTROL Semi-automatic iris can be a useful technique if you are filming somewhere with problem areas of light or dark that you cannot eliminate from the shot. While in auto-iris, show the camera the area you want to expose by zooming in, but with any problem areas like bright windows excluded from the shot. - Page 10 F9.6. To access the variable shutter speeds on the PD 150 make sure the autolock button is set to the middle position. Press the shutter speed button at the rear of the camera. Use the control wheel to change the shutter speed. For the slow shutter speeds, put an ND filter on, even if you’re indoors, and do your focussing before switching the shutter on.
- Page 11 PD 150 shooting guide If you’re doing a fast paced shoot, needing the full lens performance, use the graticule and NOT the anamorphic lens.. Examples are ‘fly on the wall’, actuality, and documentaries. Frame within the graticule height, and again watch out for extreme left &...
- Page 12 PD 150 shooting guide the contributor’s eyes. If the dark side of the face is too dark you need to reduce the contrast. This is the function of the fill light, and it could be a simple reflector like a white card or Lastolite collapsible reflector. The final light, the back light, can further enhance your shot.
-
Page 13: Audio Introduction
Recording audio automatically means that your audio is less likely to distort, because if the sound gets too loud, it will try to reduce the level and keep it within the cameras capabilities. The PD 150 has a very limited range of auto level adjustment, and you can get distortion or low level sound even if you have selected auto. - Page 14 It is vital to use good quality headphones to constantly monitor the quality of sound. Also, as the PD 150 can produce dangerous levels of sound, you must use limited headphones. Plug them into the green socket on the panel at the front right of the camera.
-
Page 15: Checking Level
PD 150 shooting guide buzz & handling noise when using a mic physically attached to the camera. Normally leave it off, but if you hear the hum or buzz from the camera, you could try switching it on. There is a wind noise reducer setting in the ‘Camera set’ menu which reduces bass and is best left switched off unless you’re in a car with a low humming engine, or in very windy conditions. -
Page 16: Boom Operation
The PD 150’s screen can fold right back onto the side of the camera, giving the boom swinger a guide to the shot. This should help to avoid the dangers of booms in shot 59. - Page 17 PD 150 shooting guide A cabled microphone is plugged into a transmitter, and the audio is transmitted via a radio link to a receiver that plugs into the camera. The transmitter has sockets for the mic and for the aerial. The receiver will have one or two fixed aerials and a socket for the cable that runs to camera.
Need help?
Do you have a question about the PD 150 and is the answer not in the manual?
Questions and answers