Table of Contents
Advertisement
Available languages
Available languages
Quick Links
Advertisement
Table of Contents

Subscribe to Our Youtube Channel
Related Manuals for EAS Electric EMRH908TX


Summary of Contents for EAS Electric EMRH908TX
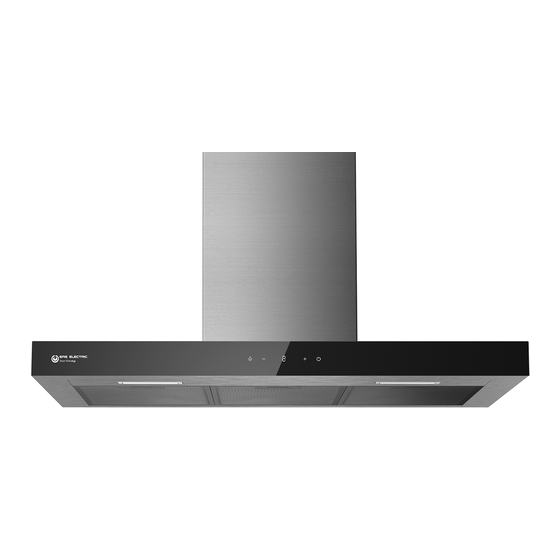
- Page 1 CAMPANA EXTRACTORA COOKER HOOD EMRH908TX MANUAL Lea este manual de Instrucciones antes de usar el aparato y consérvelo para futuras consultas. Before use the appliance please read this manual carefully and keep it for future reference. www.easelectric.com...
-
Page 2: Recomendaciones Y Sugerencias
RECOMENDACIONES Y SUGERENCIAS Las instrucciones de uso se aplican a varias versiones de este dispositivo. En consecuencia, puede encontrar descripciones de características individuales que no se aplican a su dispositivo específico. INSTALACIÓN El fabricante no será responsable de los • daños que resulten de una instalación incorrecta o incorrecta. - Page 3 • No conectar la campana a tubos de descarga de los conductos de combustión (Calderas, chimeneas, etc.). • Si la campana es utilizada conjuntamente con aparatos no eléctricos (por ejemplo aparatos quemadores de gas), se debe garantizar un sistema de ventilación suficiente en la sala con el fin de prevenir el reflujo de los gases de escape.
- Page 4 • Se deben cumplir las normativas relativas a la descarga de aire. • La campana extractora es solo para uso doméstico, adecuada para barbacoas, asados y otros fines comerciales. Nunca use la campana para otros fines que no sean para los que ha sido diseñada.
-
Page 5: Mantenimiento
Los niños deben • ser supervisados para asegurarse jueguen aparato. La limpieza y el mantenimiento del • usuario no deben ser realizados por niños sin supervisión. “PRECAUCIÓN: las partes accesibles • pueden calentarse cuando se usan con aparatos de cocina”. MANTENIMIENTO La campana de cocina y su filtro •... - Page 6 En base a la norma europea del 2002/96/CE de residuos de aparatos eléctricos y electrónicos (RAEE), los electrodomésticos no pueden ser arrojados en los contenedores municipales habituales; tienen recogidos selectivamente para optimizar la recuperación y reciclado de los componentes y materiales que los constituyan, y reducir el impacto en la salud humana y el medio ambiente.
- Page 7 COMPONENTES Ref. Componentes del producto Cuerpo de la campana, completo con: Controles, Luz, Soplador, Filtro. Interior de la chimenea decorativa Exterior Chimenea decorativa Cubierta (opcional) Tubo de escape Filtro de carbón activo (opcional) Documentación Manual de instrucciones...
- Page 8 Ref. Componentes opcionales de instalación Tornillos 5 x 50 Tapones de pared Tornillos 4,2 x 9,5 Soporte de fijación de la campana Soporte de fijación para chimenea...
- Page 9 DIMENSIONES UNIDAD:mm Min. Min. 650mm 650mm Opción Chimenea 400+ 390 425-760 500+ 490 490 525-960...
- Page 10 INSTALACIÓN PERFORACIÓN DE PAREDES Y FIJACIÓN DE SOPORTE Opción Chimenea 400X390 160-500 500X490 260-700 Línea de referencia vertical Como primer paso, proceda siguientes dibujos: • Una línea vertical hasta el techo o hasta el límite superior, en el centro del área en la que se instalará...
- Page 11 Marcar puntos: • Marque un punto (1) en la línea horizontal A, 80 mm a la línea de referencia vertical. • Repita esta operación en el otro lado y en la línea de referencia vertical, verificando que las tres marcas estén niveladas. •...
- Page 12 Chimenea decorativa inferior: • Fije el tubo de escape en el cuerpo de la campana, conecte la chimenea y el cuerpo de la campana con 2 tornillos 12. Conecte el soporte de fijación de la chimenea y la chimenea 4 tornillos (STA 4.2*9.5) tornillos 12.
- Page 13 CONEXIONES SISTEMA DE ESCAPE DE AIRE POR CONDUCTOS Al instalar la versión con conductos, conecte campana a la chimenea utilizando un tubo flexible o rígido de ɸ 150 o ɸ 120 mm, cuya elección se deja al instalador. • Si va a instalar una conexión de escape de aire de ɸ...
- Page 14 Consejos: la campana extractora viene con función de memoria, la próxima vez que la inicie, mantendrá el ajuste de antes de ser apagada. Modo Funciones de los botones Observaciones de funcionamiento Enciende o apaga el sistema Botón encendido. de iluminación Cambia la velocidad del motor circularmente están encendidos...
- Page 15 MANTENIMIENTO FILTROS DE GRASA LIMPIEZA DE SOPORTES DE METAL DE LOS FILTROS DE GRASA filtros deben • limpiarse cada 2 meses funcionamiento, mayor frecuencia para particularmente intenso, y pueden ser lavados en lavavajillas. • Retire los filtros uno por uno, empujándolos hacia la parte posterior de la unidad de la campana y simultáneamente tirando hacia abajo.
- Page 16 FILTRO DE CARBÓN ACTIVO (OPCIONALES - NO INCLUIDOS) Estos filtros no son lavables y no pueden regenerarse. Deben reemplazarse aproximadamente cada meses funcionamiento, o más frecuentemente con un uso intensivo. SUSTITUCIÓN DEL FILTRO DE CARBÓN ACTIVO • Retire los filtros de grasa metálicos.
- Page 17 Antes de cambiar el (los) módulo (s) de • luz, desenchufe el aparato de la red eléctrica o apague el interruptor de circuito en la caja de fusibles. Retire el filtro de grasa y retire con • cuidado los 2 tornillos de la placa frontal (se necesitará...
-
Page 18: Solución De Problemas
SOLUCIÓN DE PROBLEMAS Fallo Causa Solución Las aspas están bloqueadas. Compruebe las aspas Las luces El condensador está dañado. Sustituya el condensador están El motor está dañado. Sustituya el motor encendidas pero el cableado interno motor se corta / desconecta. motor no Sustituya el motor Puede producirse un olor... -
Page 19: Exclusiones De La Garantía
CONDICIONES DE LA GARANTIA COMERCIAL Este aparato tiene una garantía de reparación de dos años, a partir de la fecha de venta, contra todo defecto de funcionamiento proveniente de la fabricación, incluyendo mano de obra y piezas de recambio. Para justificar la fecha de compra será... -
Page 20: Recommendations And Suggestions
RECOMMENDATIONS AND SUGGESTIONS The instructions for Use apply to several versions of this appliance. Accordingly, youmay find descriptions of individual features that do not apply to your specific appliance. INSTALLATION • The manufacturer will not be held liable for damages resulting from incorrect... - Page 21 For Class I appliances,check that the • domestic power supply guarantees adequate earthing.Connect the extractor to the exhaust flue through a pipe of minimum diameter 120mm.The route of the flue must be as short as possible. The air must not be •...
- Page 22 • Regulations concerning the discharge of air have to be fulfilled. • The cooker hood is only for home use, not suitable for barbecue, roast shop and other commercial purposes.Never use the hood for purposes other than for which it has been designed.
-
Page 23: Maintenance
Children should be • supervised to ensure that they do not play with the appliance. • Cleaning and user maintenance shall not be made by children without supervision. “CAUTION: Accessible parts may • become hot when used with cooking appliances”. MAINTENANCE •... - Page 24 The european directive to 2002/96/EC on wasted electrical and electronic equipments (WEEE), requires that household electrical appliances must not be disposed of in the normal unsorted municipal waste stream. appliances must be collected separately in order to optimize the recovery and recycling of the materials they contain, and reduce the impact on human health and the environment.
- Page 25 COMPONENTS Ref. Qty. Product Components Hood Body,complete with: Controls, Light, Blower,Filter. Lower Decorative Chimney Upper Decorative Chimney Flange ( optional ) Exhaust Pipe The Activated Charcoal filter ( optional ) Qty. Documentation Instruction Manual...
- Page 26 Ref. Qty. Optional Installation Components Screws 5 x 50 Wall Plugs Screws 4,2 x 9,5 Hood fixing bracket Chimney fixing bracket...
- Page 27 DIMENSIONS :mm Min. Min. 650mm 650mm Option Chimney 400+ 390 425-760 500+ 490 490 525-960...
-
Page 28: Installation
INSTALLATION WALL DRILLING AND BRACKET FIXING Option Chimney 400X390 160-500 500X490 260-700 Vertical reference line As a first step, proceed with the following drawings: • A vertical line up to the ceiling or up to the upper limit, at the center of the area in which the hood is to be fitted. - Page 29 Mark Points: • Mark a point (1) on the horizontal line A, 80 mm to the vertical reference line. • Repeat this operation on the other side and on the vertical reference line, checking that the three marks are leveled. •...
- Page 30 Lower decorative chimney Fix the exhaust pipe • on the hood body, connect chimney and hood body with screws connect chimney fixing bracket and chimney with 2 screws 12. 4 screws (STA 4.2*9.5) Hook the hood body Hook the hood body to the bracket 20. •...
- Page 31 CONNECTIONS DUCTED VERSION EXHAUST SYSTEM When installing the ducted version, connect the hood to the chimney using either a flexible or rigid pipe ɸ 150 or ɸ 120 mm, the choice of which is left to the installer. • If to install a ɸ 120 mm air exhaust connection, insert the reducer flange 3 on the hood body outlet.
- Page 32 Tips:The cooker hood comes with memory function, the next time you start up, automatically open the last shutdown before the gear. Operation Button Function Remarks mode Turns the lighting system on or off Button on. When Change the motor speed circularly Touch Turns the motor on at speed When...
- Page 33 MAINTENANCE GREASE FILTERS CLEANING METAL SELF-SUPPORTING GREASE FILTERS The filters must be • cleaned every months of operation, or more frequently for particularly heavy usage, and can be washed dishwasher. • Remove the filters one by one pushing them towards the back side of the hood unit and simultaneously pulling downwards.
-
Page 34: Activated Charcoal Filter (Recirculation Version)
ACTIVATED CHARCOAL FILTER (RECIRCULATION VERSION) These filters are not washable and cannot be regenerated, and must be replaced approximately every 4 months of operation, or more frequently with heavy usage. REPLACING THE ACTIVATED CHARCOAL FILTER • Remove the metal grease filters. - Page 35 • Before changing the light module(s), unplug Dismantle LED linght module the appliance from the mains or switch off the circuit breaker in the fuse box. Remove the grease filter and carefully • remove the 2 screws from the front plate (a cross headed screwdriver will be needed to remove the screws).
-
Page 36: Troubleshooting
TROUBLE SHOOTING Fault Cause Solution The blades are blocked. Check the blades. The capacitor is damaged. Replace capacitor. Light on, but The motor is damaged. Replace motor. motor does The internal wiring of motor not work is cut off/ disconnected. An Replace motor. -
Page 37: Warranty Exclusions
Technical Services authorized. • Periodic maintenance of the product. • Malfunctions caused by acts of God, force majeure or accidents resulting from improper installation. • Broken or damaged materials for wear or normal use, joints, plastic, glass, brushes, etc. Eas Electric www.easelectric.es...
Need help?
Do you have a question about the EMRH908TX and is the answer not in the manual?
Questions and answers